|
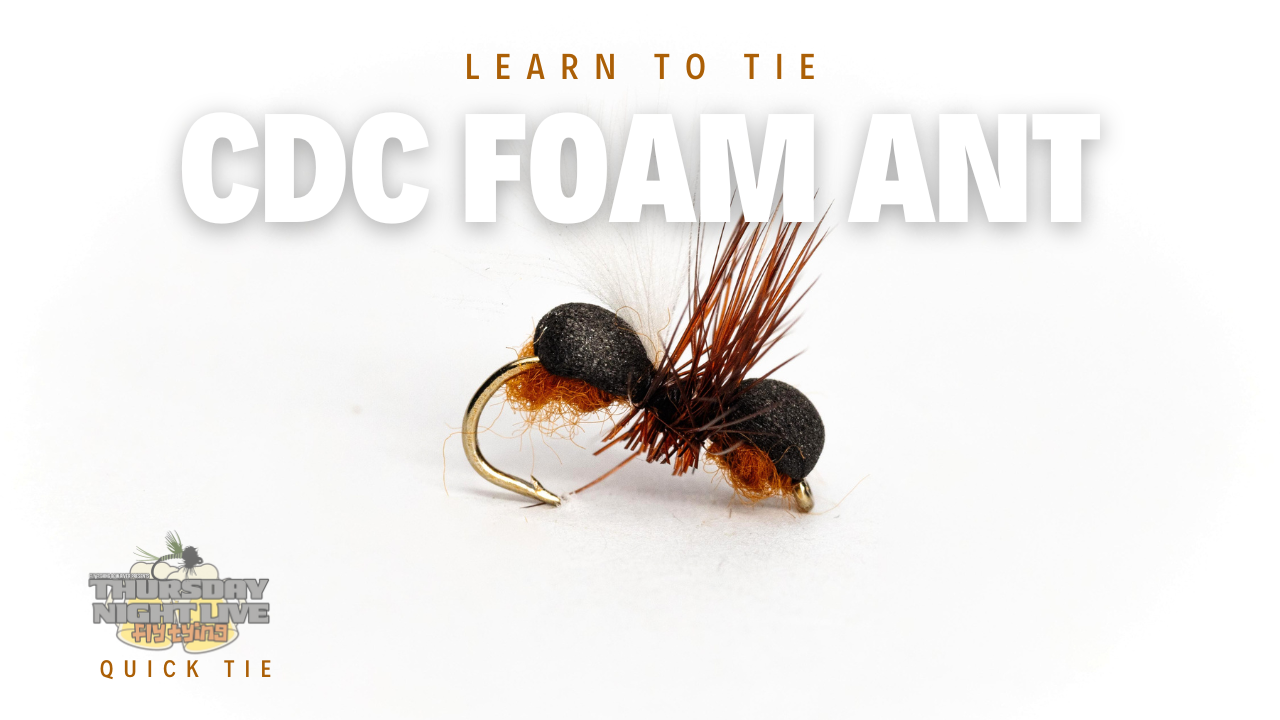
Tying a CDC Ant Fly Introduction Welcome to another quick fly tying session! In this article, we will guide you through the process of tying a CDC (Cul de Canard) Ant fly. This fly is a simple yet effective pattern that can be used to imitate ants on the water's surface. Whether you're a seasoned fly tyer or just getting started, this pattern is a great addition to your repertoire. Materials Before we dive into the tying process, let's take a look at the materials you'll need for this fly: - Hook: Size 14 hook - Thread: UTC 70 in golden brown - Foam: A strip of foam, cut to about an inch in length - Dubbing: A small amount of dubbing for the body - CDC Plume: A CDC feather for the wing - Hackle: A long strip of reddish-brown hackle Tying Steps 1. Securing the Foam Start by attaching your thread just behind the eye of the hook. Leave it hanging right around the barb area. Now, take the strip of foam, which you've cut to a smaller size, and trim a point at one end. Lay this pointed end on the near side of the hook and secure it with a couple of loose wraps. Make sure the foam is evenly distributed on both sides of the hook. 2. Creating the Body Move your thread back to the desired position for the body, which should be closer to the hook's eye. Take a pinch of dubbing and create a dubbing noodle on your thread. Wrap the dubbing to form a slightly bulky body, especially in the back portion of the fly. This will help create the ant's body shape. 3. Securing the Foam Again Now, fold the foam strip over the body you've created and secure it with a couple of wraps. Be cautious not to pull too tight as you might cut through the foam with the fine thread. Use open spiral wraps with intermittent pressure to trap the foam down to the hook's eye. Smooth out the area with additional wraps. 4. Creating the Head Move your thread to the front of the foam, where you want to create the head of the ant. Use about half the amount of dubbing as you did for the body and make a smaller dubbing noodle. Wrap it to form the head of the ant. 5. Adding CDC Plume Prepare a CDC plume by stroking the fibers forward to create a fluffy wing. Measure it to hang off the back of the fly, approximately the length of a hook gap. Secure the CDC plume in the middle of the hook with thread wraps. Trim the excess. 6. Adding Hackle Prepare the hackle by stripping off a few fibers from the butt end, exposing the stem. Tie in the hackle with the underside facing down the fly. Palmer the hackle forward to fill in the space between the body and the CDC wing. 7. Finishing Wrap your thread behind and in front of the hackle to secure it. Trim any stray hackle fibers. Trim the excess foam and create a small head with a whip finish. 8. Final Trimming Trim any remaining stray hackle fibers below the hook point. This ensures that the fly sits correctly on the water's surface. Conclusion Congratulations! You've successfully tied a CDC Ant fly. This pattern is versatile and can be effective in various fishing situations. Experiment with different sizes and colors to match the natural ants in your area. Happy fly tying, and may your next fishing adventure be a successful one!
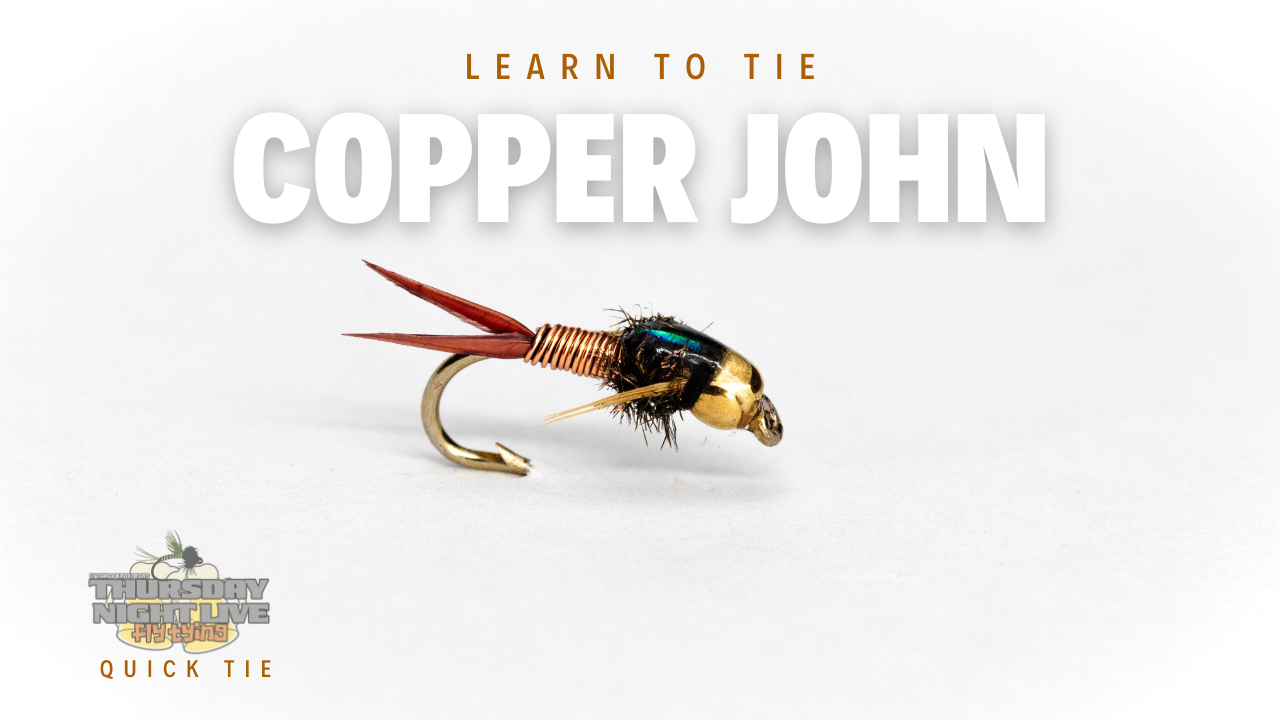
Tying the Copper John Fly: A Step-by-Step Guide Fly fishing enthusiasts, gather 'round! In this article, we will guide you through the process of tying the renowned Copper John fly, a classic pattern that has consistently proven its worth on the water. Whether you're a seasoned angler or a novice looking to expand your fly tying skills, we've got you covered. So, let's dive in and get those vise grips ready! Introduction to the Copper John Fly The Copper John is a small nymph fly that has stood the test of time in the world of fly fishing. This versatile pattern imitates various aquatic insects and is known for its ability to attract trout. In this tutorial, we'll walk you through the steps of tying a Copper John, complete with detailed instructions and tips. Materials and Equipment Before we start tying the fly, let's gather all the materials and tools you'll need: - **Hook**: You'll want to use a hook with a copper or bronze bead. The pattern typically calls for a size 14 hook, but you can adjust the size based on your preferences. - **Thread**: For this pattern, we recommend using UTC 70 thread in a bronze-brown color. - **Tail Material**: The tail of the Copper John is made of biots. You'll need two biots from your kit. - **Wire**: Copper wire is essential for wrapping the body of the fly. - **Flash Material**: Crystal Flash will provide some flashy highlights to attract fish. - **Nymph Back Material**: You can use Scud Back material, modified for this pattern. - **Peacock Herl**: Two pieces of peacock herl will help create the thorax of the fly. - **Legs**: Feathers from your kit will serve as the legs of the Copper John. - **Hackle Pliers**: These will be handy for handling the feather fibers. Tying the Copper John Now that we have everything ready, let's dive into the step-by-step process of tying the Copper John. Step 1: Preparing the Tail 1. Start by attaching your size 4 hook to the vise. 2. Use UTC 70 thread in a bronze-brown color. 3. Begin wrapping the thread just behind the eye of the hook, and trim any excess. 4. Move the thread back on top of the hook bend, stopping just short of the other side. Step 2: Tying in the Tail 1. Take two biots from your kit and ensure their points are facing upward. 2. Trim the butt ends of the biots to prevent tangling. 3. Arrange the biots to curve away from each other for a natural appearance. 4. Pinch the biots together and place them on top of the hook, measuring them to be about 3/4 of the hook shank. 5. Secure the biots in place with a few wraps of thread. Be gentle to avoid disrupting their position. Step 3: Building the Body 1. Wrap your thread forward, leaving space behind the bead for the thorax. 2. Now, take some of the biot material and wrap it up the hook shank. This will create an even underbody for the fly. 3. Continue wrapping until you have a space of about one bead length behind the bead. 4. Trim any excess biot material. Step 4: Wrapping the Copper Wire 1. Take the copper wire from your kit and secure it right behind the bead on the near side of the fly. 2. Wrap a couple of thread turns to secure the wire and then wrap it back toward the tail. 3. Be careful not to overwrap too far, as it might disturb the biots. 4. Ensure the wire reaches the edge of the hook bend. Step 5: Creating the Thorax 1. Leave the space you've cleared behind the bead to create the thorax. 2. Start by tying in two pieces of Crystal Flash right behind the bead. 3. Next, use the modified nymph back material to create the flashback. Tie it in right behind the bead as well. Step 6: Adding the Peacock Herl 1. Select two pieces of peacock herl and align their tips. 2. Tie in the herl right behind the bead and position it so that it forms the bulky thorax. 3. Palmer the peacock herl forward, wrapping it carefully to create bulk without overdoing it. 4. Secure the herl near the bead with a few wraps of thread. Step 7: Attaching the Legs 1. Prepare your feather fibers for the legs by pulling a few down from the tip. 2. Tie in these fibers on either side of the fly. Use hackle pliers to grab the very tip of the feather, expose it, and then trim it. 3. Position the legs to extend about two-thirds of the way down the body. 4. Secure the legs with a couple of wraps of thread. 5. Trim the excess feather material. Step 8: Finalizing the Fly 1. Pull the nymph back material forward, which will cause the legs to splay back and down the body. 2. Secure the material behind the bead with thread wraps. 3. Trim any excess material. 4. Add a touch of UV resin to create a glossy, durable finish on the thorax. 5. Cure the resin using a UV curing light. Conclusion Congratulations! You've successfully tied a Copper John fly—a timeless pattern that can be highly effective on the water. Feel free to experiment with different colors and sizes to match the hatch or the preferences of the trout you're targeting. Remember, practice makes perfect, so keep honing your fly tying skills, and soon you'll be creating beautiful flies that entice even the wariest of fish. Happy fishing!
Fly tying is an art that requires precision and knowledge of materials, and one of the crucial aspects of this craft is selecting the right thread. Two common systems used to measure thread thickness are the Aught and Denier systems. Understanding these systems is key to choosing the right thread for your fly tying projects.
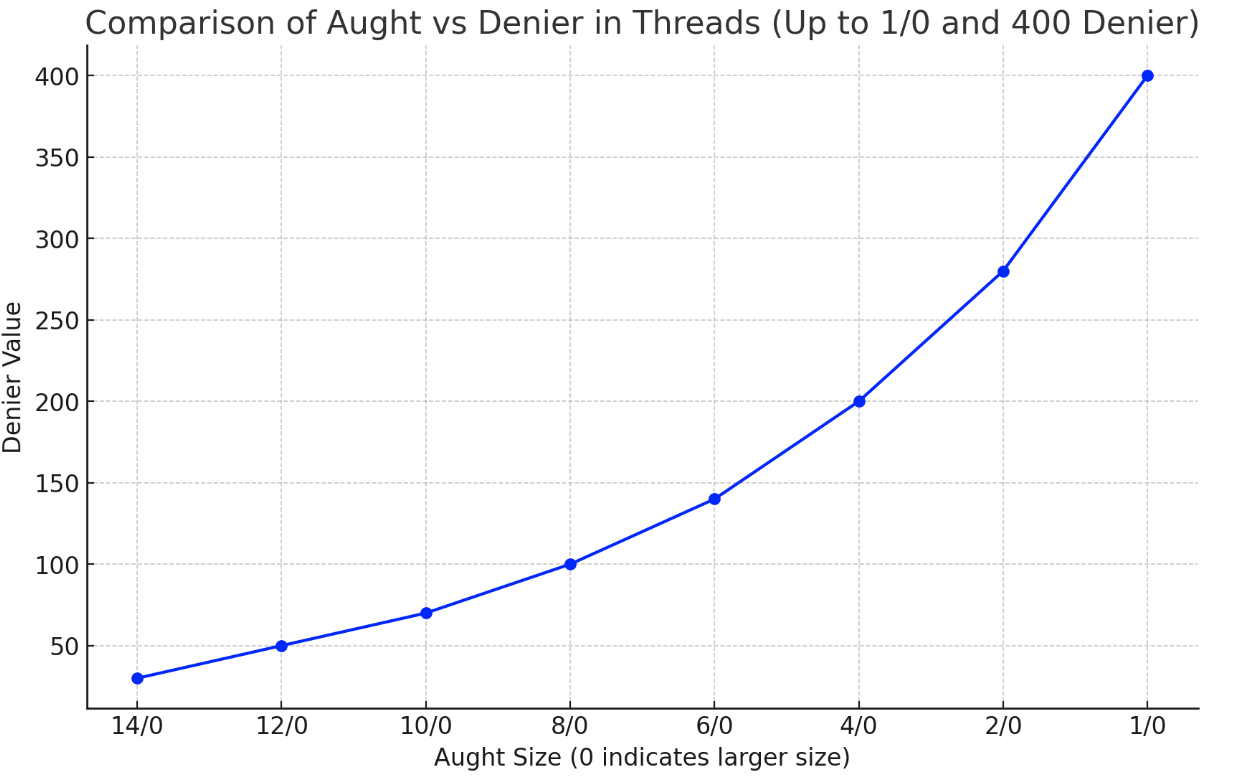
The Aught System The Aught system, denoted as "/0" (e.g., 6/0, 8/0), is a traditional method used primarily in fly tying. In this system, the higher the number before "/0", the thinner the thread. For example, 6/0 is thicker than 8/0. However, it's important to note that the Aught system is not standardized. The thickness for a given aught size can vary between manufacturers. This system is more about relative thickness and is deeply rooted in the tradition of fly tying. The Denier System On the other hand, the Denier system offers a more scientific approach. Denier measures the linear mass density of fibers and is defined as the mass in grams of 9,000 meters of thread. A higher denier means a thicker thread. This system is widely used in the textile industry and provides a consistent and quantitative measure of thread thickness. For instance, a 70-denier thread is thinner than a 210-denier thread. Comparing Aught and Denier To better understand how these systems correlate, let’s look at a chart comparing Aught sizes with Denier values: As illustrated, the relationship between Aught size and Denier is inverse; as the Aught size decreases (toward 1/0), the Denier value increases, indicating a thicker thread. Why This Matters For fly tiers, selecting the correct thread size is crucial for the type of fly being tied. Smaller flies require finer threads (higher aught number or lower denier), while larger flies need thicker threads (lower aught number or higher denier). The choice of thread affects not just the appearance but also the functionality of the fly. Conclusion Understanding the Aught and Denier systems is essential for fly tiers of all levels. While the Aught system remains popular due to its historical use in fly tying, the Denier system provides a more precise measurement. By familiarizing themselves with both systems, fly tiers |


 RSS Feed