|
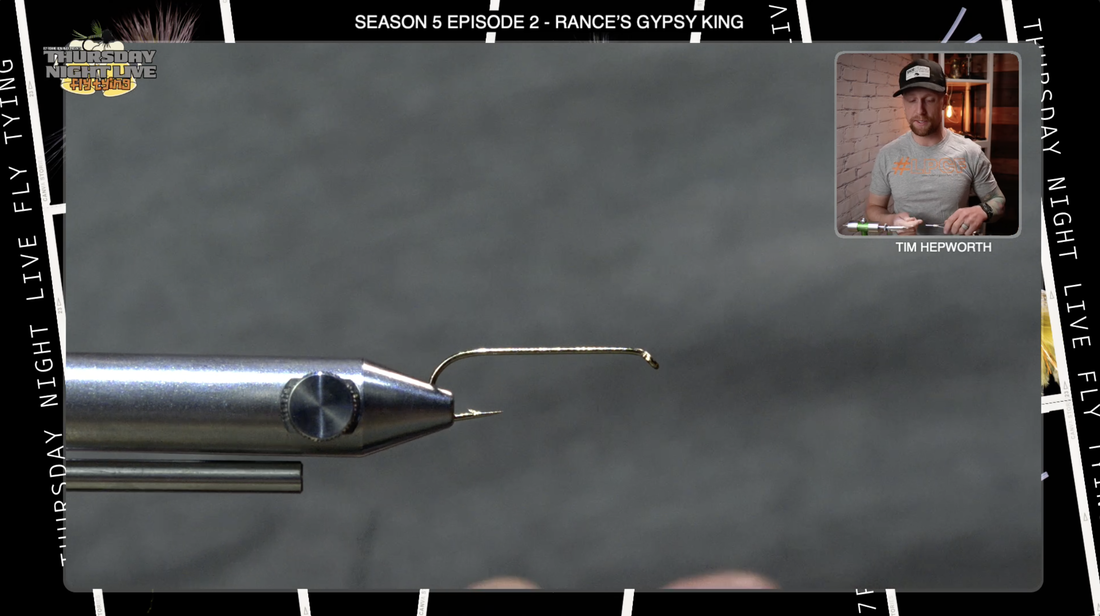
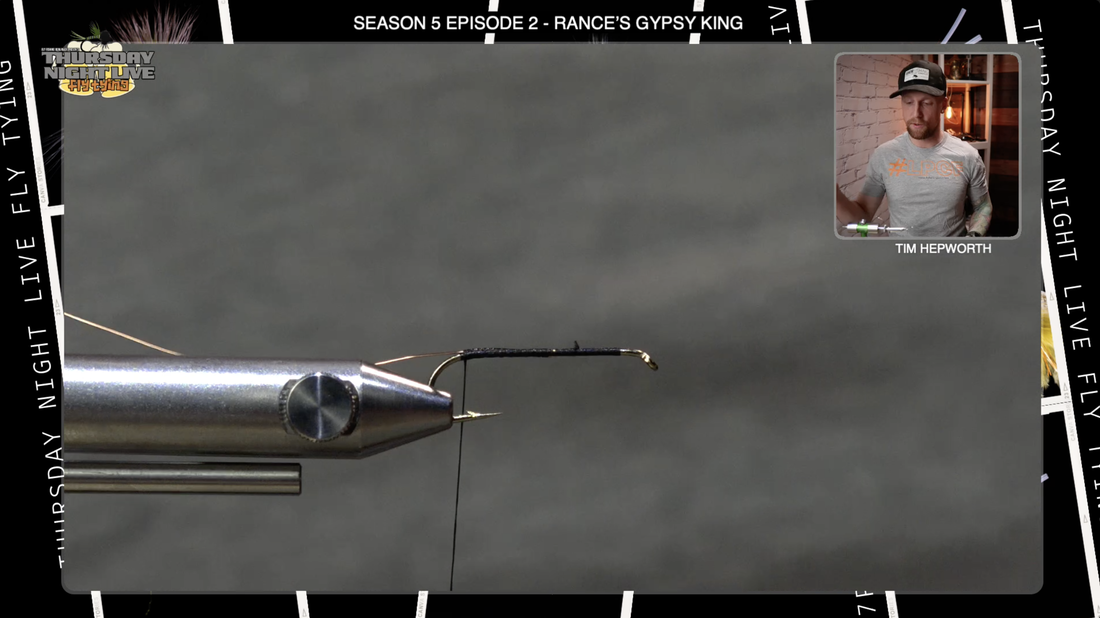
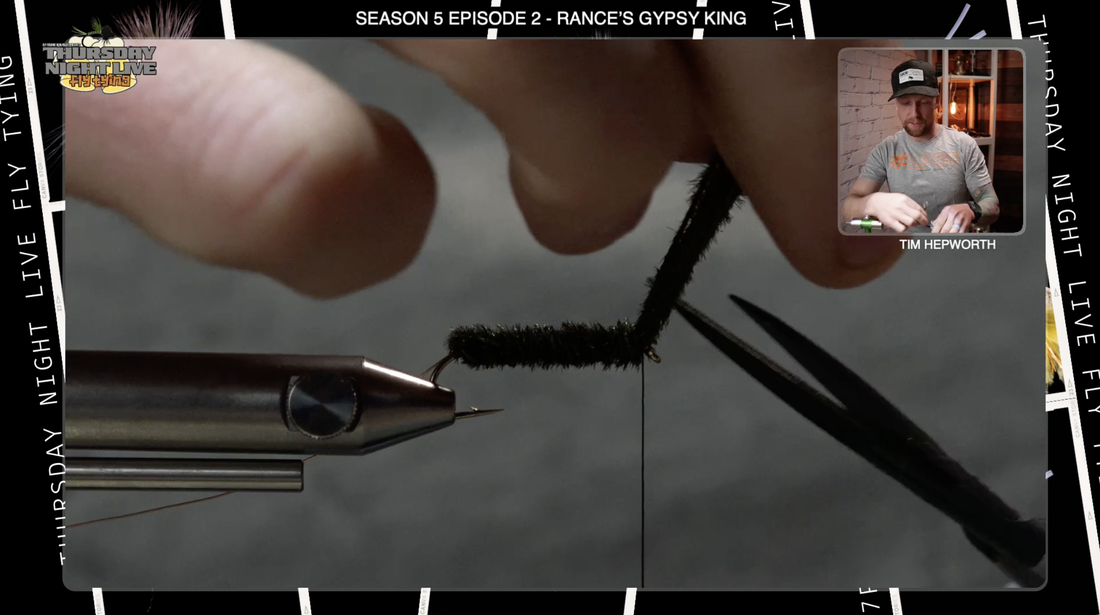
Rance's Gypsy King Fly Tying Recipe: Hook: #10 Daiichi 1280 Thread: Black Veevus 6/0 Rib: Small Copper Wire Body: Peacock Herl Body2: Brown 2MM Thin Foam+ Flash: Pearl Krystal Flash Wing: Deer or Elk Hair Hackle: Grizzly Rooster Saddle or Cape Legs: Brown Medium Round Rubber Legs 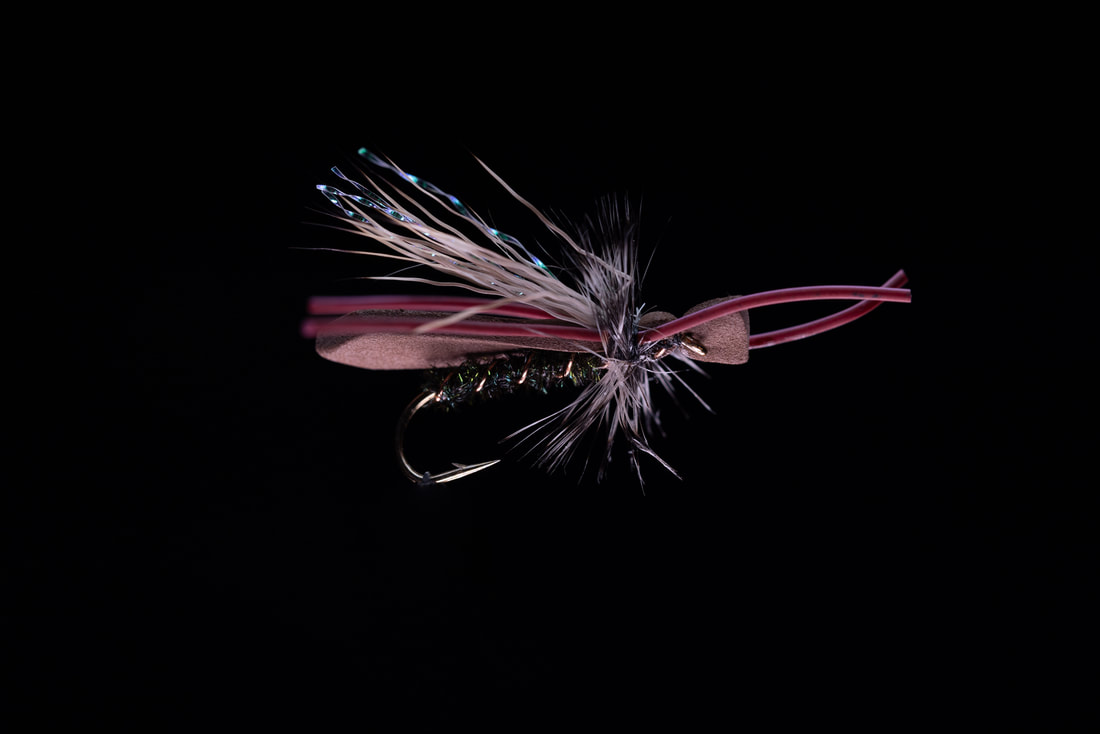 Tim Hepworth here with Fly Fishing Bow River Outfitters and Thursday Night Live fly tying. I'm here to bring you another quick tie blog and this quick tie blog is sponsored by Rock Mountain Fly Shop. remember every order over $99 from them gets you free shipping. www.rockymountainflyshop.net . I'm going to be tying tonight out of our season five kits and episode two. we are tying rancey's Gypsy King. open up your kit if you're tying out of our pre packaged material kist, but if you're not it's okay just head over to our website you're going to get a full material list (www.flyfishingbowriver.com/tnls5) and you can go to Rock Mountain fly shop or your local Fly Shop grab the materials that you need, or maybe already have them. let's go ahead, let's get our hook in our norVise. What we're tying on tonight is a size 10 number 1280 daiichi hook. so go ahead get that secured in your Vice. make sure it's not going anywhere. for a thread tonight I'm going to be tying with black, you could either use 6/0 or here I'm using some UTC 140, something a little thicker because we're going to be working with some foam and we don't want to cut through the foam too easily. let's go ahead and let's start our thread somewhere just behind the eye we'll go ahead and we'll trim out the tag end of that thread and now we're going to work this back down into the hook Bend. laying a nice little thread base in okay we'll come back just slightly. The first thing we're going to do is we're going to go ahead and tie in some brass colored small wire. I'll just tie that in and we're going to bring that thread back right to the edge of the hook bend and you can leave that wire just off the back. The next thing we're going to do is we're going to get right up building this body. Now in your kit you've got an abundance of peacock hurl. That's what we're using and there's a reason there's abundance there. You need a really good size Clump probably 10 - 12 pieces. we're building a nice thick body on this fly and we're roping up this peacock herl. it's important that they're all matched up at the tips. I'm going to level them all off. Those tips are quite brittle anyways. I'm going to lay this right on top and take a securing wrap. It's gonna spin my thread so it hops backwards. I'm gonna pull that back and I'm going to secure those butts down. create a little bit of a bump at the back of the fly here but it's not going to be noticeable once we put all this body material down.
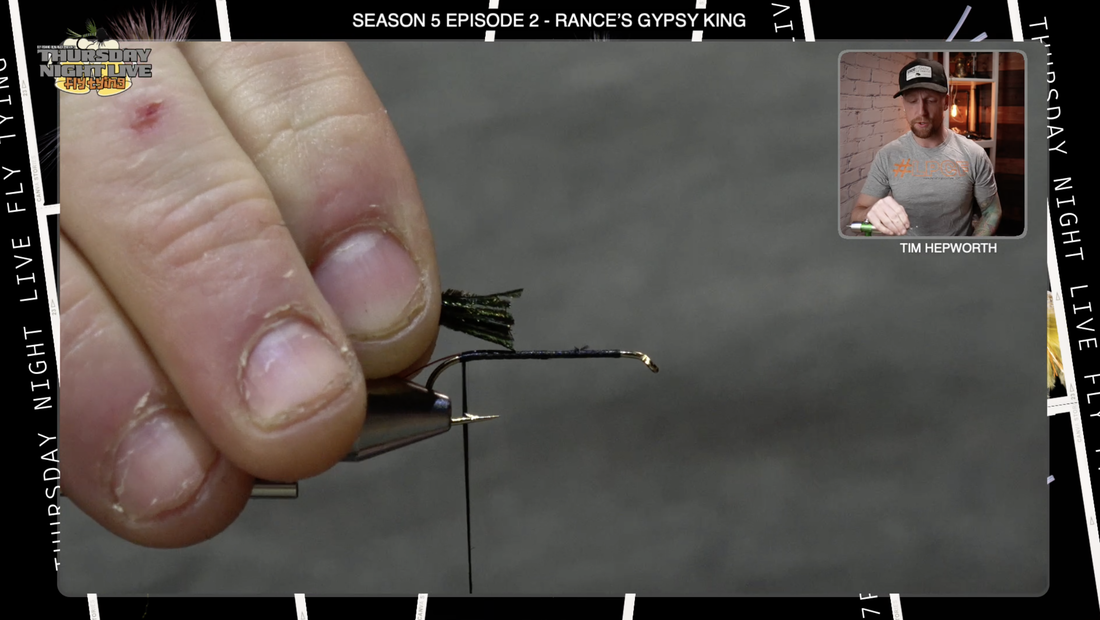
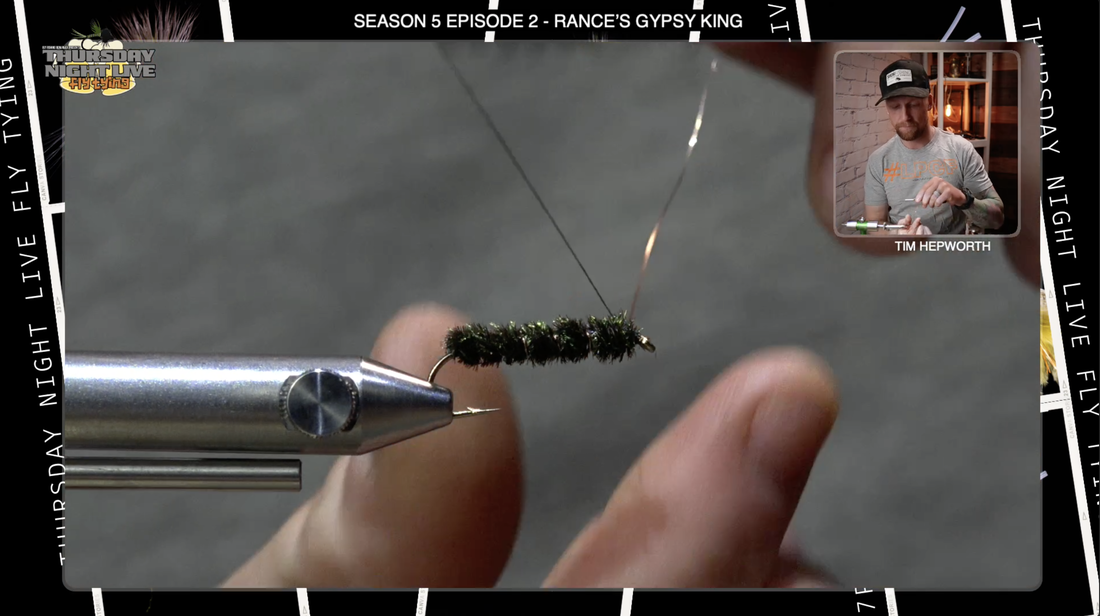
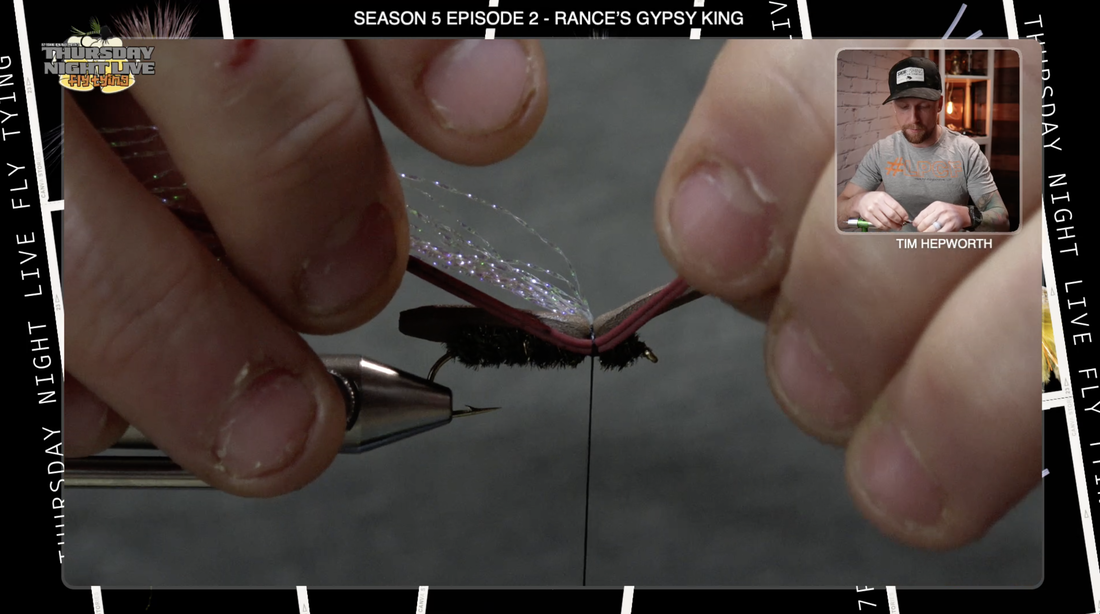
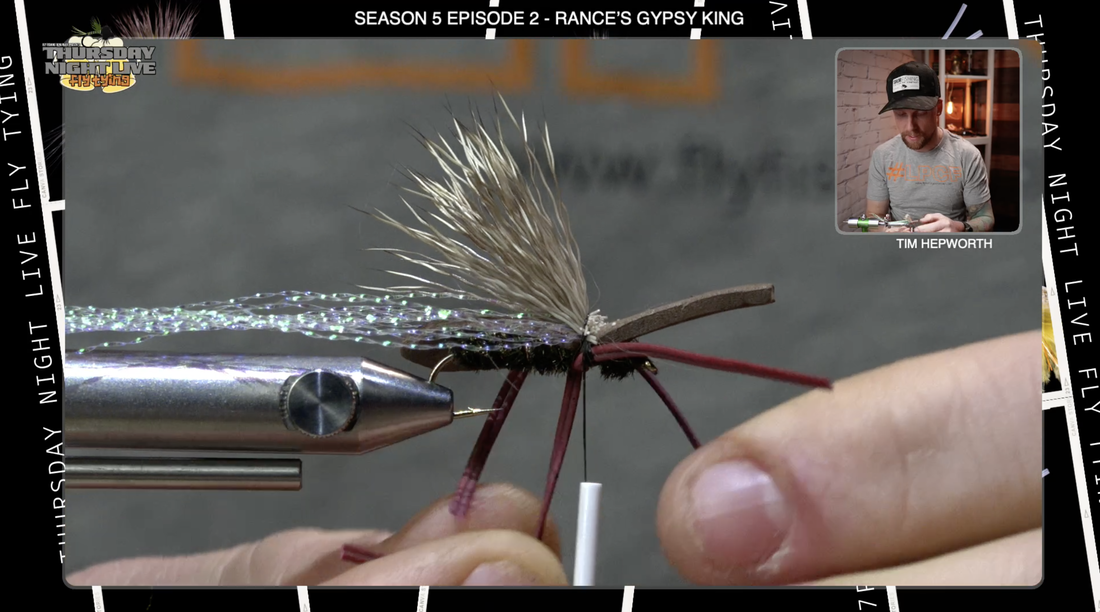
okay so I've got that secured in right to the bend. I'm going to work my thread back forward. I'm going to leave it right behind the eye. This is where we're going to bring all this material forward. I did a little half hitch there just so I could set my thread out of the way now. I'm going to get both hands here working with this peacock herl. What I want you to do is place the butts in your finger and spin them. we're going to rope up this peacock herl. it gives it a nice appearance when you get it on onto your fly, and then we're just going to start palmering this forward. use the rotary function of your Vise. if you get to a point where it hasn't totally spun together, I'm just going to spin the herl pieces up again and make sure it's spun tight. it gives it a nice velvety appearance, very buggy. I'm gonna bring it right up to the eye and I'm gonna come in and bring my thread back to a working position. hold that peacock herl straight up get a securing thread wrapping behind it and in front of it. repeat that process one more time behind it and in front of it and then we can go ahead and trim out that peacock herl. this stuff is notorious for slipping and going back so it's really important that you secure that quite well. I'm just going to go ahead with my wire and I'm going to go in that same direction as ther herl. I'm gonna do some nice segmenting wraps trying to keep them nice and evenly spaced. I'm also going to take this all the way up to just behind the eye and secure it down . I'll go ahead and trim out that wire and make sure you grab your buddies' scissors, these might be Danas. if you're looking for some good buddy scissors I think if you head on over to Rocky Mountain Fly Shop you might just have to look for something called Dana scissors and they might have some just like this for you. now what I'm going to do is I'm going to take my thread and I'm going to hop it back while I'm on top of the fly. I could wrap through this a bunch of times and you're not really going to see it but I'm just going to try to keep my wraps up on top of the peacock curl. I'm segmenting that overall hook into quarters so I figure I'm about a quarter of the way back from the eye that's going to take a couple thread wraps. I'm going to leave my thread there. the first thing we're going to do is we're going to get some foam involved here. We got some foam for this fly. This is just 2mm Brown foam. you want to measure it so that it's about a hook Gap and width. I want to have this hanging basically just off the back a little ways and then out to the front here a little ways. I just gauge it roughly. I'm not doing anything specific right now but at the back end of The Fly I'm going to cut just a little Point into it. so I'm going to flip it over and cut it again. That's what I want the back of the foam to look like. Now I'm going to lay this on top of the hook and I want that pointy end there you see to extend just beyond the bend.
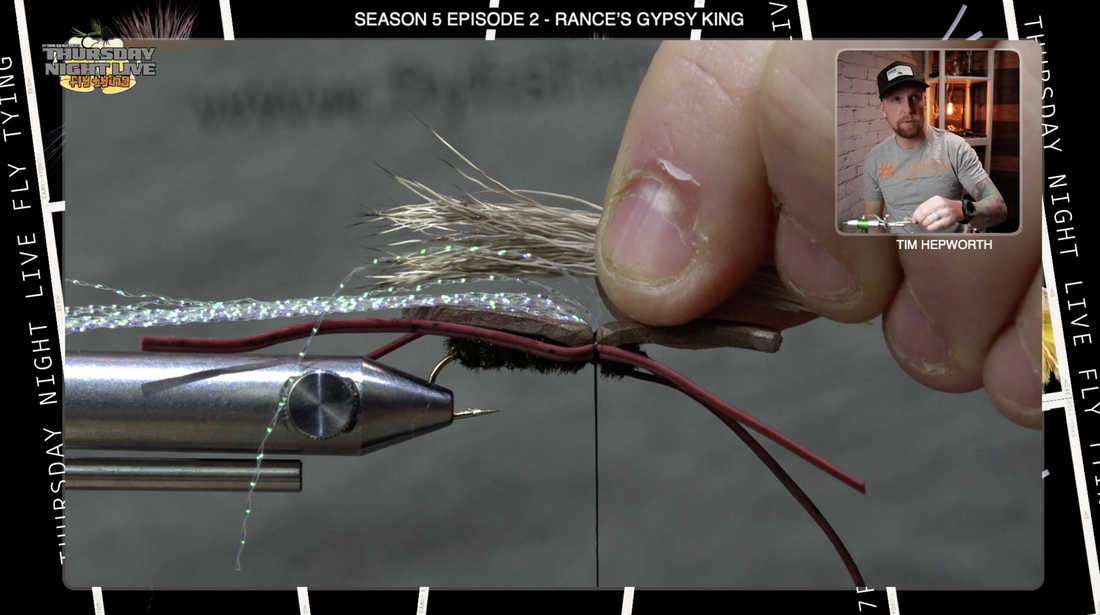
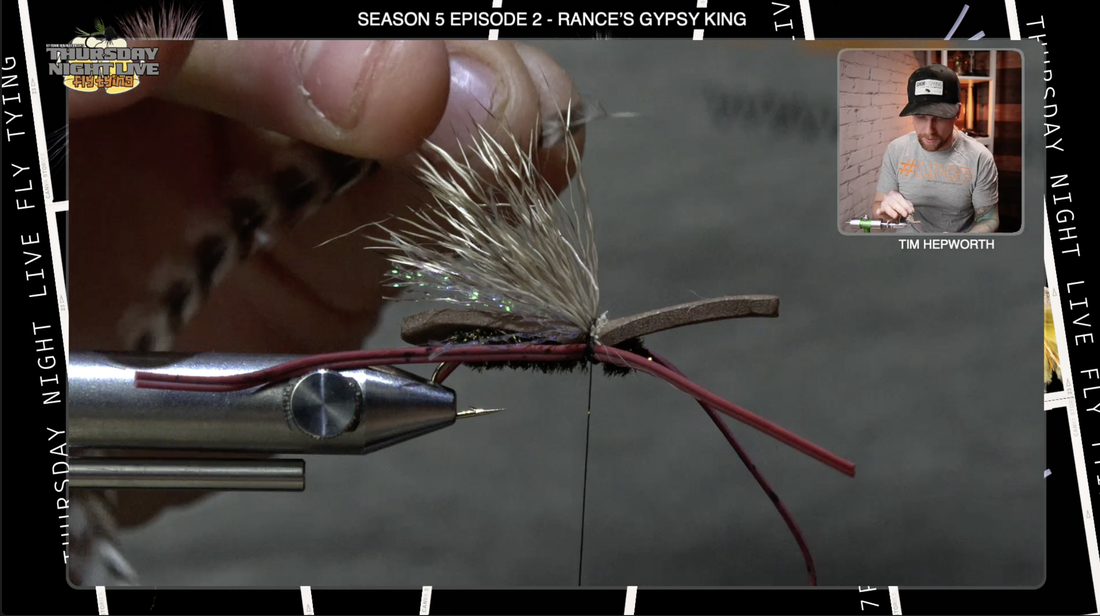
I'm going to take one wrap here. this one's a loose one . put a little tension on it. The next one is a little tighter. The third one is completely tight. if we do it in that sequence we shouldn't cut the foam with our thread. lift that foam up and take a couple wraps in front of it, that's going to help it from spinning around the hook shank itself. get that nice and secure. we're just going to kind of leave it as is. The next thing I'm going to do is I'm going to go in and grab some Crystal Flash. you're also going to notice you have quite a bit of that so if I grab let's say four or five strands, they're long strands. I'm just going to take them. I'm going to fold them over and I'm going to cut right where they're folded so this is going to give me probably double. if I had four strands now I got eight and that's gonna be plenty for this. It's gonna still be quite long. I like them long on the fly because I'm going to be able to keep them out of the way. if you cut them short right away they actually just really want to get in the way so I'm going to tie them in like that, fold that over, put a few thread wraps down to secure them, and I'm just going to pull them back out of the way like so. if you have a material clip or something it's great to just hold that stuff back. I'm going to grab my rubber legs. so a little different than normal we're going to tie two in on each side at the same time. I've got these still attached to each other, I'm just going to leave them like that. they're too long for this specifically right now but we'll trim them in a second. I'm just going to take a couple thread wraps kind of loosely, let the weight of the bobbin hang down and I can still go in there. I can adjust these. I can move them around to where I want them. if you can accomplish it , you'd like that front leg to be pointed down slightly like so. Now I'm gonna stick in the rubber legs on the near side of the fly to myself, same exact thing as I did on the far side. take a couple wraps just to get them kind of laying in there and then I can go ahead and I can adjust them a bit. okay just kind of put them right in the middle so you have a good adjustment on both sides. make sure those are just up against the edge of that foam. Next we got some deer hair. you also could use elk hair. we're going to take a decent sized Clump maybe half a pencil width, nothing too crazy. this isn't a very big fly so we're going to grab a little clump of it. I'm going to trim it off right off the patch. right away I can see there's going to be a lot of fluff in the back of it so you can see all that fluff or under fur in there and I'm gonna try to get some of that out and kind of flick it out. You can use a small comb if you like. Now I'm going to go ahead and place this right in a hair Stacker. go ahead and stack that hair. get it in your hair Stacker. we're going tips down as always. give that a couple whacks on the table now when I pull this off I want the butt end of the stacker to be facing back down the fly. That's where I want the tips to be so as you can see here I pull it out, and I got the tips right there. go ahead and grab those tips keeping them together. I can do another little clean out of that under fur while I'm at this point. My tips should be nice and lined up. Now what I'm measuring here, I want my tips to extend just beyond the back of that foam as well, so I don't want them way out here. I don't want them too short. I want to be right about there. Once I've measured that I'm going to switch hands keeping my position on the hair and I'm actually going to cut this right here. make a mess of my table for you so when I tie this in I don't want to have to trim again. I want to tie this in just like so, so I'm going to tip those hair down.
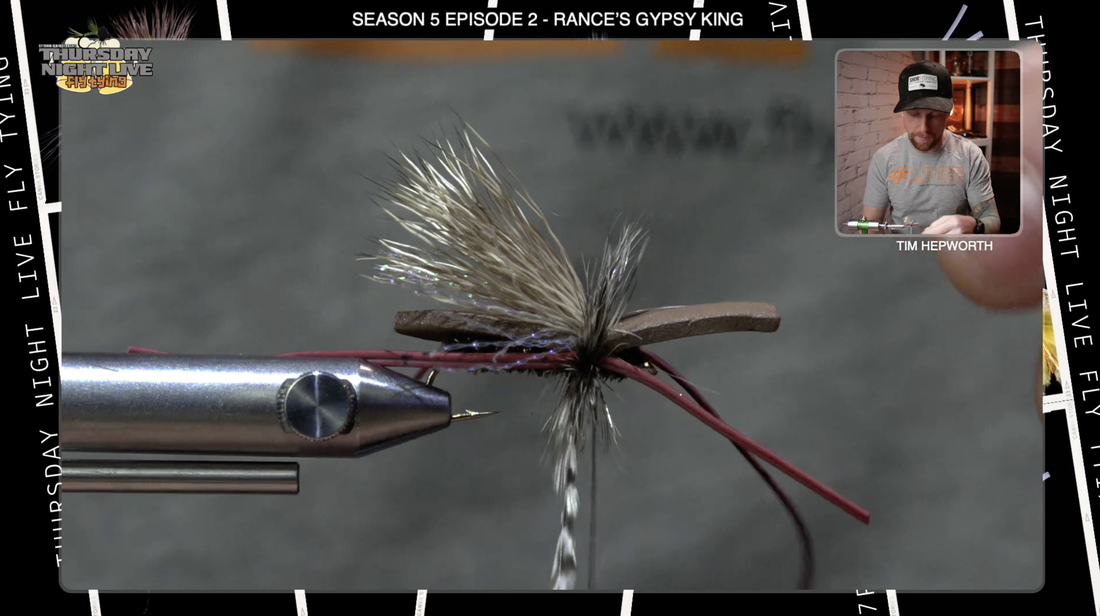
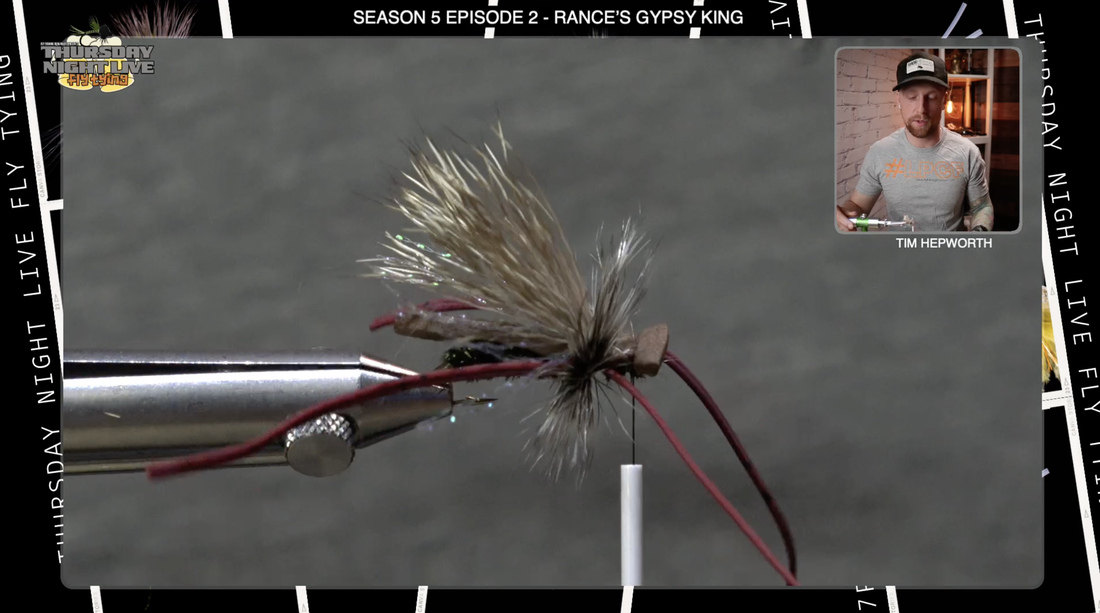
I'm going to take a gathering wrap on that hair, second wrap a little tighter and you're going to see it flares that hair slightly. I'm going to put some wraps through the butts of the hair. Now if that moved your legs around at all you can always just re-adjust them. they should still move for you. Now you can see at this point my Crystal Flash is going to be held down by that hair so I can come in here and trim that Crystal Flash. I'm going to trim it again just beyond that foam. make sure that foam sits up nice and tall right on top of the fly. take a couple more securing wraps. I got that hair and that Wing to flare real nice. I got my legs in place no problem there pretty much done this fly one more material to add in here so now I'm going to go ahead and I'm going to grab my Grizzly Hackle. you need a Hackle, you can either use from a cape or you can use a full length saddle Hackle, is probably preferred. it's a little bit easier to work with because they're longer a longer stem on them just going to go ahead and grab it onto my kit here and we're going to tie this so that the underside of the saddle Hackle here as you can see in Grizzly color is pointed back down the fly. Underside is going to be back down the fly. I'm going to pull just a few of these at the back out trying to attain the size that I want because I want it to be just beyond the actual size of the hook Gap. Once I've got that there to kind of prepare the stem, I'll trim it down slightly. I'll just take a trim a few of those fibers up that just gives me something to tie in with and hopefully that won't slip around on me. I'm going to come in here and tie down that stem. This is going to be something you want to make sure is good and secure so take some good thread wraps to lock it in place. I'm going to want to do probably at least four wraps of this Hackle depending on the water you're fishing it in, whether it's a little bit rougher water or calmer water you could maybe change the number of wraps. I want to go with at least four, so try to keep one wrap in front of the other. just trying to get this buggy appearance to kind of happen right here. make sure you keep that foam up on top. I want to secure this so I'm going to bring my thread in and run it along that Hackle. go to the other side. now go back in front of it just like we kind of did with the wire or anything else. you want to take some thread wraps in front, some thread wraps behind. I can go ahead and I can trim out that piece of Hackle. now I'm gonna quickly jump my thread right forward to the eye. hold that material back a bit and now I'm going to lay that foam down. we're going to create the head here. I laid the foam down. I'm going to take my thread and go right over top of that foam. try not to trap any of that Hackle that we just put in, and take a nice tight wrap down on top of that foam. take a couple more so when you look at it from the front it gives you a little bit of a bulge for the head. Now I'm going to go ahead and just trim out this foam to get the rest of it out of the way. I'm just going to extend my scissors just slightly forward a couple mils and there you go. That's the head of the fly. a pretty simple way to finish off that head. This can be a bit of a beast to whip finish because you have to hold everything back out of the way. I'm going to grab my half hitch tool. as I've showed before it's going to do a couple wraps and I stick the half inch over the eye of the hook and pull the thread down. that's going to give me a nice secure knot. same thing, pull it down one more time I can go ahead and trim out my thread and set that aside. we just have a little bit of trimming to go on these legs and we're pretty much set. make sure that that foam is right up on top of the hook itself looking super buggy. while these legs are still together. I'm going to pull them out. this is a this is a feel thing here guys. I want the front legs to be a little shorter than the back legs. I'm going to trim those there. I'm going to hold these back legs to just be on the back of the foam and trim them there now.
originally this fly was actually a crane fly is what it was meant to be and now we've kind of adapted a little bit more into fishing it for stone flies. really effective in both regards but important it kind of just gauge those legs where you want them and then I'm just going to go with the last piece here. I'm just going to split all those legs so if they haven't already come apart on you just split them right to the body of The Fly. we can go in there with just a little bit of solarez resin. we want to secure those last few thread wraps that we took on the underside. dab those there I'm using some bone dry by solarez. I'm going to cure that with my UV light. that is Rance's Gypsy King. a really good pattern. definitely suggest keeping this one in your box and fishing it some more. it is Tim here with Fly Fishing Bow River Outfitters, and Thursday Night Live fly tying. this has been a quick tie blog, brought to you by Rocky Mountain Fly Shop.
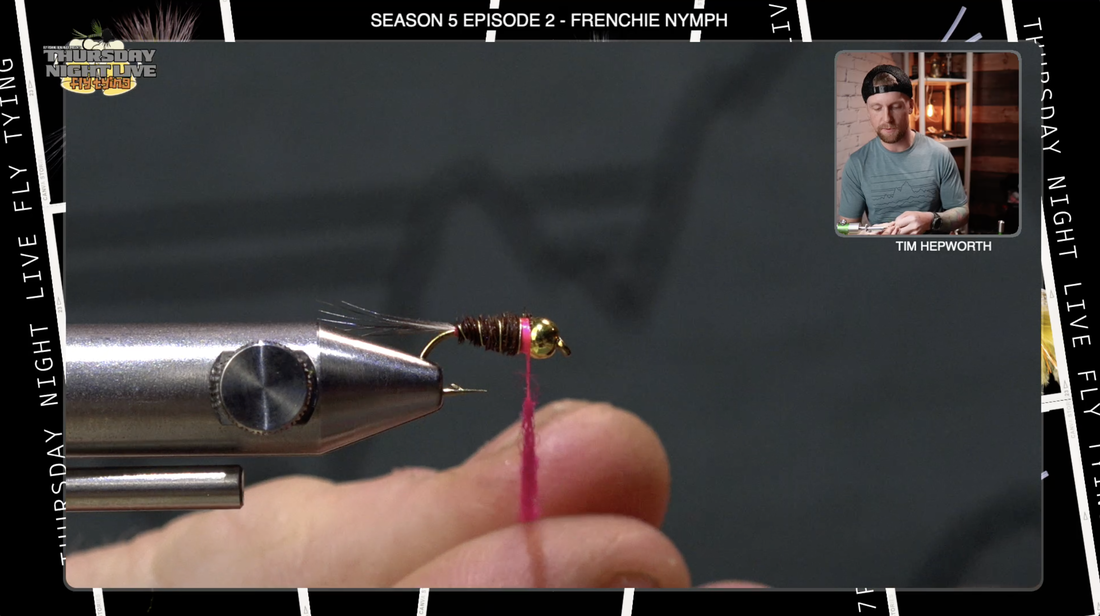
Frenchie Nymph Fly Tying Recipe: |

 |  |  |
I am tying out our Season 5 material kits, but don't worry, if you head on over to her website (www.flyfishingbowriver.com/tnls5) you also are going to find a complete material list. If you don't have the materials with you, don't worry, you're going to be able to find what you need and probably the best place to do that is at www.rockymountainflyshop.net. Let's head over to the Norvise and let's get started.
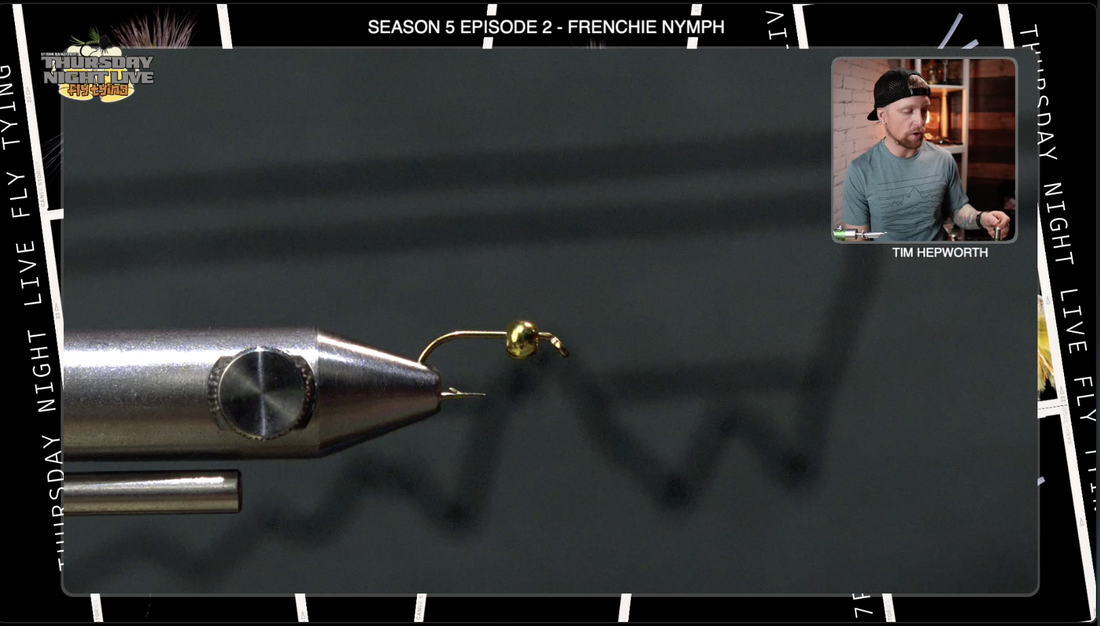
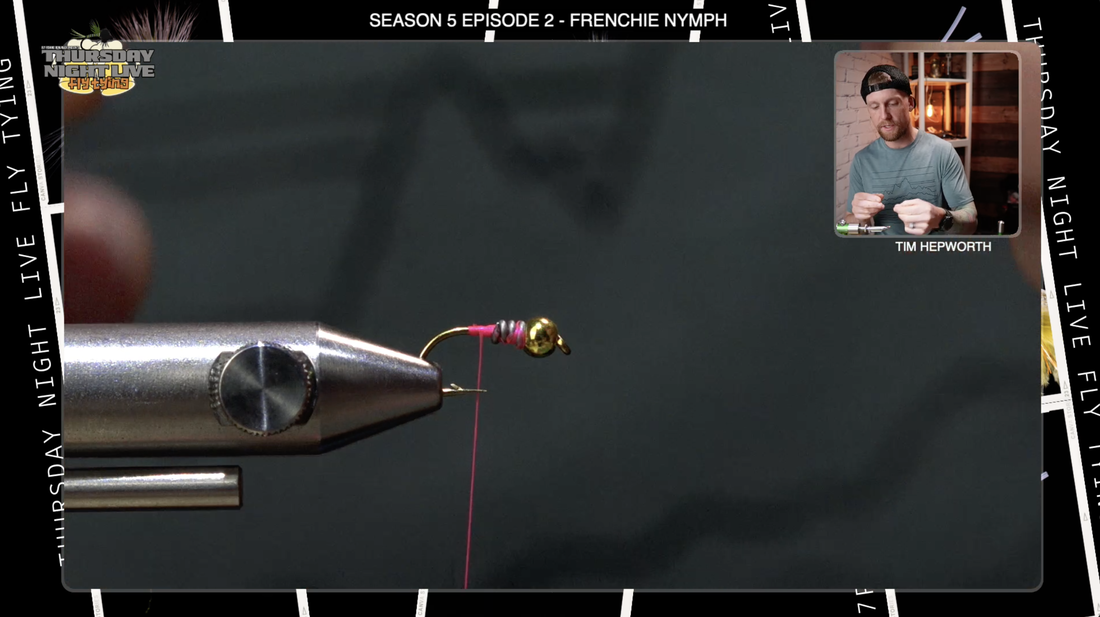
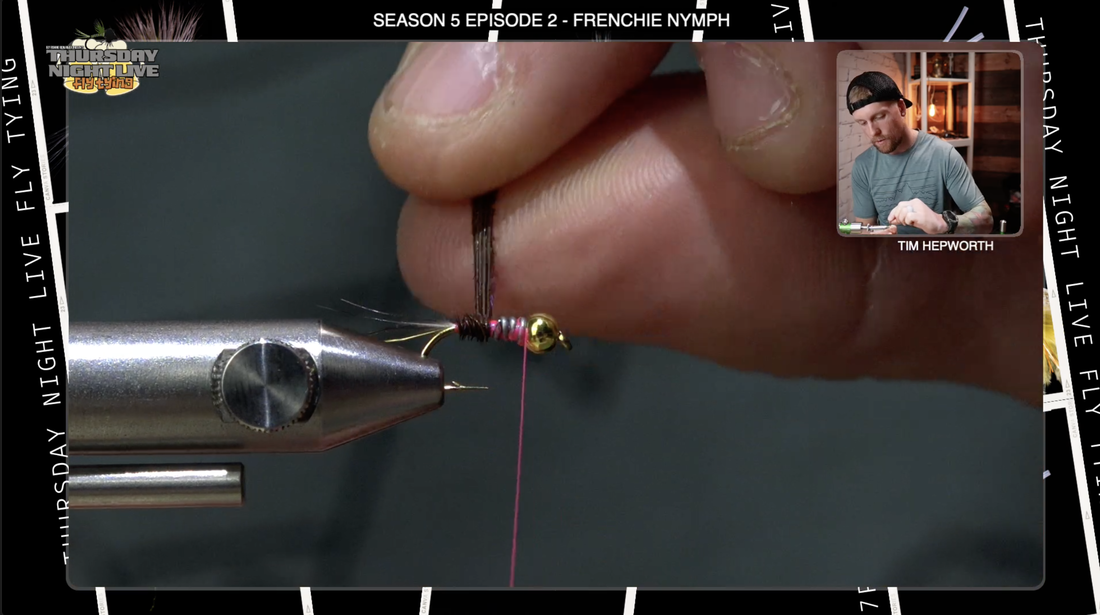
So what we got here guys, we have a size 14 Dai-Riki # 60 hook. Before you put your hook on the norvise, make sure you have a 7/64 Gold tungsten bead on your hook. I'm going to be tying with some fluorescent pink. This is UTC 70. You could also use an 8/0, that would work well here as well. Before I put some thread on though, we're going to start with some lead wire. This is 0.15 lead wire. I'm going to put in three full wraps, okay no more than that otherwise we're going to use up too much space on this hook. I'm going to use Dana scissors to come in here and trim out that lead wire, but you'll see when you do that it leaves these little pieces that stick up, so it's really important to go in there and do your best whether you're using scissors or whatever it is to flatten that lead wire down against the hook. You want it to be nice and flat. You don't want there to be a massive bump there when you put your thread in and all your other materials. Slide that lead up against the bead, and that's going to help build some taper for us. It's going to be part of the thorax as we start building this fly. So let's take that UTC 70 fluorescent pink thread and start some thread wraps just behind those lead wrap. Then trim out that tag and then while I'm here I'm going to come up, and I'm going to put some light wraps first up over that wire, and then I'm going to start to put a few more tighter ones, and then I'll come back down the hook.
So what we got here guys, we have a size 14 Dai-Riki # 60 hook. Before you put your hook on the norvise, make sure you have a 7/64 Gold tungsten bead on your hook. I'm going to be tying with some fluorescent pink. This is UTC 70. You could also use an 8/0, that would work well here as well. Before I put some thread on though, we're going to start with some lead wire. This is 0.15 lead wire. I'm going to put in three full wraps, okay no more than that otherwise we're going to use up too much space on this hook. I'm going to use Dana scissors to come in here and trim out that lead wire, but you'll see when you do that it leaves these little pieces that stick up, so it's really important to go in there and do your best whether you're using scissors or whatever it is to flatten that lead wire down against the hook. You want it to be nice and flat. You don't want there to be a massive bump there when you put your thread in and all your other materials. Slide that lead up against the bead, and that's going to help build some taper for us. It's going to be part of the thorax as we start building this fly. So let's take that UTC 70 fluorescent pink thread and start some thread wraps just behind those lead wrap. Then trim out that tag and then while I'm here I'm going to come up, and I'm going to put some light wraps first up over that wire, and then I'm going to start to put a few more tighter ones, and then I'll come back down the hook.
 | 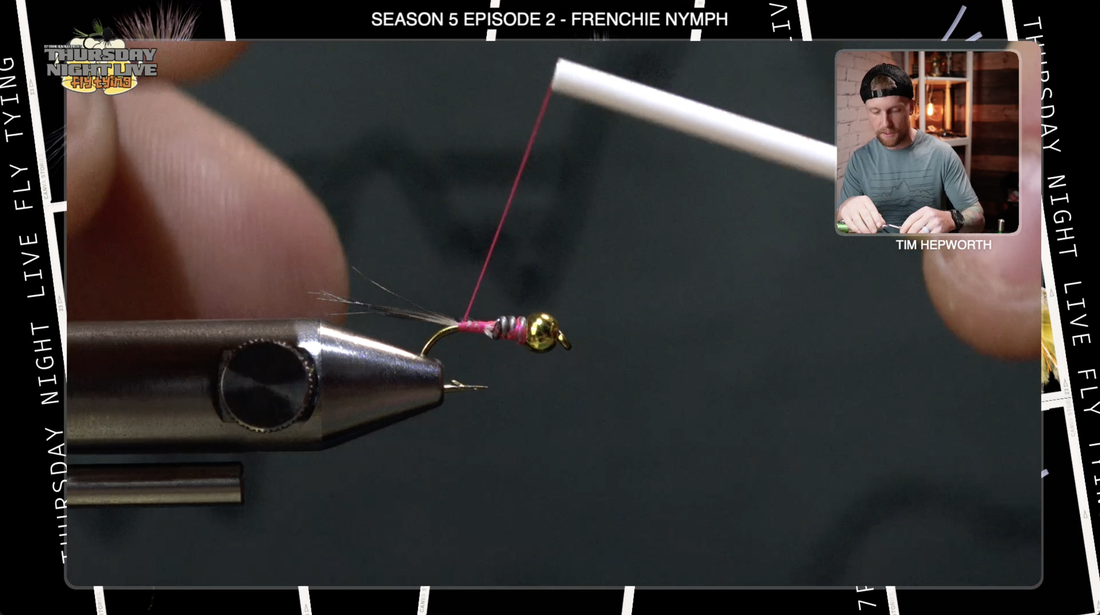 |  |
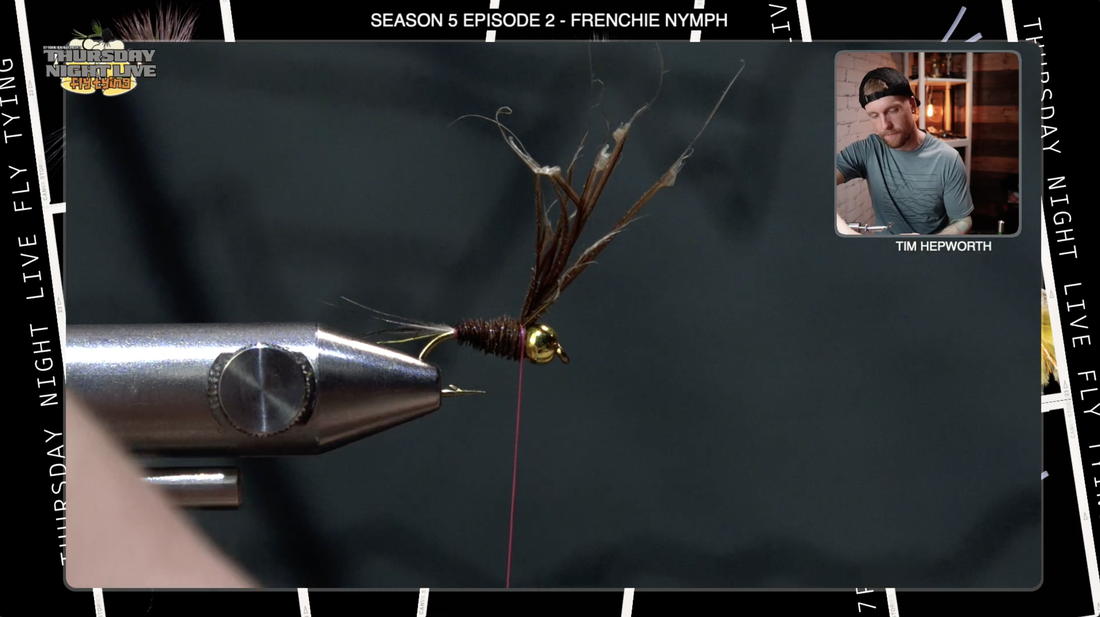
The first thing we're going to do, after getting our thread base down, is we're going to put in some tailing fibers for a tai.l This is traditionally done with some Coq De Leon. I'm going to take somewhere between probably eight and ten pieces. You're just looking for a little bit of a clump. These tails are going to be pretty light in color as well as they're not going to be a huge clump of material. After taking some off, I'm going to come in and grab the tails to get all the little fluff that might be on there out, and I'm going to come and measure out about a full hook length worth of material that is going to hang off the back of this fly. I'm going to transfer that down as my tail. I'm going to switch hands now. I'm going to Mark where that is against those lead wires, and then I'm going to cut the leftover tails. Now I'm going to lay that down on the hook, so just take that material lay it right down and do a nice securing wrap trying to keep that tail fiber right up on top of the hook. We're going to wrap the thread down just the edge of the bend of the hook. We don't want to go any farther otherwise that's going to cause the tail to aim straight down, and we want them to stick straight out of the hook. I bring my thread back to just behind the lead wire. Now we've got some size small gold wire (Brassie wire), this is going to be our ribbing on this fly. Now I'm going to come in here and I’m going to place this wire butting up against those lead wraps. I'm going to secure it on the side of the hook, and I'm going to take that down right to where I left my tail fiber, and I'm going to leave it out the back. So we've got our ribbon, we've got our tail in, now we're going to go over to the main body. The material going to be some pheasant tail. So grab yourself a healthy Clump, and you're going to again want somewhere, probably in that eight pieces Mark. You want a decent sized body. I've come in here with a fairly generous clump. I'm going to try to line up those tips the best I can and once I have, I'm just going to trim them out. Trim them flat, so they're all the same length, and then I'm going to tie these in right at that tail, so I can lay them forward a bit first. Take a wrap around the pheasant tail, and then I can pull back on those fibers to get them back to where I want them at the back of the fly. I'm just going to lock those in place and work my thread all the way forward to right behind the bead. Now I'm going to go ahead grab all that pheasant tail, and I'm slowly going to Palmer that forward, making sure I try to keep them together but also covering up all my work as I go. Watch out for that hook point; it can grab some pheasant tails. We're going to work those fibers all the way up to just behind the bead. Take your time, these aren't super long fibers, so they can slip out of your hands pretty easy. Hackle pliers aren't a terrible idea. Once I get up here to the head, I'm going to grab that material and lock it in place with my thread. If you were able to leave a little space behind the bead that's kind of Ideal because we have some dubbing we're going to put in there, if not, it's okay too we can wrap back over them. We're going to come in here and trim these out as close as we can, nice and smooth. I'm going to take a couple thread wraps just to make sure that's definitely locked in place and not going to come unraveled on me, that would be a bit of a frustrating thing to happen here now. I'm going to take my brassie wire rib, and come forward to protect those pheasant tails and give some segmentation to the body. There's two schools of thought here
1. I could either counter-wrap it or
2. I could wrap it the same direction
1. I could either counter-wrap it or
2. I could wrap it the same direction
 |  | 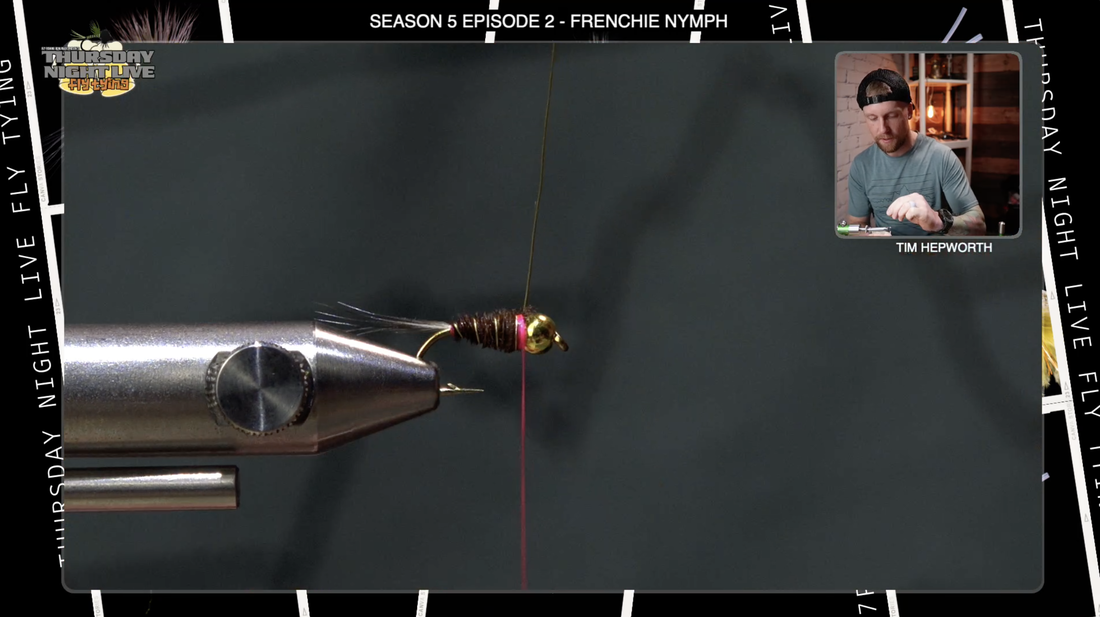 |
The issue with counter wrapping is when I go to secure my wire with my thread I'm going to be securing it in the wrong direction, and it has the probability of loosening the wire down the chain. So I'm going to go ahead, and I'm going to go the same direction that I put on that pheasant tail, just a nice equally spaced rib all the way up to where I left my thread. I'm going to secure that with a couple wraps behind, a couple wraps in front, and now you can either go ahead and helicopter that off, or go into some not so great scissors (Dana’s Scissors) and cut out that wire.
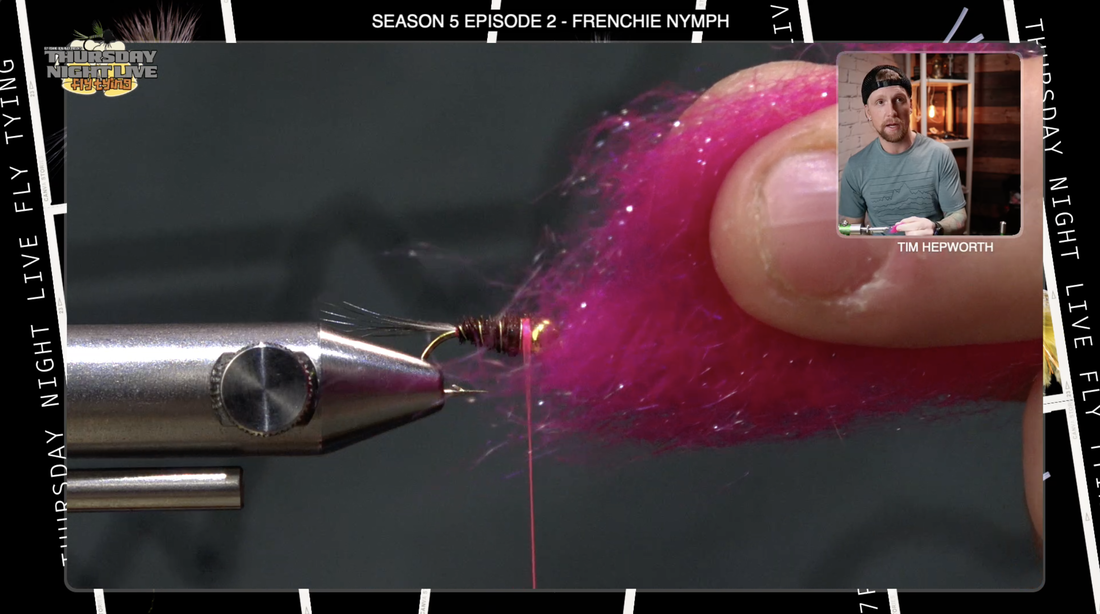
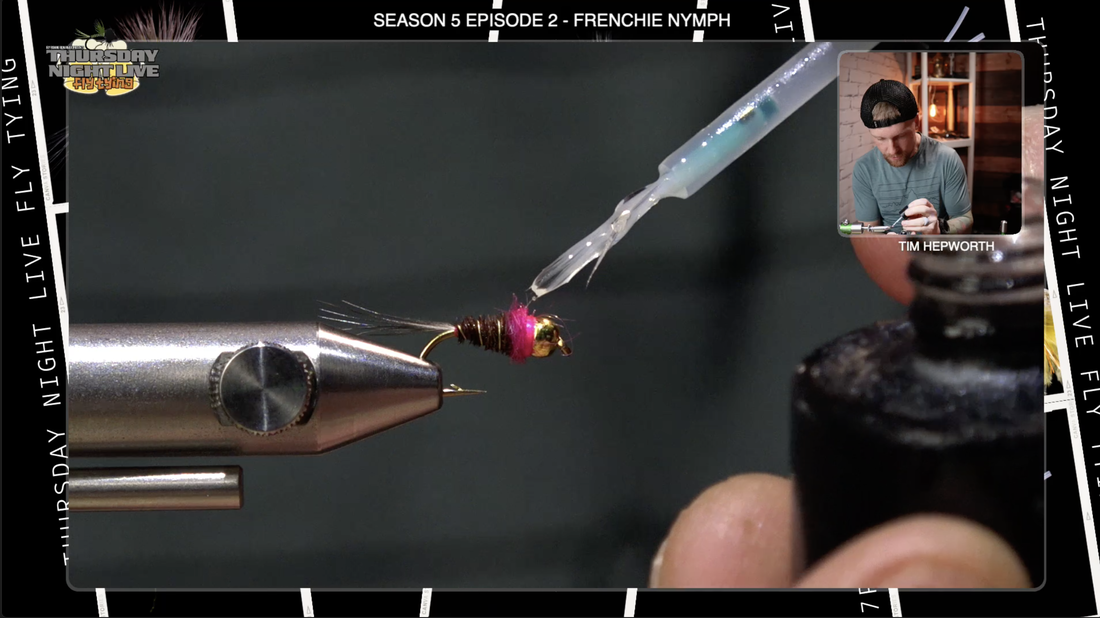
Only one more material left. We got this beautiful pink fluorescent UV dubbing, and we're going to take just a whisk, and I mean a whisk. We don't need much at all. Most people use way too much, so make sure you just grab a little bit. We're going to make a little bit of a dubbing noodle with that pink UV Dubbing. I'm going to come in here like we did last time on the Near Nuff Sculpin. Take that small pinch and spin it onto my thread. It shouldn't need any wax or anything on the thread. This stuff actually binds to the thread really well. Now I'm going to start making some wraps just behind that bead I want to make a nice thorax out of that pink dubbing, and then I'm going to bring my thread in front, and now we want to make a bit of a hot spot with just the Pink Fluorescent Thread. Seems kind of silly, but the pattern calls for a hot spot with hot pink even though there's pink dubbing. A way we can accomplish that is let's just overdo it on our whip finish, to be careful not to create too much bulk around the bead. I'm going to come in here with a whip finish just behind the bead. Normally we do three, let's go four five six wraps. That's going to create a little bit of a hot spot just behind that bead, and then I can come in here and snip that. If you like, you can go ahead and put just a little bit of resin on there. I'll use just a little bit of Bone Dry from Solarez. Just the tiniest touch on those thread wraps, and I'll come in here, and I'll cure it with my UV light. Give it a half a second so it cures.
Only one more material left. We got this beautiful pink fluorescent UV dubbing, and we're going to take just a whisk, and I mean a whisk. We don't need much at all. Most people use way too much, so make sure you just grab a little bit. We're going to make a little bit of a dubbing noodle with that pink UV Dubbing. I'm going to come in here like we did last time on the Near Nuff Sculpin. Take that small pinch and spin it onto my thread. It shouldn't need any wax or anything on the thread. This stuff actually binds to the thread really well. Now I'm going to start making some wraps just behind that bead I want to make a nice thorax out of that pink dubbing, and then I'm going to bring my thread in front, and now we want to make a bit of a hot spot with just the Pink Fluorescent Thread. Seems kind of silly, but the pattern calls for a hot spot with hot pink even though there's pink dubbing. A way we can accomplish that is let's just overdo it on our whip finish, to be careful not to create too much bulk around the bead. I'm going to come in here with a whip finish just behind the bead. Normally we do three, let's go four five six wraps. That's going to create a little bit of a hot spot just behind that bead, and then I can come in here and snip that. If you like, you can go ahead and put just a little bit of resin on there. I'll use just a little bit of Bone Dry from Solarez. Just the tiniest touch on those thread wraps, and I'll come in here, and I'll cure it with my UV light. Give it a half a second so it cures.
 |  |  |
This is a real simple fly, guys. You want to keep some of these in your box and have a dozen of them in a few different sizes. Change up that pheasant tail to different colors as well, and you'll make a true variation on this pattern. Once again this is Tim here with Fly Fishing Bow River Outfitters and Thursday Night Live fly tying, this has been another quick tie blog brought to you by Rocky Mountain Fly Shop. Don’t forget, everything over $99 is free shipping from them, so make sure to check them out! We will see you on the next pattern.
Author
Tim Hepworth
Kinder Gentler Mop Fly
HOOK:Scud/pupa hook (here a Dai-Riki #135), size 12
THREAD:Dark gray, 6/0 or 140-denier
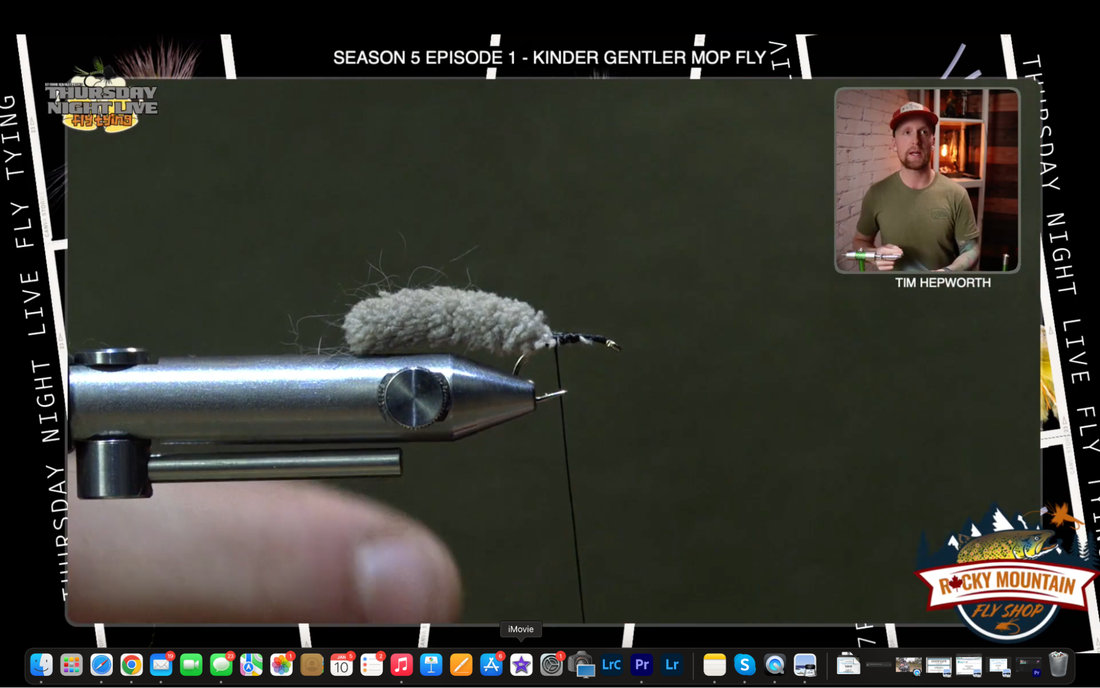
BODY:Mottled gray segment from a mop or auto wash mitt
HEAD:Gray rabbit-fur dubbing
I want to welcome you back to another Quick Tie blog brought to you by our friends at Rocky Mountain Fly Shop (rockymountainflyshop.net). We are currently in season five episode one. Thursday Night Live Season 5 KitsThursday Night Live season five kits are still available on our Website, head on over to www.flyfishingbowriver.com/tnls5 and grab your kit today. I’ll be taking you through the “Kinder Gentler Mop Fly”, so go ahead and open your TNL season 5 kit and grab out your episode 1 package. If you don't have a kit, grab the materials listed above in the recipe. You will notice in your season 1 package you will have two fly bags inside, grab the one correctly labeled “Kinder Gentler Mop Fly”. Now let's head on over to my Norvise and get started on this fly.
 |  |
There are very few materials in this fly pattern which makes it quick and easy. We will get this Dai-Riki #135 scud hook secured in the jaws of the norvise, and get our Black UTC 140 started on the hook shank. It is important to use a bit thicker thread as I will be teaching you how to spin dubbing by splitting the thread.
 |  |
After starting the thread wraps behind the eye of the hook,we will work them forward to the hook barb and then take a couple wraps back towards the hook eye; let your thread hang at the hook point. We're going to then grab the tail piece, which is a piece off a car detailing mitt, and look at the cut end. You will find this material to be similar to chenille in that if it has a few core threads that we need to expose then tie in. Place the tail right on top of the hook where we left our thread and place a securing wrap to hold it right on top of the hook. Go ahead and take a few thread wraps forward to secure the middle strands of the tail and then come back to your tie in point.
 |  |
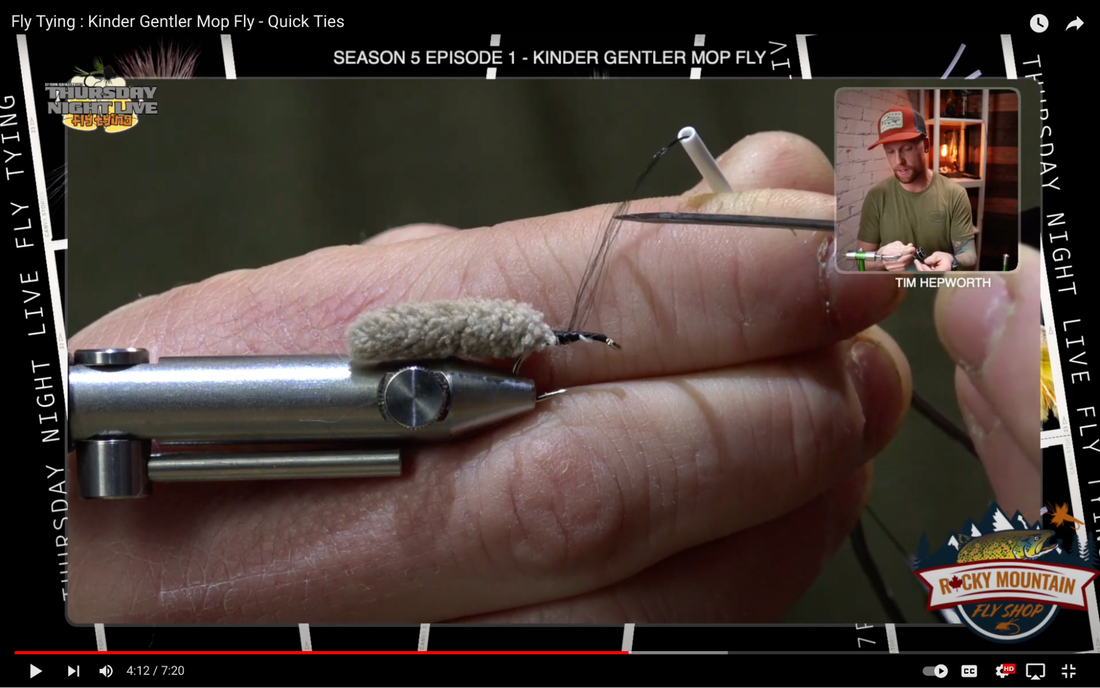
We're now going to see the importance behind choosing a thicker thread. We're going to counter spin our thread to flatten it out. You will notice if you over spin your thread it will cord it back up, so you have to find the happy medium point where the thread is flat and able to be split. Now with the thread on my finger I'll use my Shore bodkin or something pointed like my Shore whip finish tool and split the thread into equal parts. Slip your finger in between the two pieces of thread to hold your spot.
 |  |
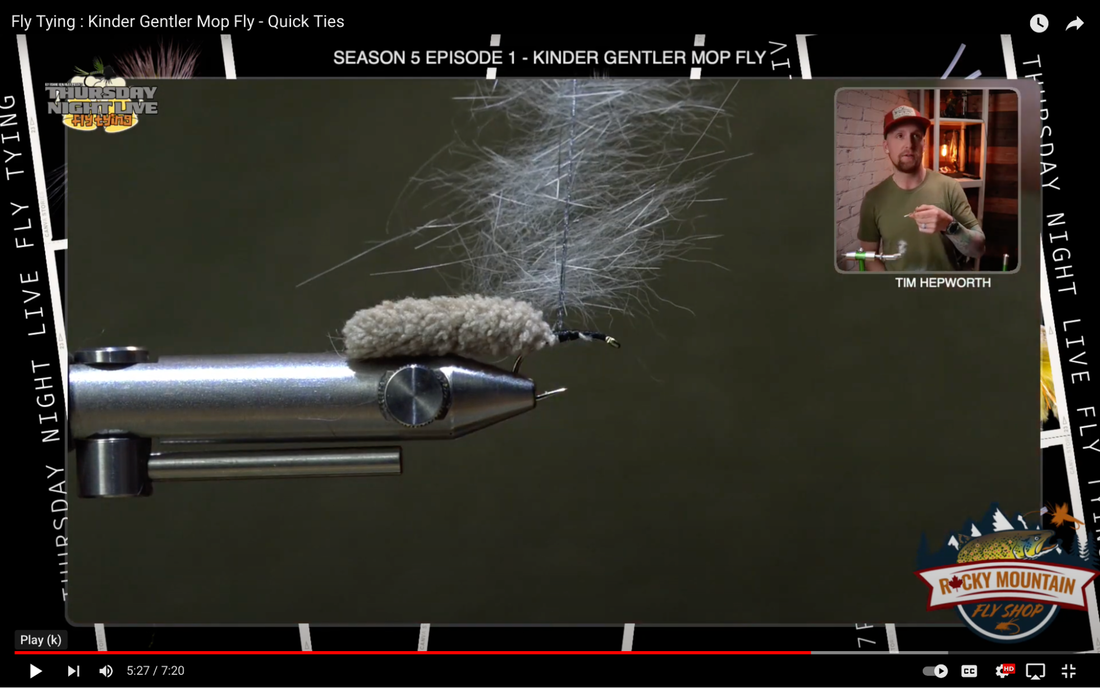
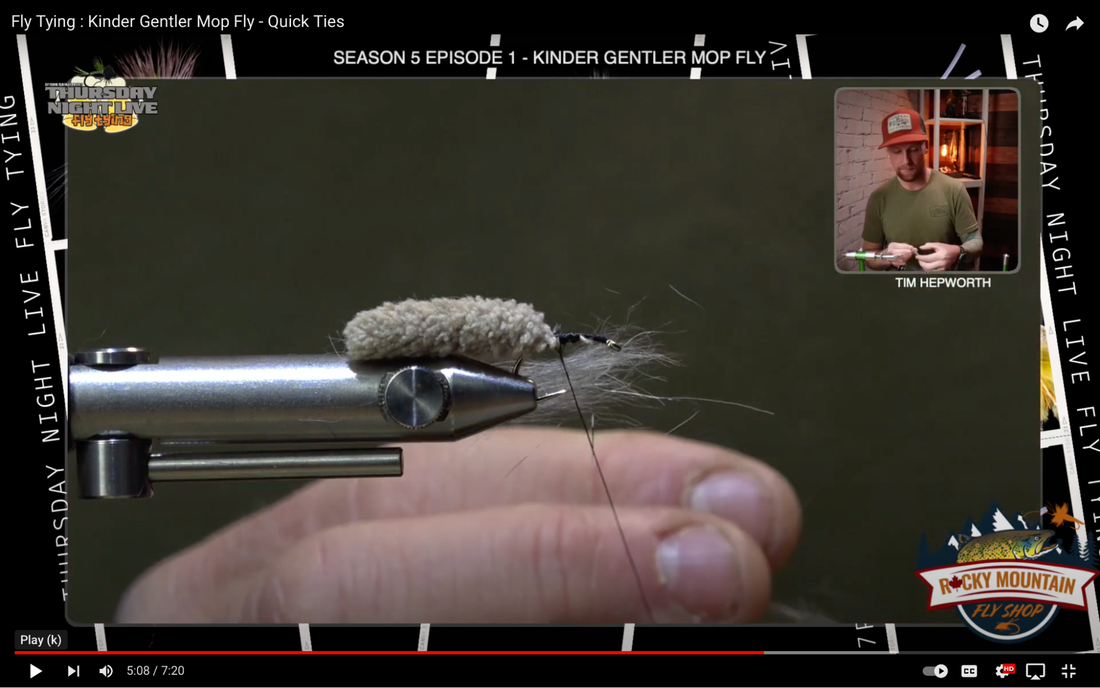
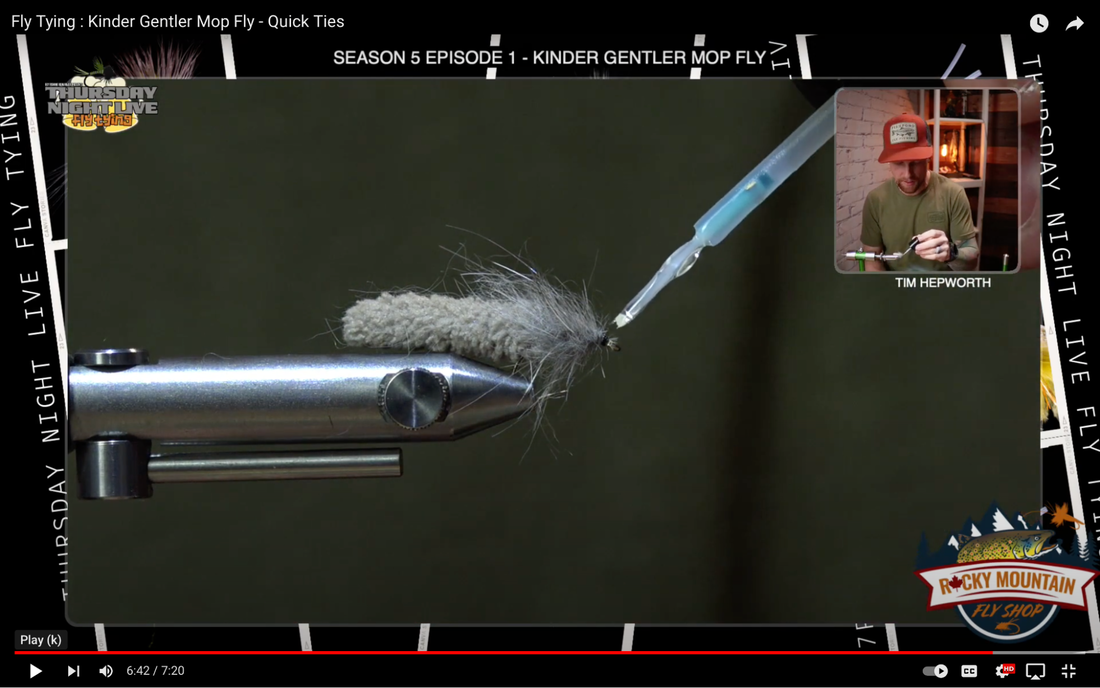
While keeping your finger securely holding the thread grab the only other material in this pattern, your Hareline rabbit fur dubbing in the color gray. We should not need to use any dubbing wax to accomplish this split thread dubbing loop. Grab three equal small pinches of the dubbing and slide them in between the pieces of split thread. Once you feel you have the correct amount of dubbing placed, take your finger out of the thread and spread the dubbing out before you spin your bobbin.Now I'm going to go ahead and spin my Norvice Auto Bobbin until the materials spin up nicely. Now moisten your finger tip and pull the dubbing rearward as you start to palmar the dubbing loop up the hook shank towards the eye of the hook, and hopefully you run out of dubbing right as you arrive at the eye.
 |  |
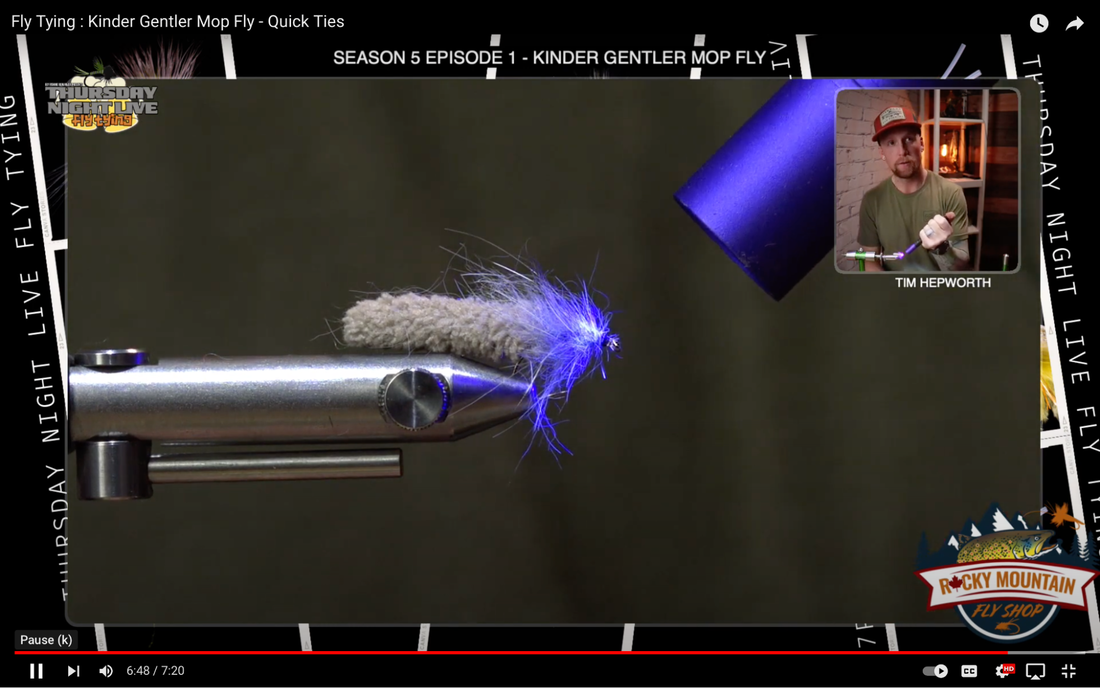
Once we are at the eye of the hook take a couple extra wraps slightly rearward to secure the dubbing material. Now I will go ahead and grab my Shore Whip Finish tool and whip finish the fly. Two to three turns repeated twice will be plenty. Go ahead and snip your thread off. If you have it on your tying desk I recommend grabbing some Solarez Bone Dry resin and just put a small dab right over your whip finished thread. Go ahead and cure it with your Uv light.
 |  |
It doesn’t hurt to grab your favorite dubbing brush and just stroke the rabbit fur rearward back down the fly.
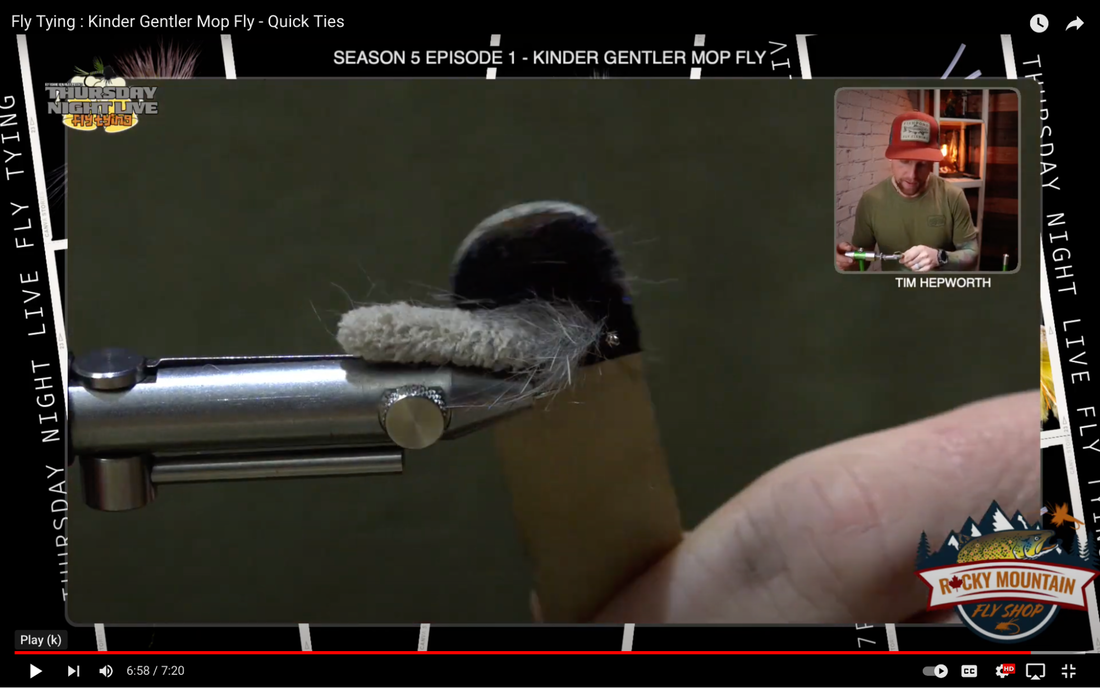
That right there my friends is the Kindler gentler mop fly, it's a very good imitation of a crane fly larva, and very effective. I suggest if you haven't already, add it to your repertoire and give it a try. We again want to thank Rocky Mountain Fly shop for bringing us this week's Quick tie. See you all soon for so many more great patterns from Season 5 of Thursday Night Live.
Author
Fly Tied by : Tim Hepworth
NEAR NUFF SCULPIN
Near Nuff Sculpin Fly Tying Recipe:
Hook: #4 Tiemco 5263
Eyes: Medium Lead Eyes
Thread: Olive / Black UTC 140
Tail: Grizzly Olive Soft Hackle
Flash: Pearl Krystal Flash
Body: Sculpin Olive SLF Dubbing
Rib: Brassie Copper Wire
Collar: Grizzly Olive Soft Hackle
 Tied by Tim Hepworth
 Hey everybody welcome back to another quick tie Blog, brought to you by our friends at Rocky Mountain Fly Shop. We're super excited to have them sponsoring this year, remember if you head over to their Website www.rockymountainflyshop.net ,you can order any material or anything you see on the show pretty much you're gonna be able to find there and everything over $99 Canadian is free shipping so take advantage of that make sure you get in there. We're going to take you through another fly today this one is the “Near Nuff Sculpin “
I'm tying out of a Thursday Night Live Season Five Kit, looks just like this.
I'm tying out of a Thursday Night Live Season Five Kit, looks just like this.
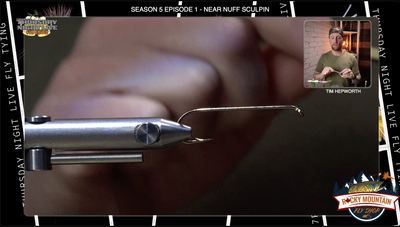
You can still grab your kits today if you head over to our website www.flyfishbowriver.com/tnlS5 . Now what do you get in a kit? Why is that of value to you? Well what you get is both patterns that we tie on that episode, so two patterns per episode x 17 episodes. For Episode one, you have two different patterns, the Kinder Gentler Mop fly and the Near Nuff sculpin. You will have enough material to do this five more times and you get a fly already tied for you. So essentially 6 flies times two patterns is a dozen flies per episode. If you have a kit, grab the Episode 1 kit and find the Near Nuff Sculpin Package and let's get into this fly.Let's head on over to the Norvise and we'll get started. Alright, what we're tying on is a Tiemco 5263 Hook, Size 4 3xl ,a really nice long streamer hook. Go ahead and get that secured in your norvise nice and level. What I'm tying with For Thread is UTC 140 in Black. If you got something in UTC 140 Olive even better. We're not going to see a whole lot of the thread tonight so it's not super critical on
what color you use. Let's go get ahead and get this thread started just behind the eye. Snip off that Tag. I'm going to work my thread all the way down the hook right into the bend to lay a nice thread layer all the way down , so now we're gonna come back to the eye. I want you to grab the dumbbell eyes that you have in your kit. This is going to be the next thing we put on our hook. I want you to imagine having a full dumbbell eye length back from the eye of the hook. This is where we are going to set our dumbbell eyes. Pretty easy to put on. Set them down on the hook, and take a cross wrap ( figure 8 pattern) a couple times to kind of get it
secured . Leave a little bit of space in front of those eyes because we want to make this
look nice and bulky at the head. It's important sculpins have nice big bulky Head, as that is most realistic. Let's take a bunch of Wraps now, and let's get this nice and secured. You're going to notice I'm not spinning these dumbbell eyes around the hook shank on this pattern. We're going to leave these right on top and if you've tied with us before we've explained why you put the dumbbell eyes on the top or bottom, but if you haven ‘t , you'll understand that where the weight sits is where the fly sits so this fly is going to ride hook up. The advantage of that is that we're going to be able to keep this fly hopefully not snagged on the bottom. Lots of weight with these oversized dumbbell eyes because we want this fly to be right on the bottom where the sculpins are. I'm going to flip it over so I can see those wraps there and I'm just going to put a little touch of UV resin on there.
 |  | 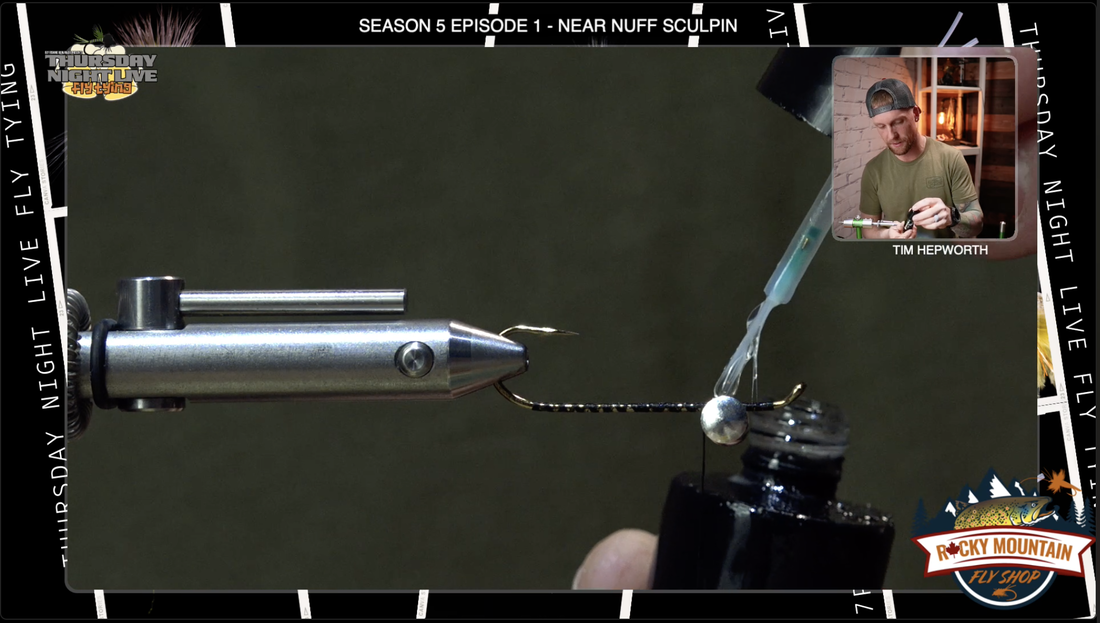 |
You can also put some super glue, whatever you like. What I am using is bone dry by solarez. I like this stuff, it soaks in really nice, and you’ll have to hit that with your UV light so you know those eyes aren't going to go anywhere. When you see The Smoke Stop you know the Solarez bone dry is cured.
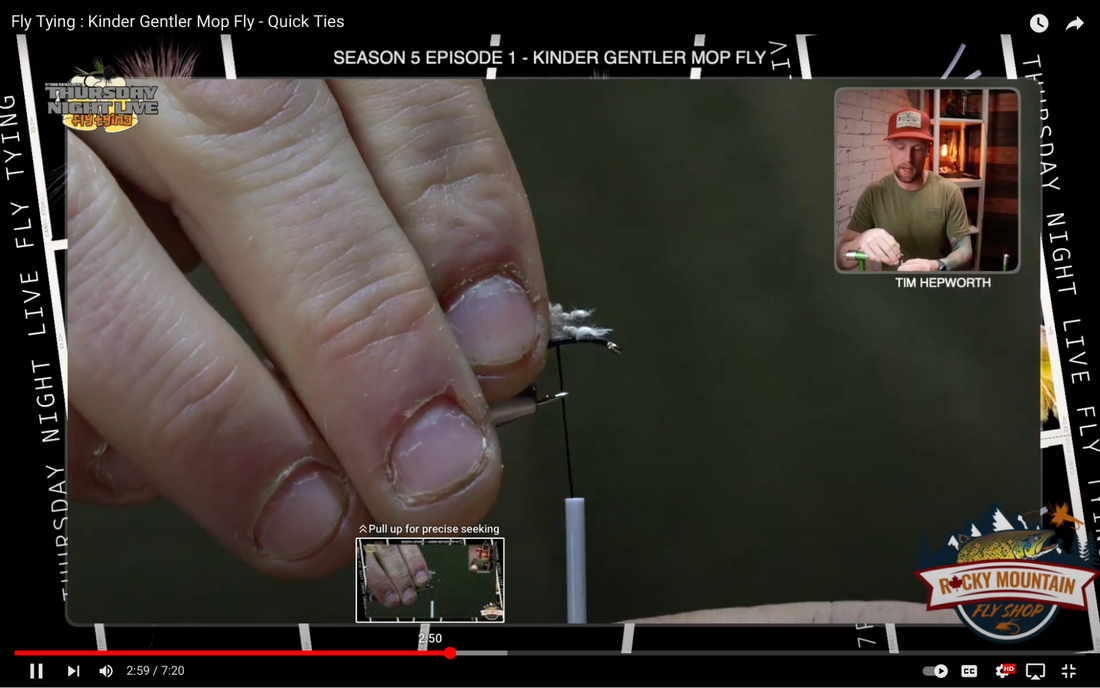
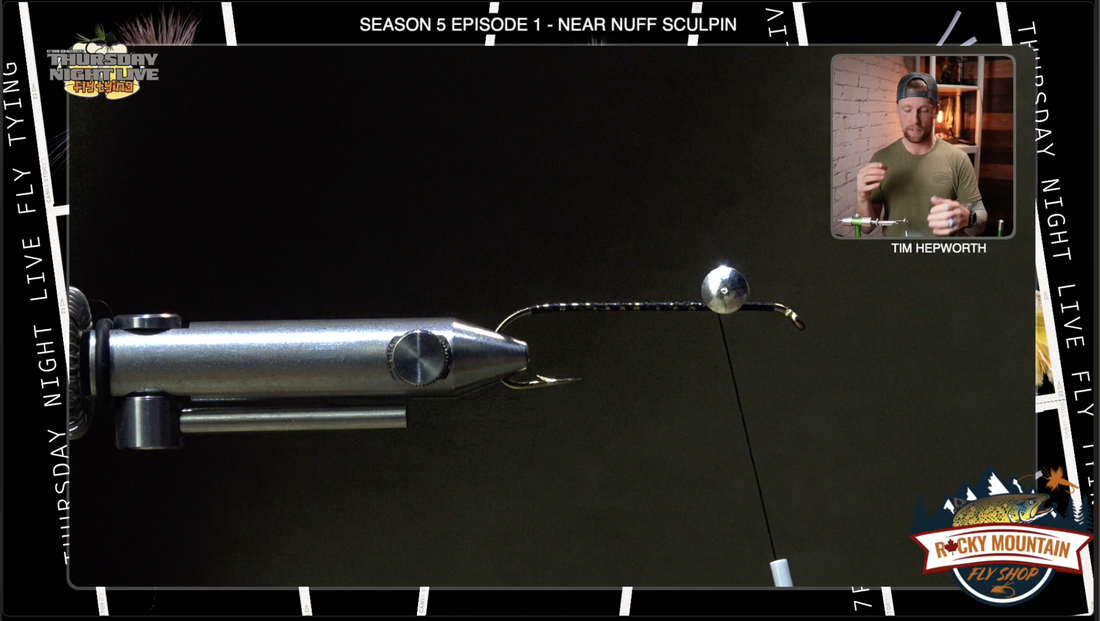
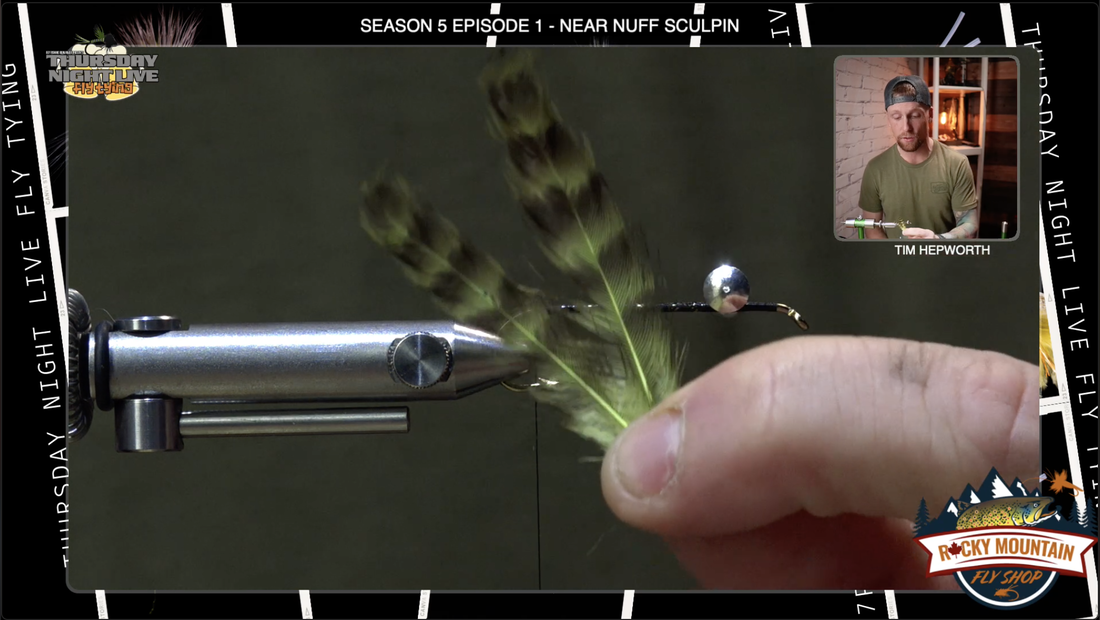
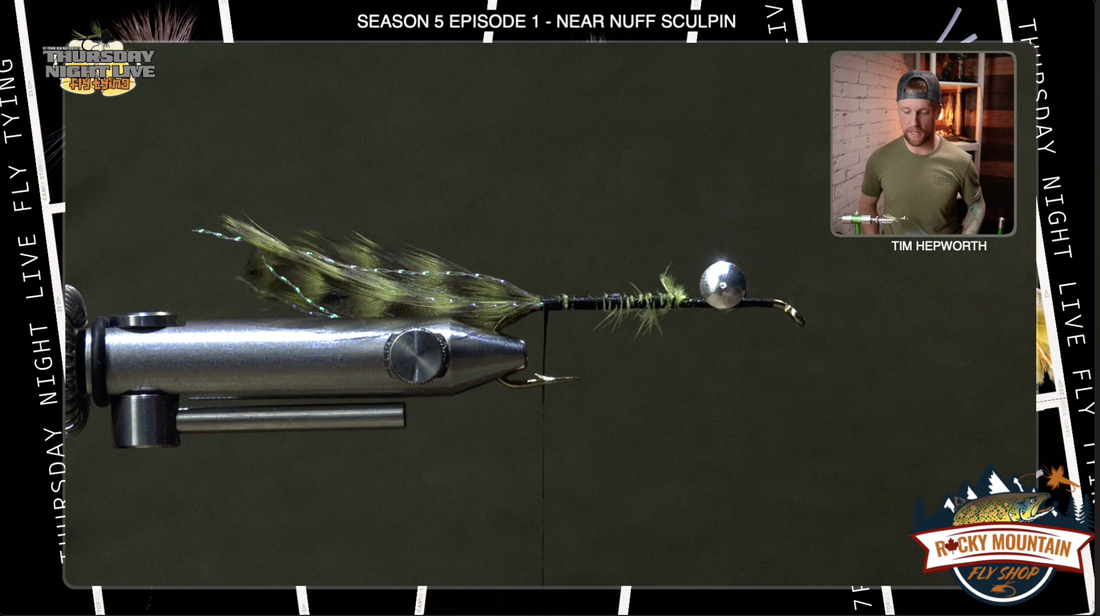
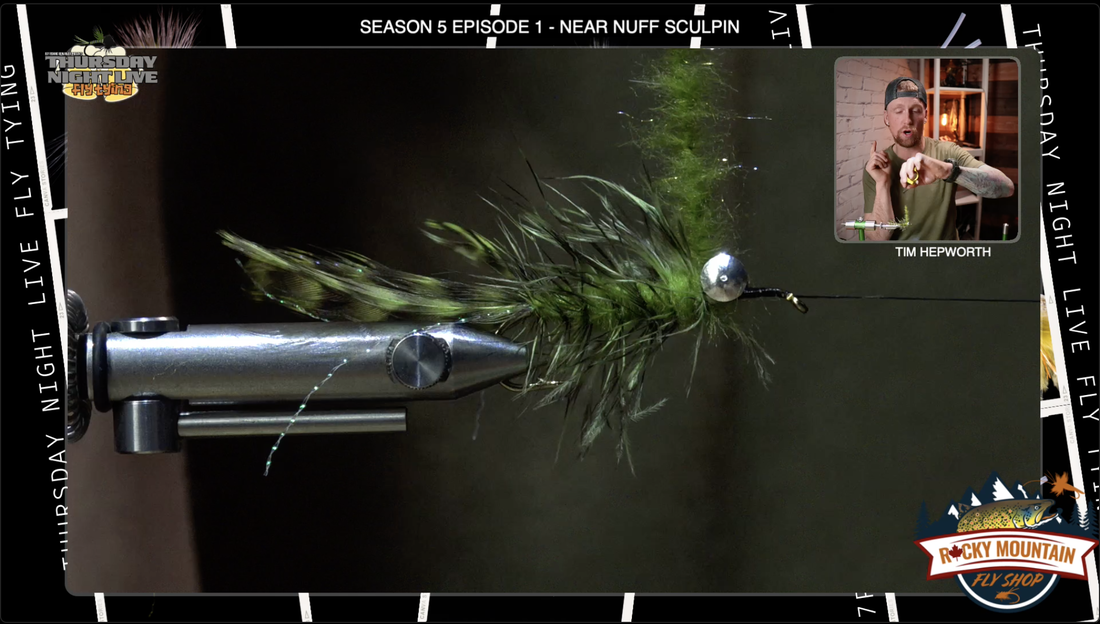
I'm gonna flip the hook back up so I can see what I'm working with. I'm gonna take my thread ( UTC 140) and I'm gonna start working back. I'm gonna get all the way back so it's sitting right about at the Barb. We don't want to be down beyond the hook Bend, you want to be before that hook starts to tip off. We're going to start off with the soft hackle Grizzly and Olive. We're gonna take two of these feathers. Now there's two trains of thought on this. You could think of putting them facing each other or facing out. I want to face them out. I like the way that this moves in the water. I want them to splay when I tie them in, but I want them to be matched in length so I'm holding them opposite each other. I want them to be roughly a hook shank out the back of the fly. I'm gonna switch hands. I'm gonna take a gathering wrap, make sure that it's cinched in there nice, and then pull tight. I'm going to look from the top to make sure they splay and make sure they're even now. Those back here are going to move really nicely in the water. This is a good opportunity to arrange them on the hook shank where you want them before you move on. I'm going to use some of the butts ends of the grizzly hackle to build bulk in the body. I'm gonna wrap thread back on these butts, because I want to create some bulk in the middle end of this fly. We will do it with dubbing as well, but lets take advantage of the material that's already on the hook.
I'm gonna flip the hook back up so I can see what I'm working with. I'm gonna take my thread ( UTC 140) and I'm gonna start working back. I'm gonna get all the way back so it's sitting right about at the Barb. We don't want to be down beyond the hook Bend, you want to be before that hook starts to tip off. We're going to start off with the soft hackle Grizzly and Olive. We're gonna take two of these feathers. Now there's two trains of thought on this. You could think of putting them facing each other or facing out. I want to face them out. I like the way that this moves in the water. I want them to splay when I tie them in, but I want them to be matched in length so I'm holding them opposite each other. I want them to be roughly a hook shank out the back of the fly. I'm gonna switch hands. I'm gonna take a gathering wrap, make sure that it's cinched in there nice, and then pull tight. I'm going to look from the top to make sure they splay and make sure they're even now. Those back here are going to move really nicely in the water. This is a good opportunity to arrange them on the hook shank where you want them before you move on. I'm going to use some of the butts ends of the grizzly hackle to build bulk in the body. I'm gonna wrap thread back on these butts, because I want to create some bulk in the middle end of this fly. We will do it with dubbing as well, but lets take advantage of the material that's already on the hook.
 |  |
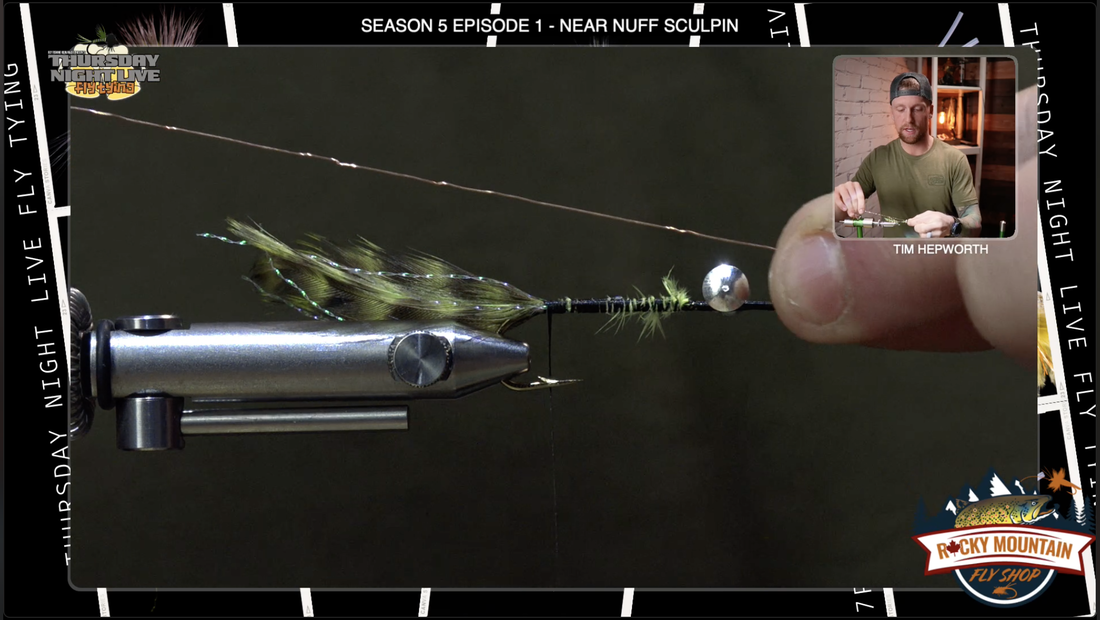
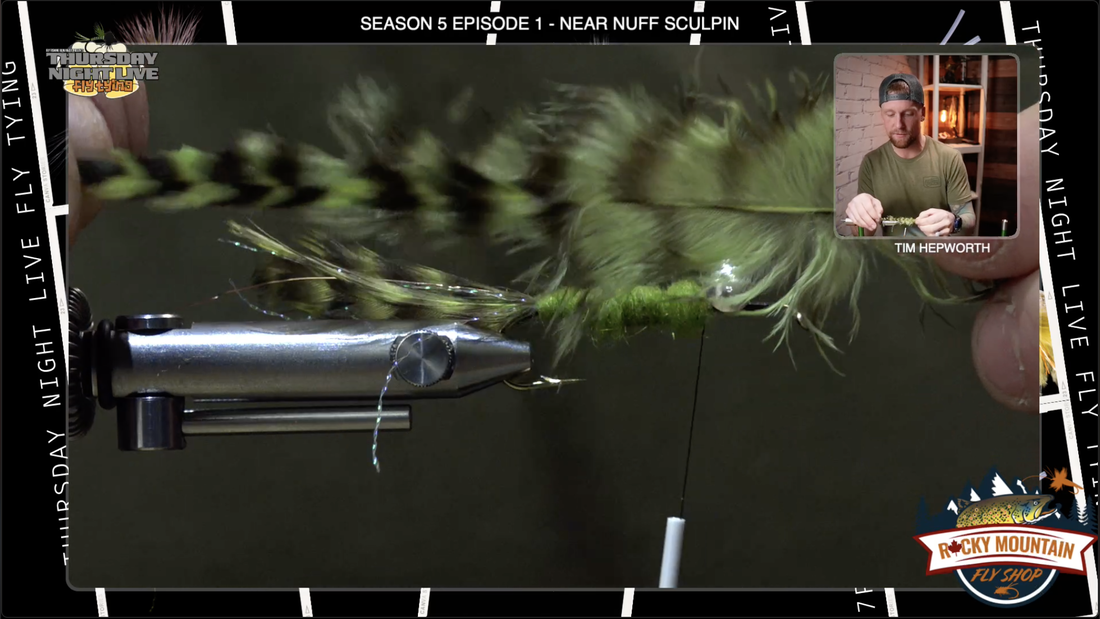
I’m going bring my thread back about the halfway mark. Leave my thread there. I'm going to come in and grab a piece of Crystal Flash. I'm gonna grab just one piece. I'm gonna cut it in half so I've got two pieces in my hand. I'm gonna find that Midway Point on it and I'm gonna fold it around my thread. This is kind of a neat little Trick. I fold around my thread. I now pull upwards on it and I can use my thread to direct where I want it to go. I pull it right down on top of the hook shank and I start taking a few thread wraps back so it's secure. I want to take and grab two pieces and pull it to the near side of the fly and take two pieces and pull it to The Far Side of the fly. I use my fingers to spread them out and then I'm going to run my thread back down the fly and secure the crystal flash on either side of those Grizzly Hackle feathers. So now work them all the way back. The goal is just to have two pieces on both sides and then I'm going to pull them back with the feathers. I want to cut them off just a little beyond the feather. Next material you got some brass colored wire in your kit. Grab a chunk of it ( 6 inches minimum) . We're going to tie it in the back along the crystal flash. This fly is tied similar to a style of an original woolly bugger so we're going to leave wire at
the back end we're going to tie in our Hackle feather at the front and then we're going to secure it with our wire going back forward. The wires pointing out the back now and at this points should have three materials locked in. The Grizzly Hackle, The wire, and the Crystal Flash.
the back end we're going to tie in our Hackle feather at the front and then we're going to secure it with our wire going back forward. The wires pointing out the back now and at this points should have three materials locked in. The Grizzly Hackle, The wire, and the Crystal Flash.
 |  |  |
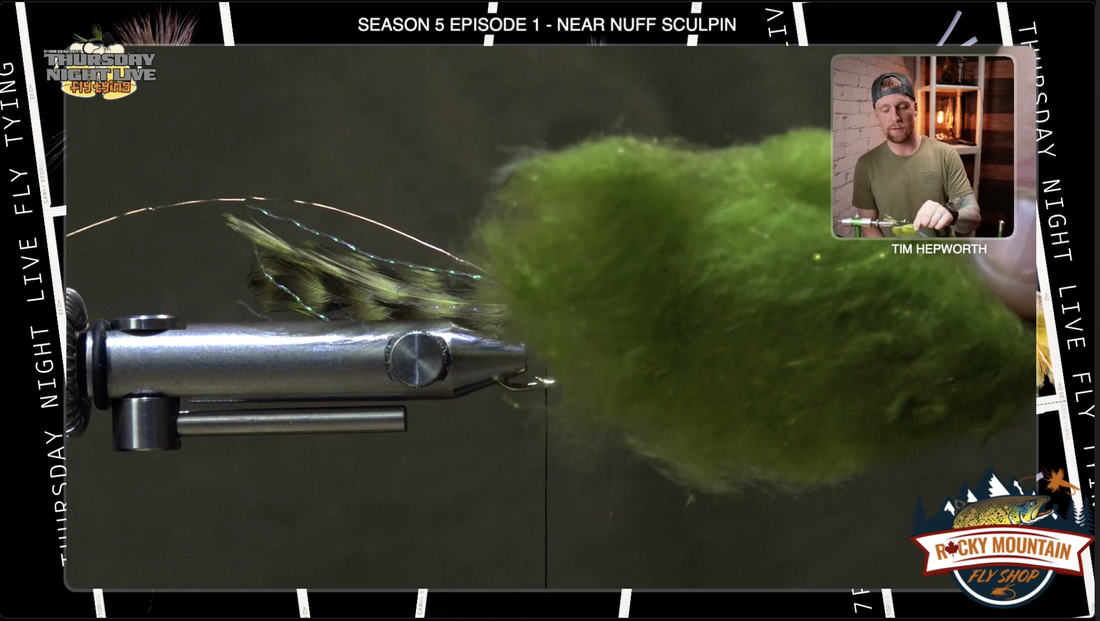
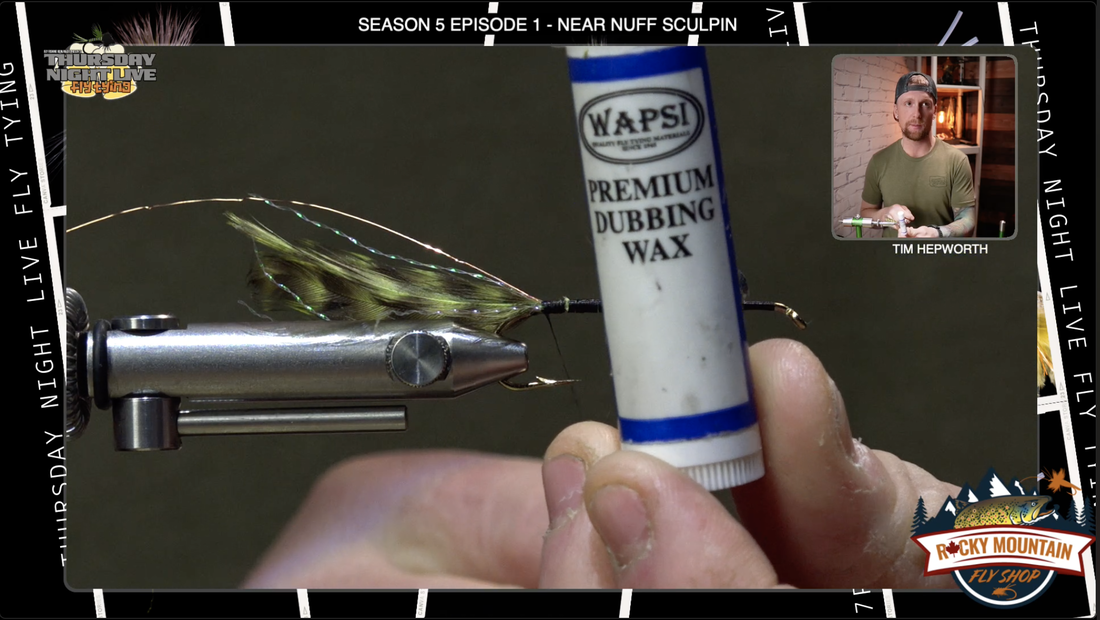
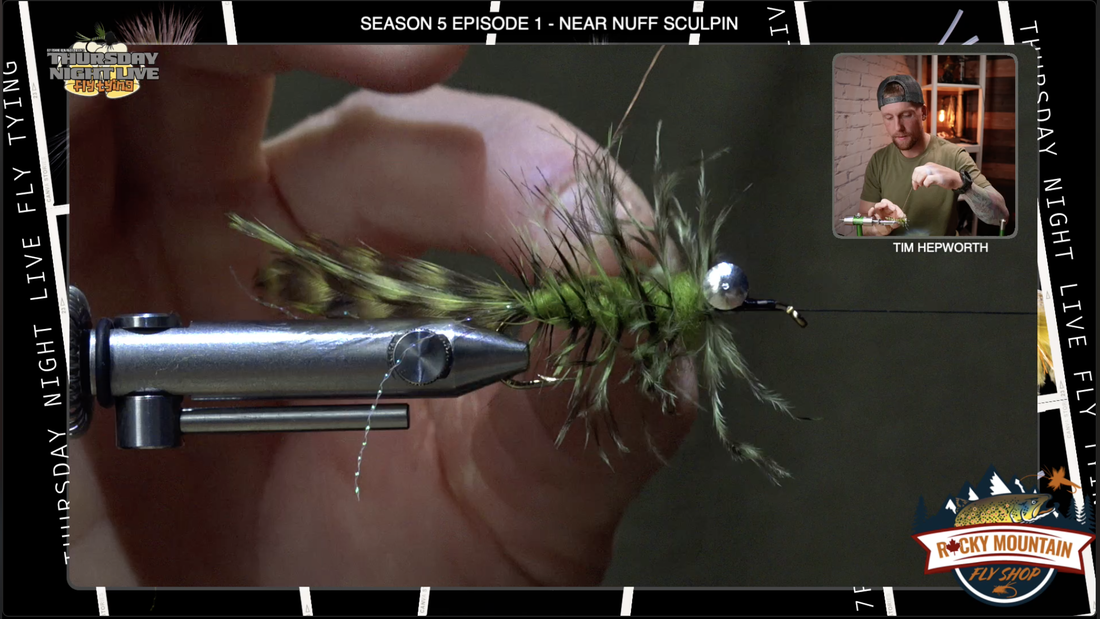
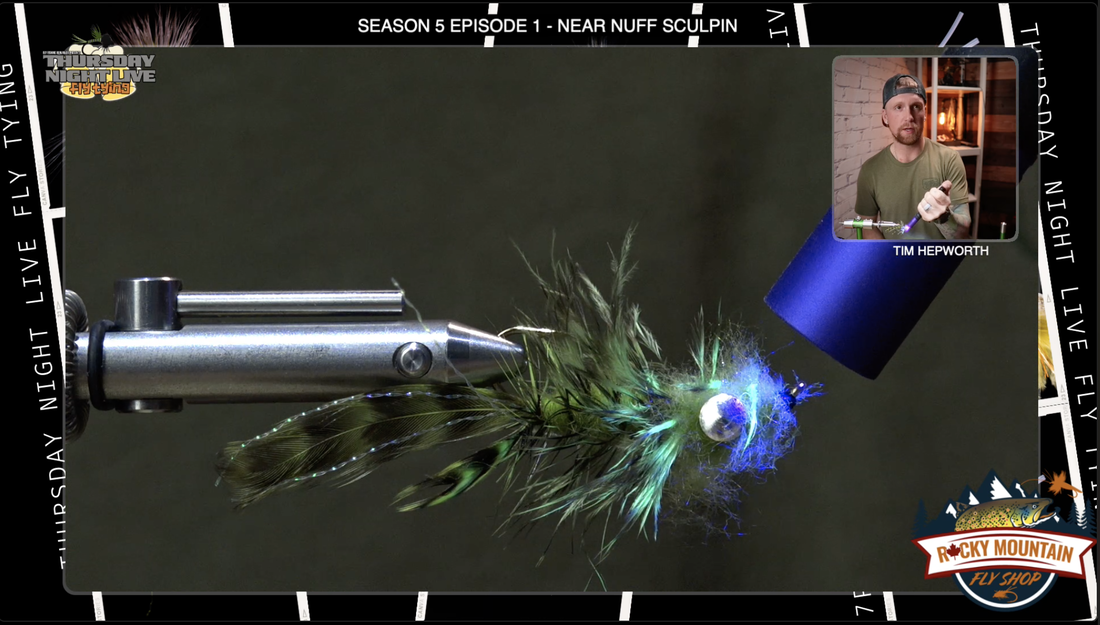
Grab some Olive Dubbing, or Caddis Green Dubbing (Wapsi Prism Dubbing) and we're gonna start making dubbing noodle. I am going to use a little bit of wax nothing too crazy just some of Wapsi premium dubbing wax, it helps with this style of dubbing I just put a light
little skiff on top of my thread. Don't get overthinking the situation on this dubbing, we are going to create just a real generous sized dubbing Noodle and probably have to add more. I come in and I spin my fingers on it, remember, only spin one direction, or your dubbing wont noodle proper. We want quite a big thick rope because we're gonna try to build up a nice bulky body and head with this material. We want to make sure that we get that fairly secured onto that thread by winding it on. I'm gonna start wrapping forward towards the dumbbell eyes. Think about tapering a fly so we get it thinner in the back bulkier at the head. Start building bulk as you go forward. It doesn't have to be perfect but we're trying to kind of create a generalized shape. That should get us all the way up to the head. Finish that off right behind those dumbbell eyes. Now we're going to go in and we're gonna put Hackle in and wrap it back. You're gonna see on a hackle fiber a little bit of Marabou here at the back and then you get into the actual Hackle as we move up the feather. We want to use a little bit of both in this fly so I'm gonna come back to about here. I want to use my first whole wrap to be that nice fluffy Marabou so it creates a little bit of extra bulk up at the head of the fly. I'm going to leave some of that on. I'm gonna peel off the rest. I've got that stem, it looks something like that, you can already see how it creates a tapered shape. We tie in the thicker part of the feather at the front of the fly and as we go back it gets thinner and that's going to create that taper. I have the underside of the feather, it's the dull side. I want that dull side to be pointed back down the fly, towards the back, when I tie it in and secure it with a few wraps. I like to wrap that stem under the dumbbell eyes. Once it’s secure, then I'll come in and trim it out. Make sure it's good and secure.Now what I want to do is secure my work with a little half hitch, which is just a simple overhand knot. Now what I'm going to do is start working this Hackle back down the fly. I'm going to do one full wrap before I start moving down. I'm just gonna have some nice evenly spaced out wraps. Moving back down the fly trying to kind of time it perfectly so I run out of Hackle, right near the back end of The Fly. You could use some Hackle pliers as well, if that makes it easier for you.
little skiff on top of my thread. Don't get overthinking the situation on this dubbing, we are going to create just a real generous sized dubbing Noodle and probably have to add more. I come in and I spin my fingers on it, remember, only spin one direction, or your dubbing wont noodle proper. We want quite a big thick rope because we're gonna try to build up a nice bulky body and head with this material. We want to make sure that we get that fairly secured onto that thread by winding it on. I'm gonna start wrapping forward towards the dumbbell eyes. Think about tapering a fly so we get it thinner in the back bulkier at the head. Start building bulk as you go forward. It doesn't have to be perfect but we're trying to kind of create a generalized shape. That should get us all the way up to the head. Finish that off right behind those dumbbell eyes. Now we're going to go in and we're gonna put Hackle in and wrap it back. You're gonna see on a hackle fiber a little bit of Marabou here at the back and then you get into the actual Hackle as we move up the feather. We want to use a little bit of both in this fly so I'm gonna come back to about here. I want to use my first whole wrap to be that nice fluffy Marabou so it creates a little bit of extra bulk up at the head of the fly. I'm going to leave some of that on. I'm gonna peel off the rest. I've got that stem, it looks something like that, you can already see how it creates a tapered shape. We tie in the thicker part of the feather at the front of the fly and as we go back it gets thinner and that's going to create that taper. I have the underside of the feather, it's the dull side. I want that dull side to be pointed back down the fly, towards the back, when I tie it in and secure it with a few wraps. I like to wrap that stem under the dumbbell eyes. Once it’s secure, then I'll come in and trim it out. Make sure it's good and secure.Now what I want to do is secure my work with a little half hitch, which is just a simple overhand knot. Now what I'm going to do is start working this Hackle back down the fly. I'm going to do one full wrap before I start moving down. I'm just gonna have some nice evenly spaced out wraps. Moving back down the fly trying to kind of time it perfectly so I run out of Hackle, right near the back end of The Fly. You could use some Hackle pliers as well, if that makes it easier for you.
 |  |  |
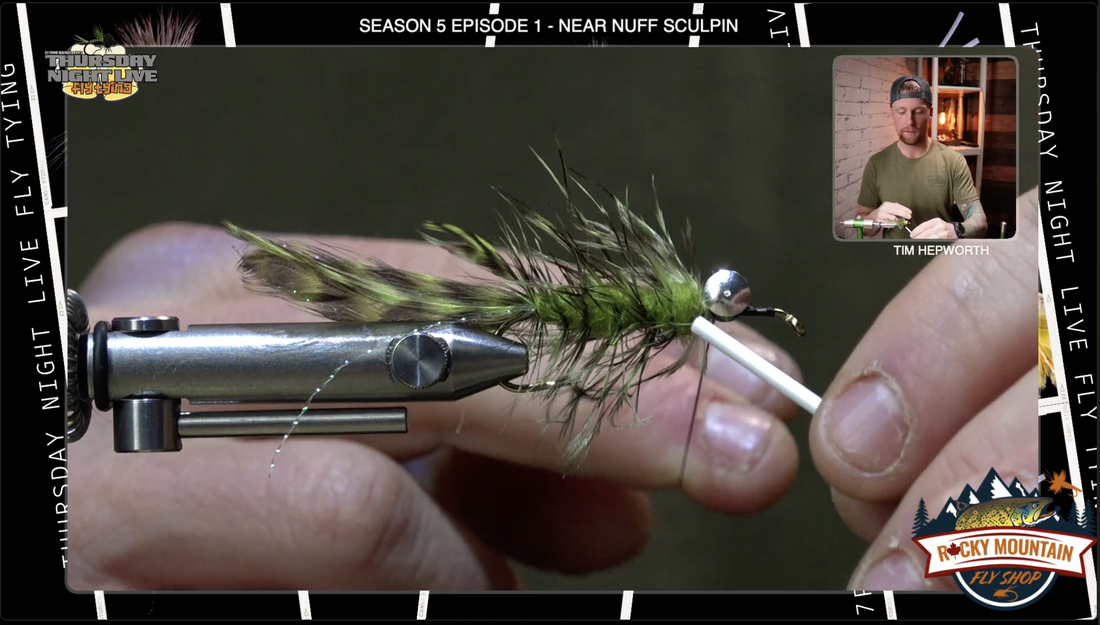
Grab that wire and pull that wire back and kind of out of the way and then capture that feather with the wire. Start wrapping the wire back up the opposite way that I came down with the feather. I'm wiggling it back and forth so that the wire doesn't trap a whole bunch of those feather fibers. Work it all the way back forward to the dumbbell eyes. Take a wrap behind the wire, a wrap in front of the wire, and a wrap behind. That's how I know how to get the wire nice and secured. You can either helicopter that off or grab your buddy's scissors and cut that wire. Don't use your good Shor Scissors because that definitely will dull your scissors. Now we're going to finish off with the head of the sculpin.
 |  |
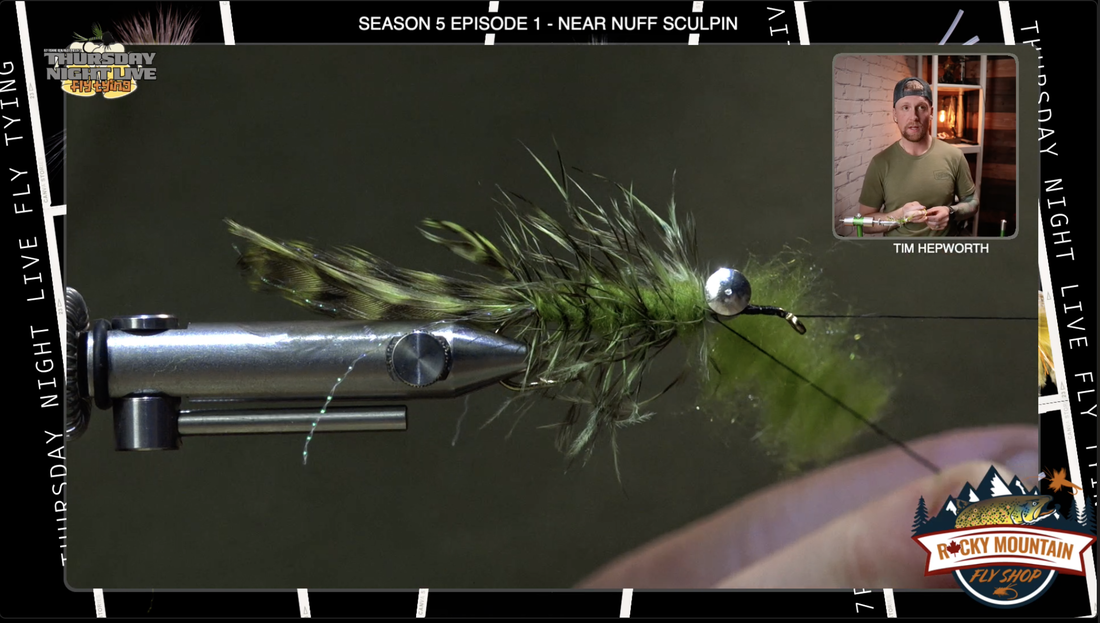
We're going to use the same dubbing but we're going to make a little bit of a different style to apply it to the head. This time I'm gonna make a dubbing Loop. I'm Gonna put two fingers and fold over top to make this loop. I'm gonna give myself about four inches of thread in this dubbing loop. I’m gonna take a couple of wraps in front and behind the dubbing loop at the hook. Bring the thread in front of the eye. I just have my finger stuck in that Loop, or you can stick the dubbing spinner in the loop to keep it open.I'm using this Loon Tools Dubbing Spinner. I'm gonna grab a little bit of that Wapsi dubbing wax. I'm only gonna put some on the bottom side. What I'm going to do is grab that same dubbing I was using before. I'm gonna grab little pinches. Spread them out a little bit. This isn't long fiber dubbing so we can't try to spread it out too much. All I'm going to do is start setting these little pinches into that dubbing Loop. We're going to put quite a few because we're going to rope this up and create some bulk in the head of the fly. I'm gonna let go of that top thread so it pinches down and closes the dubbing loop, this will hold the material in place before we start spinning this loop tight. Give the dubbing spinner a good spinner and make that noodle nice and tight. We're not going to brush it out. I'm gonna do a full wrap right behind the dumbbell eyes then I'm going to cross over forward, so it's almost like a figure eight, like how we put the Dumbbell Eyes on at the beginning of this fly. I'm going to cross over in front and I'm gonna come back over behind and back to the front again. I'm going to finish off with a couple of wraps right in front of the eyes and I should pretty much run out of material at the right time. Bring bobbin and thread back to the fly again. I'm going to do that same wrapping sequence to secure the dubbing loop to the hook. I'm going to go behind the thread in front of the thread behind the thread in front of the thread and that's going to lock it in so it's not going anywhere. I'm going to trim out that dubbing noodle now. I like to flip the fly around so I can see the underside and make sure I've trapped all those materials at the head. Take a few thread wraps, build a little bit of a thread damn so none of that material is going to move on you. I'm going to grab my whip finish tool. I'm gonna whip finish it right here with three wraps. I can go ahead and snip out that thread. I'm going to add a little bit of that Solarez Bone Dry UV resin again to make sure this isn't going anywhere. Grab a little brush or you can grab a piece of velcro whatever you prefer. I'm just going to grab and pull all those fibers rearward. I'm not going to try to brush them up too much. I just want to pull them rearward so I can see the shape that I'm working with. There you go guys, that is your near nuff sculpin. super buggy looking looks great under the water it's going to sit right on the bottom where you want it to be.
 |  |  |
 RSS Feed