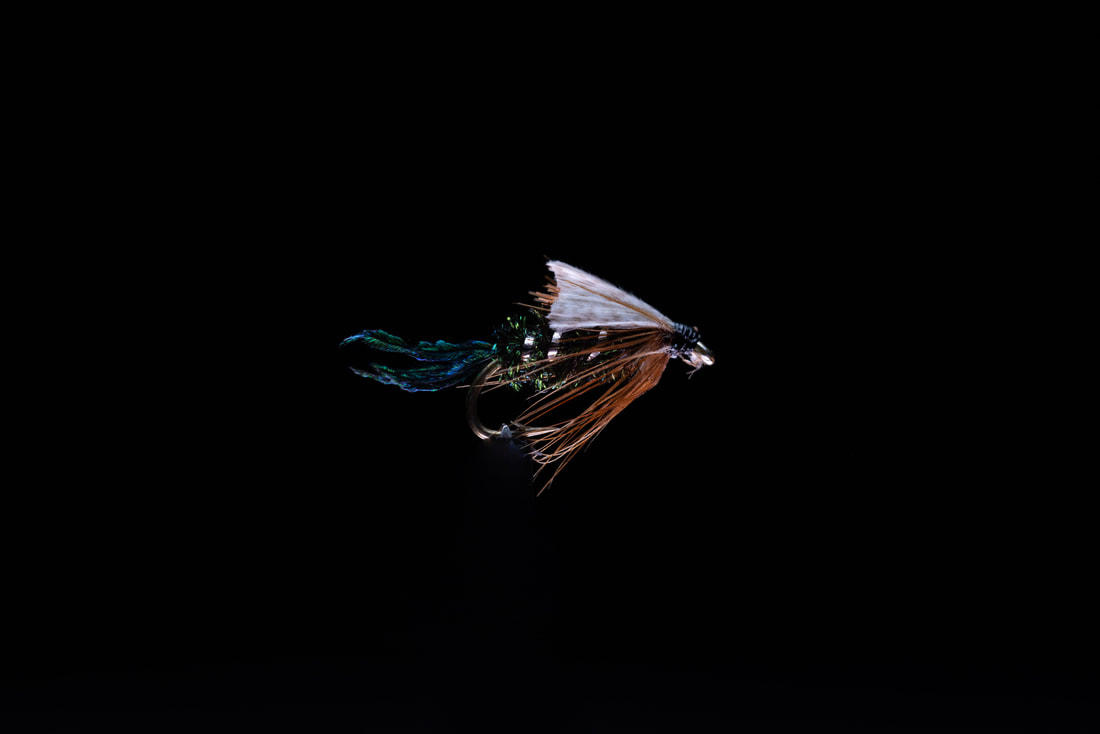
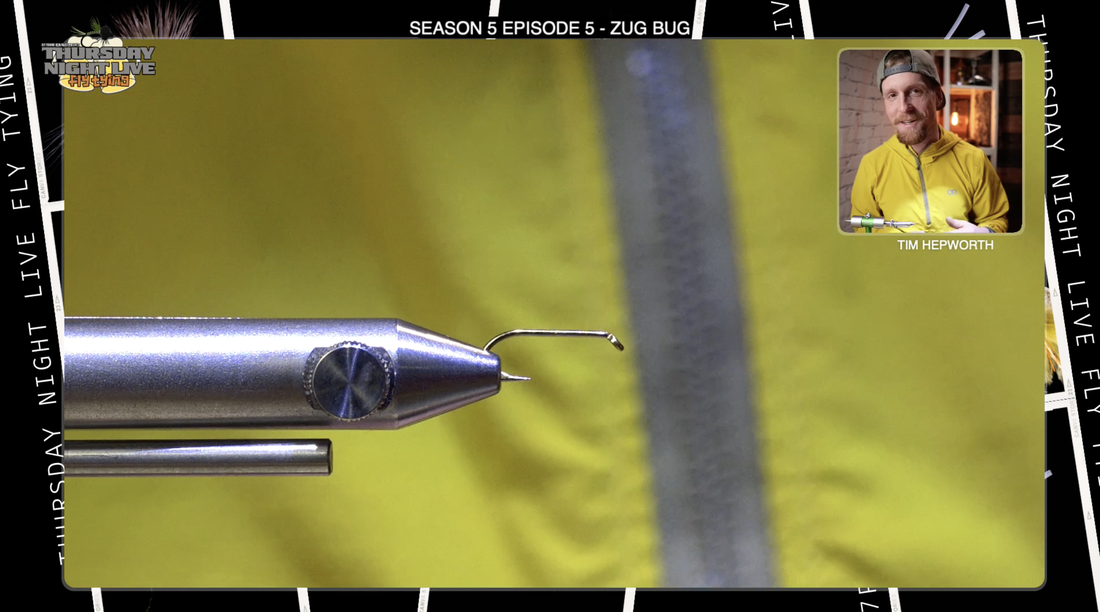
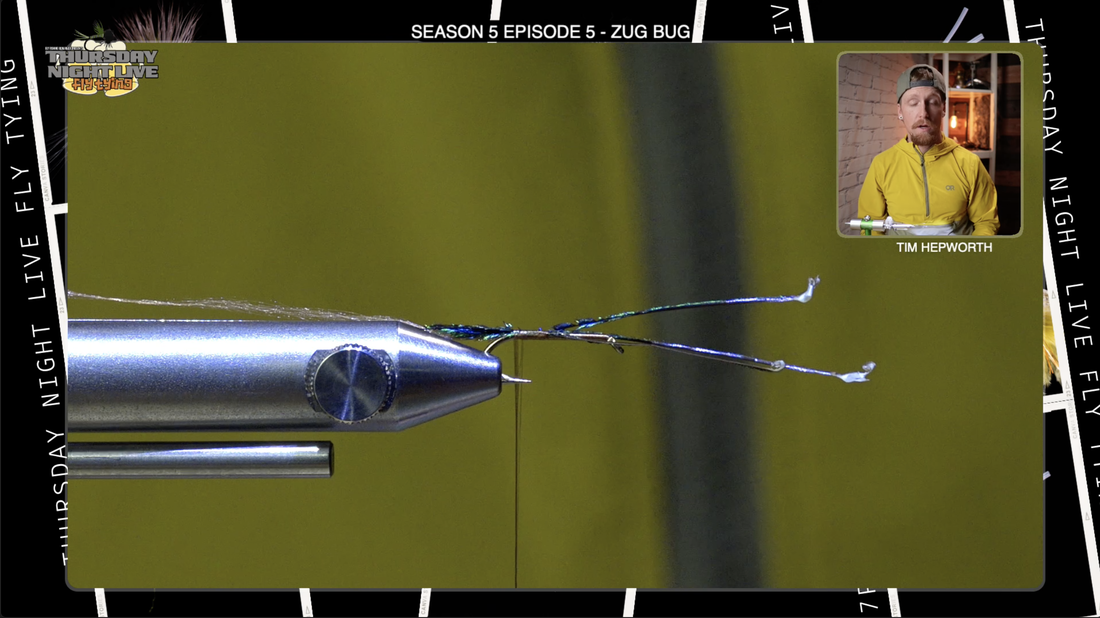
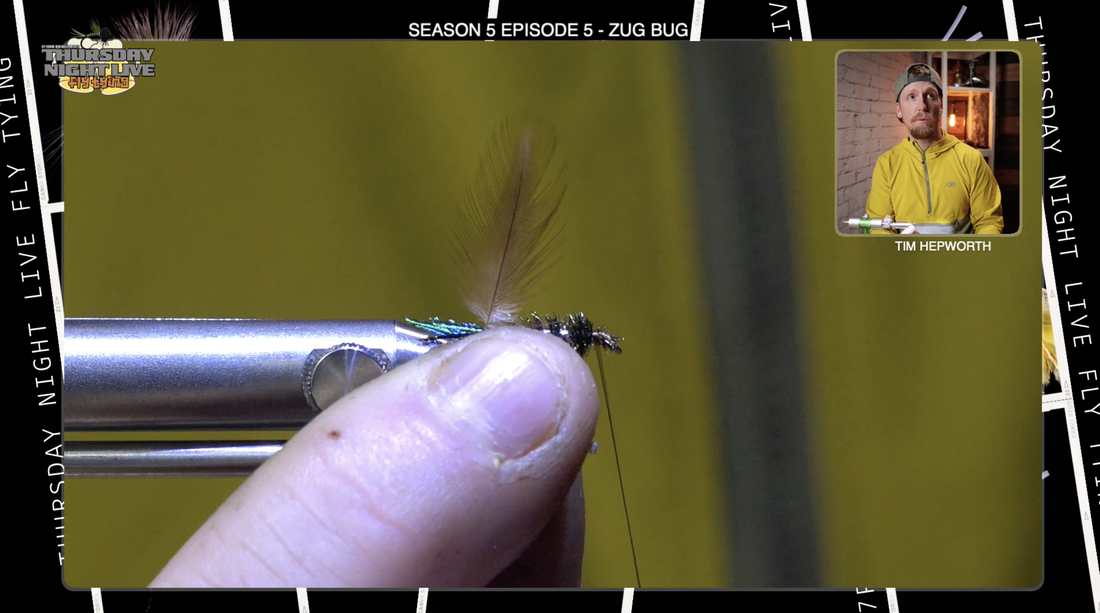
 ZUG BUG Fly Tying Recipe: HOOK:2X-long nymph hook (e.g. Dai-Riki #730), sizes 14. FIRST THREAD:Black, 6/0. TAILS:Peacock herl. RIB:Silver tinsel. BODY:Peacock herl. LEGS:Hen hackle. WING CASE:Mallard or wood-duck flank feather. Head: Tying thread. Hey everybody. Tim Hepworth here. With Thursday Night Live Fly Tying and Fly Fishing Bow River Outfitters, we are here to tie the Zug bug today on this episode of Quick Tie. This is season five, episode five. We wanna thank Rocky Mountain Fly Shop for bringing you this quick tie. As well, I want you to like and subscribe to this video. I'm gonna be tying out my season five kit. Looks just like. Don't forget, you can still head over to our website and pick one up today if you don't already have one. It's www.flyfishingbowriver.com/tnls5. You can grab yours there today, as well as the materials list for the fly I'm about to tie will also be up there on the website. Let's head on over to the vice and get started. Okay, so today we are tying this on a size 14. This is a dairichi #730. There you go. Alright. I'm gonna start my thread just behind the eye. I'm gonna work a thread base down a little ways. Actually, before I do that, I'm gonna remind you of something we need to do for this pattern. We need to leave a longer tag of line. So I'm gonna pull off a little bit extra before I start this on here cuz we are actually gonna use our thread to bind some materials down. So I'm gonna take this back, leaving this big long tag and just remember, don't trim it out cuz we are gonna use it. So I'm gonna get to about the hook bend and I'm gonna set this. I always find it difficult to keep track of this. So I actually come in here with a little hair clamp and I'm gonna clamp it to my vice over here so that I know where that thread is at all times, and it's outta my way. So the first material we're using, we're actually using two different types of peacock material. So you have these things called spears. Now if you had a, if I had a full feather here, I could show you where we get these from. But these are called spears. You can see they're a little bit, they're super iridescent, but they're a little bit more pointed in how they come. And they get a little bushy at the end, so they're a unique material. Grab three to four of them outta your kit. This one here is three of 'em gonna tie in. I want these, I just gotta match up the tips so that the tips are equal in length. Once I have those equal, I'm gonna come over here. I'm gonna measure off of my hook shank. I want these to be roughly half of the hook, shank in length, sticking out the back. I'm gonna measure that, set that over to the side. Switch hands, take a gathering. to gather them on top of the hook. Take a few wraps forward and then I'm gonna spring my thread wraps back. The goal is to try to keep 'em right up on top and then have them secured all the way back to basically where that hook bend was and where I initially had left my thread. Now I'm gonna work myself forward and secure those butts down, and then I'm just gonna come trim 'em out at this point here. Just so I should have my tail, my spears hanging out like that. I also have that thread there. Haven't cut that yet. So make sure you don't do that. Then I'm gonna come in here with a piece of silver flash, silver tinsel. Pretty much anything silver here could work if you were using silver wire.
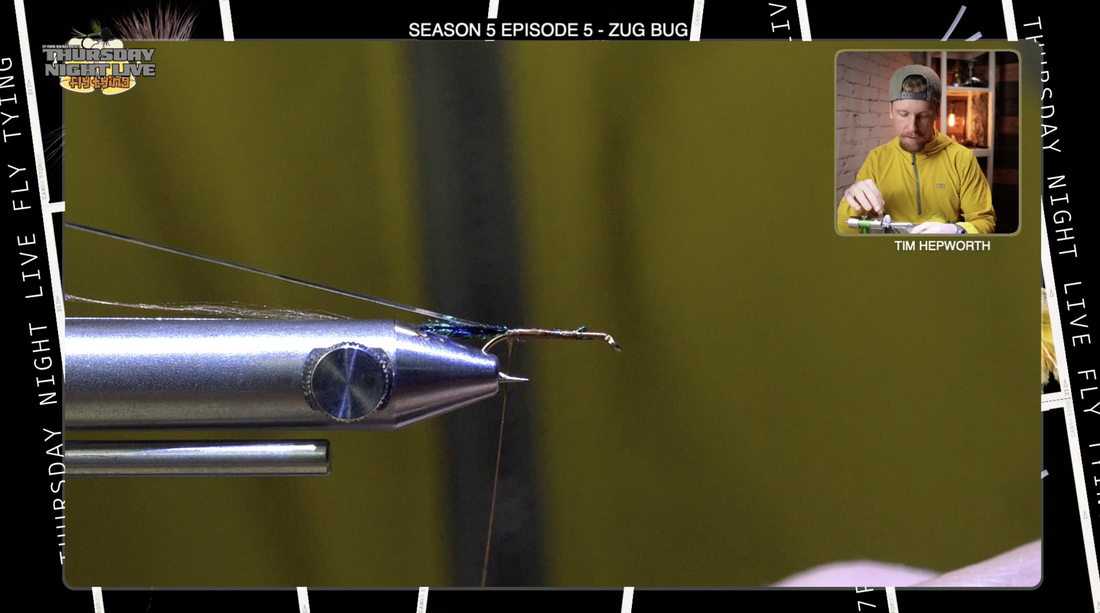
However, you wouldn't need to leave the thread behind, so maybe that's actually a step saver. But the original pattern was just used as a piece of silver tinsel. So what I'm gonna do here is I'm. Get that fixed. Doesn't really matter where in the hook shank, but my thread's up here, so I'm gonna go ahead and do it right there and work. My thread wraps back to that point. I'm gonna cord up my thread just so it's, here we go. Acting like I wanted to, and now I'm gonna bring my thread back forward to cut it just behind the bead like and I'm gonna go over it. I'm gonna, Now another piece of peacock. This is just peacock herl. Okay, got a nice peacock herl. Try to find a couple that looked like they got some really nice plump little micro barbells on 'em. Cause that's what we're really gonna be tying this pattern with and trying to make it look good. I want to actually tie this in from the butts this time, cuz I'm gonna be tying it at the front, putting it to the back, using the thread to secure it. So I want the taper to look a little more natural. So I'm gonna come in and trim out the very stem the base of the stem because it's not weak, but it doesn't have the, what's the right word here? Puffiest or most plump looking portion of the feather. And then I wanna tie this in just in front of the head or the eye of the fly. Okay. And then we're gonna wrap it backwards, just like that, get that good and secure, trim out any of that little bit of tag, if I had any so I'm gonna take a nice half hitch here. Remember that's just an overhand knot. All I'm doing that for is to get my thread outta the way. And now I'm gonna wrap these two feathers or these peacock curls together, nicely evenly spaced. Trying not to wrap on top of the previous wrap because I want to have this nice standup of the material. That's where we get our shape on this fly from. We're already gonna have to put two more materials through it, which is gonna bind some of those down. So just make sure you don't touch any of them. As you go back, I'm gonna take this right to the back of the fly. Now I'm gonna reach in here and grab that thread that I left. Okay? So I got my thread. Make sure it's not tangled up in your, now I'm tangled up in that tinsel. Okay, now I'm gonna do a full wrap over to. , and then I'm gonna wiggle it as I move forward so that it doesn't get trapped or it doesn't trap any or too many of those little pieces of the peacock herl. Now this is almost acting if you can imagine, like in a wooly bugger, how we take wire and bring it forward over top of a hackle feather. Very similar idea. We're just using the thread because it's a much softer material that we're binding down. But peacock herl is always a little Fragile.
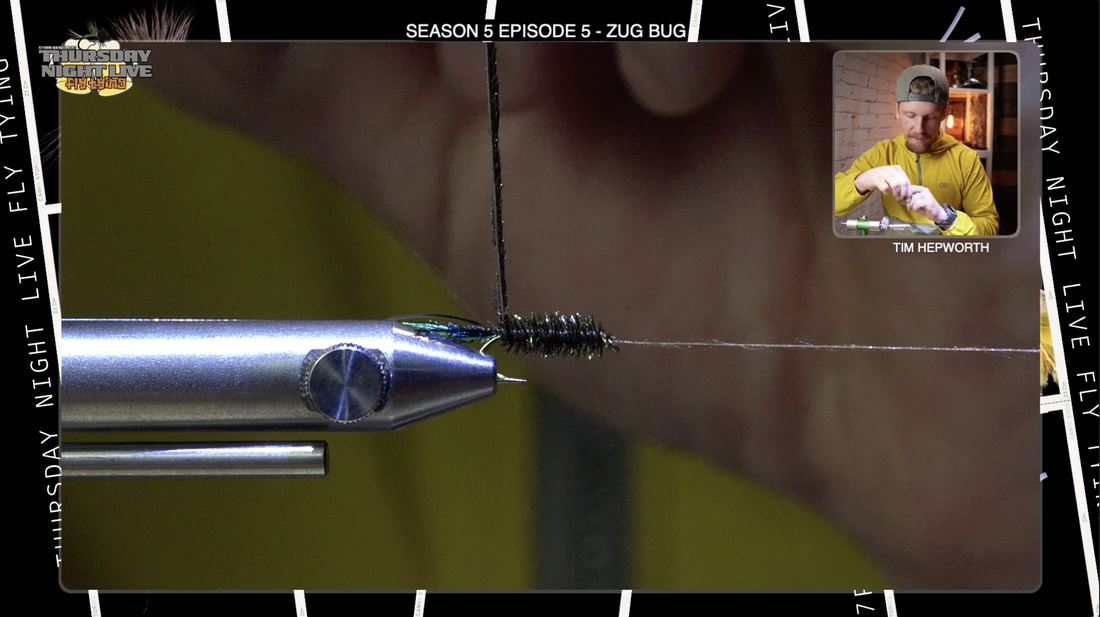
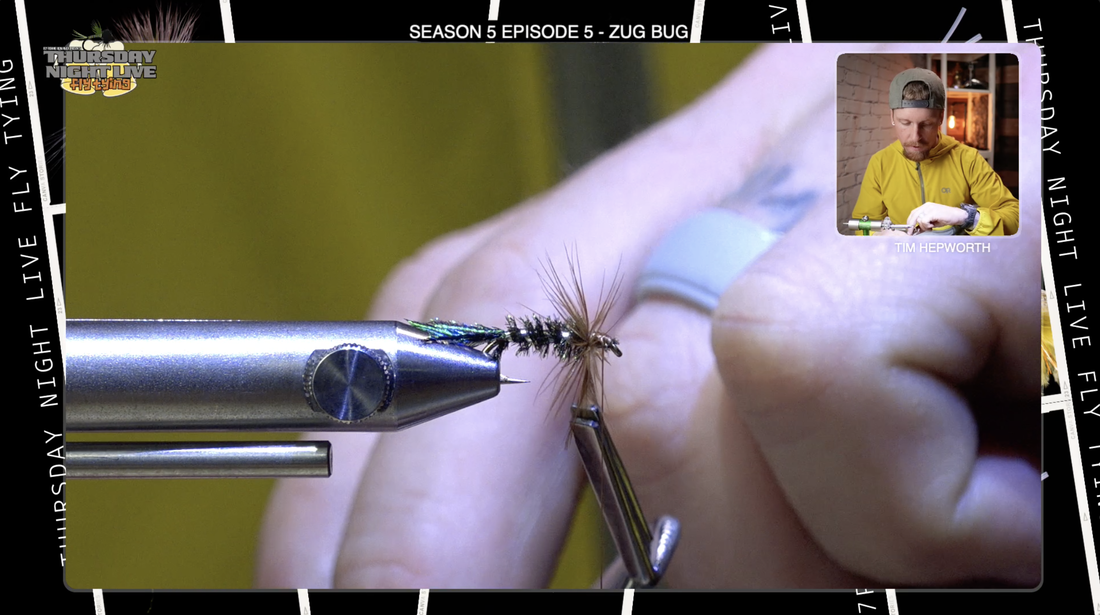
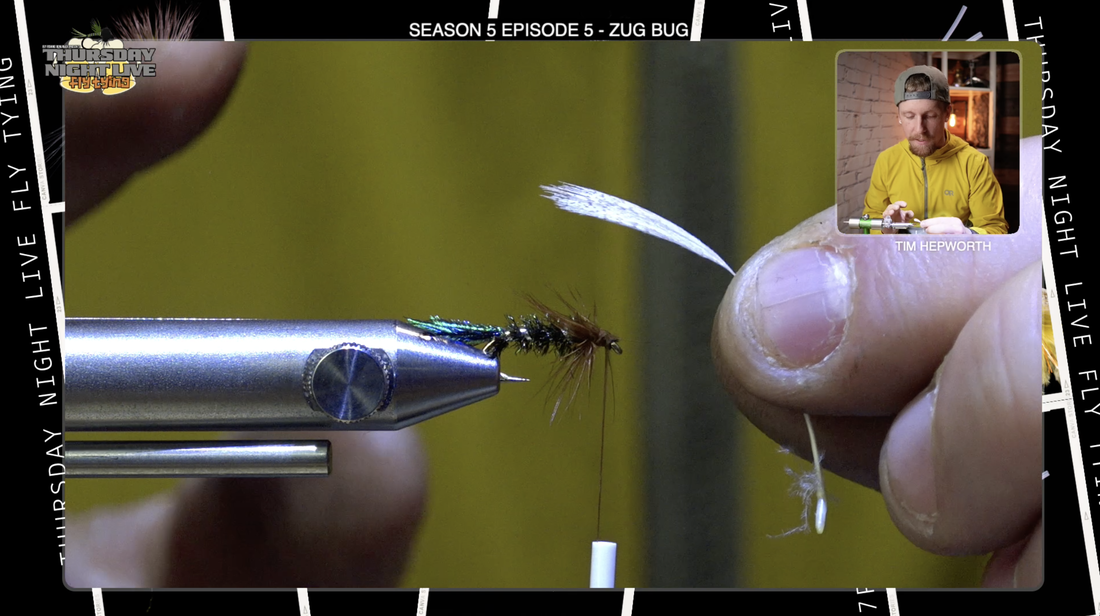
So we use this to make it a little stronger. Then I'm gonna tie off that thread and now be careful when you trim it out. Make sure you trim out the right thread and not the one that you're still tying with. I'm gonna take a few more thread wraps up here at the eye just to make sure I got this all locked in place and now I can come in here and grab those two peacock herl stems that I have left over and get rid of them. Now they're outta the way. Now what I'm gonna do is I'm gonna do one more half hitch here just to make this a little easier. Keep my thread outta the way. I'm gonna set this aside one more time, and now I'm gonna bring this silver tinsel forward. Same idea, what I just did with the thread. I want three to five wraps as I come forward. Now this is gonna compress some of those materials. And we actually want it to, because this is what's gonna give some segmentation and it's also gonna give some flash to the center of the body, just like that. One more to get up to the eye and then I'll secure it down, just like that. Make sure the tinsel's not going anywhere and then I can trim it out. Now I'm gonna run my thread back just a smidge, cuz I'm gonna create a little bit of room cuz we're gonna tie. a soft tackle up here at the head. And then we're also gonna finish off with this little bit of a piece of a mallard flank that we put on the top as well. So in your kit you're gonna see we have these nice, small, not meant to be super long barbells or anything, but we are gonna pretty much be using that whole little feather. So let's just pull down any of the pieces that have white on them. That white plume on the bottom. We're gonna get rid of any hackle feathers here, guys, it's gonna work. A soft hackle. Okay. Just something that's got some, it still looks pretty wide down at the base, but soft and supple so that it can be actually wrapped around the hook Shank. I'm going to tie this in from the butt end. This time, like so can I get a thread wrap behind In front? Behind in front. Okay. Making sure that stem is very secure. Before I trim that out, I wanna make sure that it is not gonna go anywhere. . Okay. Now what I'm gonna do is I'm gonna grab a pair of hackle pliers. This is an important step here cuz this is a very small feather. You want to come in here and grab just the very tip with the hackle feather. And now we are gonna start some wraps forward. Okay? And as I go forward, I'm pulling those pieces of the feather back down the fly so that I'm not stacking on top. Because I don't want to not use any of those. So taking some thread wraps behind in front. Again, making sure that's not gonna go anywhere . Okay. I'm gonna pull all of those little pieces of the feather forward now so I don't lock any of them down forward. I can come in here and trim out that tiny little stem, any of the pieces that went forward. I can also get rid of those and then I'm gonna come up here and coax them to go down the edges of the fly. Okay, so you can see. Then it almost looks flat on top. That's what I want cuz I'm gonna tie in one more material up here and that's gonna be a small mallard flank. So you see we have just a couple different ones here. Nothing special cause we're actually not really gonna use the feather itself per se. But I'm gonna peel a bunch down so that I'm not using any of that fluff. And I want to be tying in kind of the top stem, top of the tip of the stem, cuz that's where it's a little bit softer. And I'm gonna get the stem itself to stay nice and tight. It's gonna tie in long, it's gonna look funny, but just bear with me. We'll fix it up. Okay. So I'm gonna get my thread back just a smidge so I have space to tie this. , I'm gonna lay that right on top. And tying in basically right to where I left the peeled off portion. So just the bear stem is tying in itself. Take a few wraps to tie that in. Okay. I'm not gonna put any wraps underneath that stem. I'm gonna do a little bit of a secure thing here with my UV resin at the end, or any resin for that matter. I'm gonna slide my scissors up underneath the stem so it clears the eye out and trim it off.
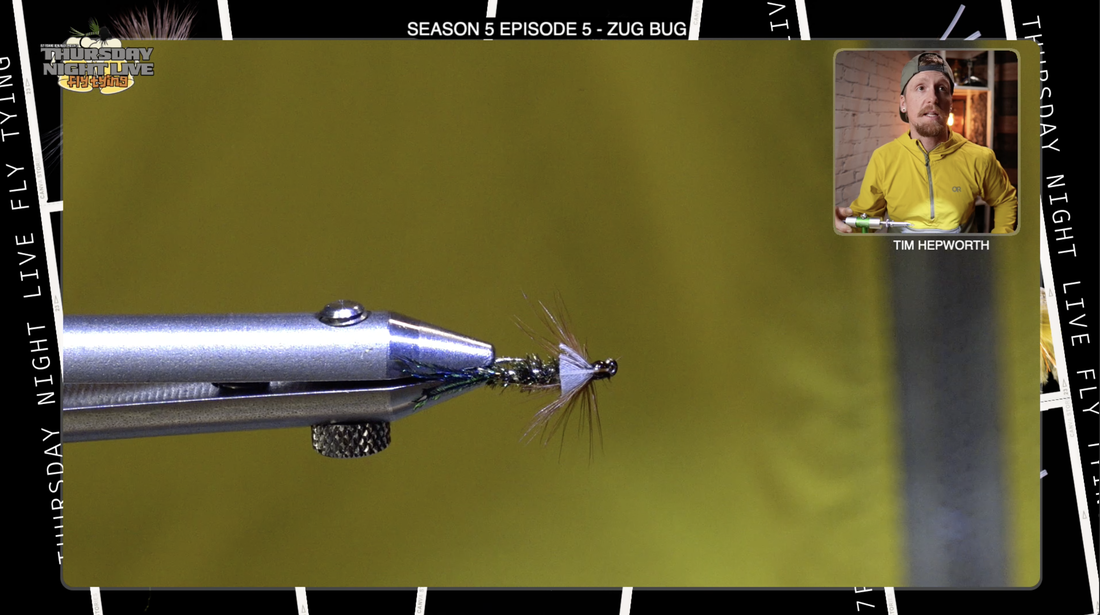
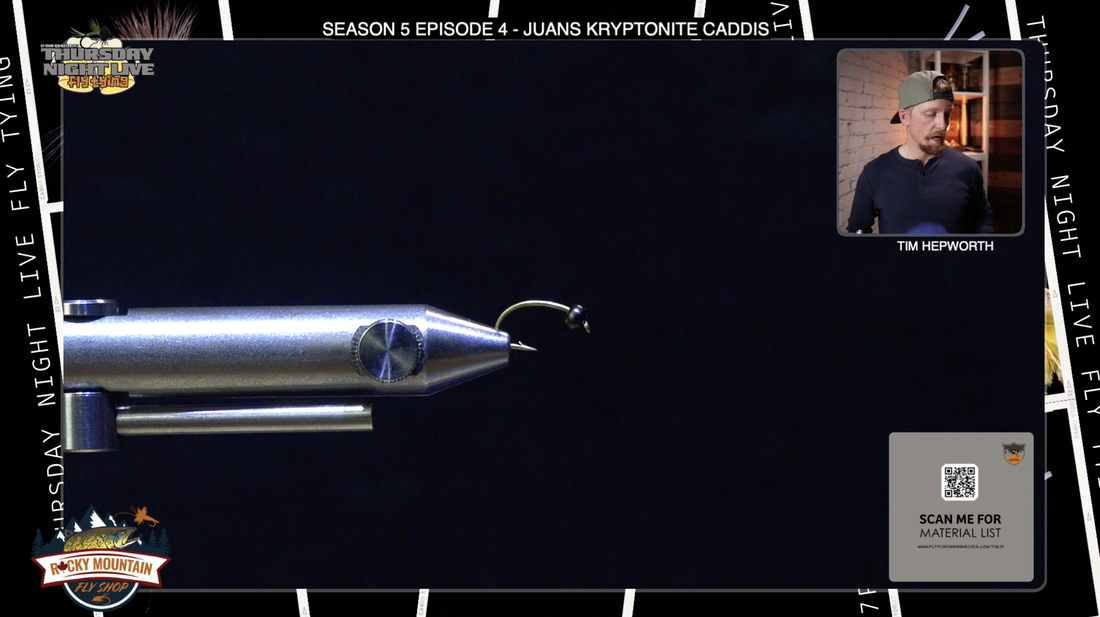
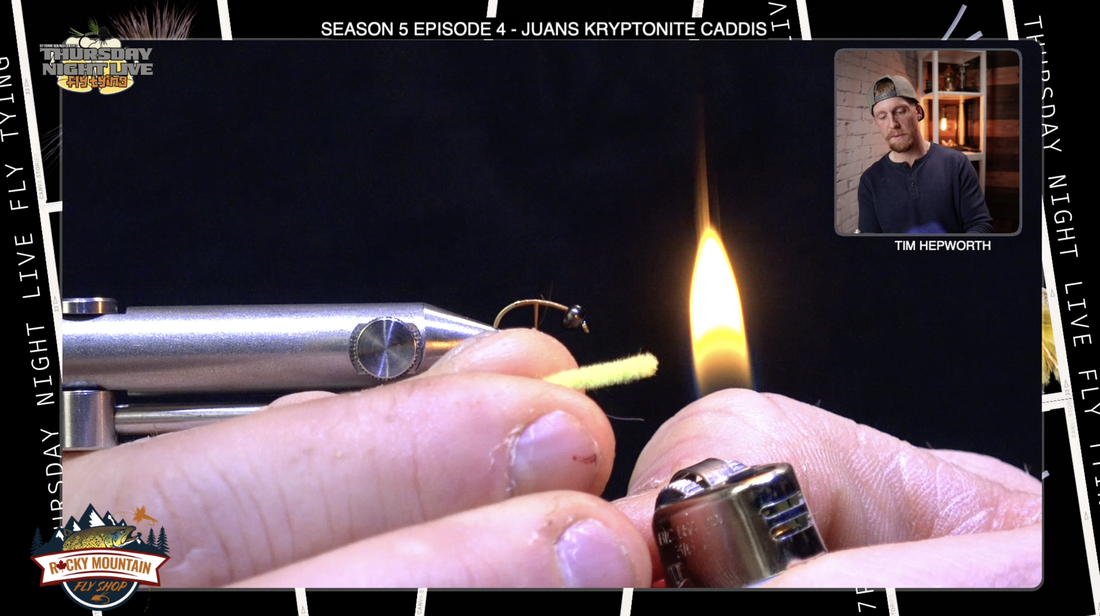
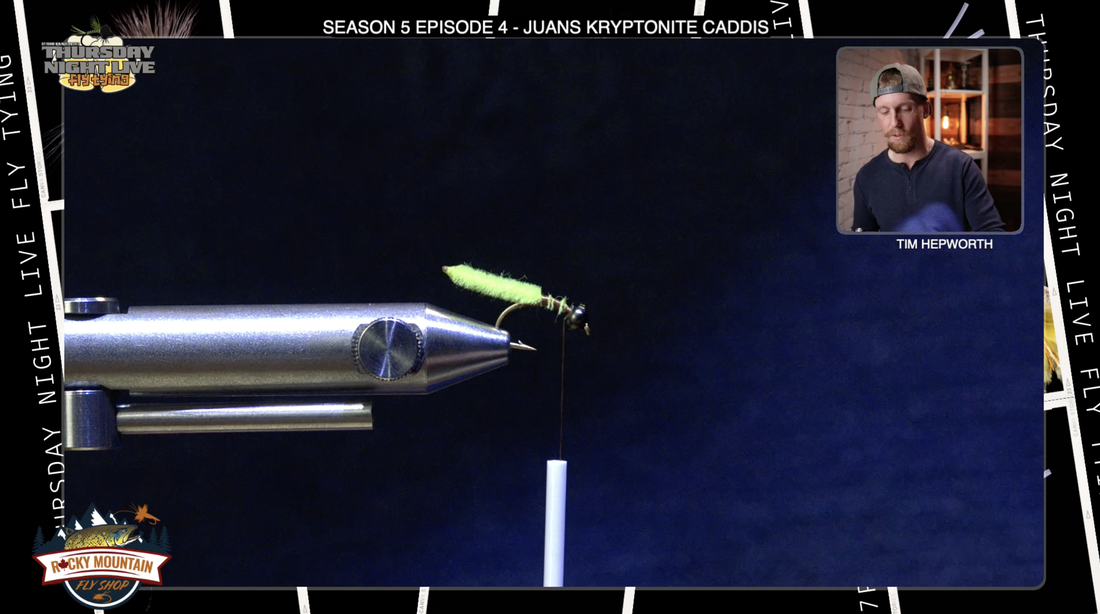
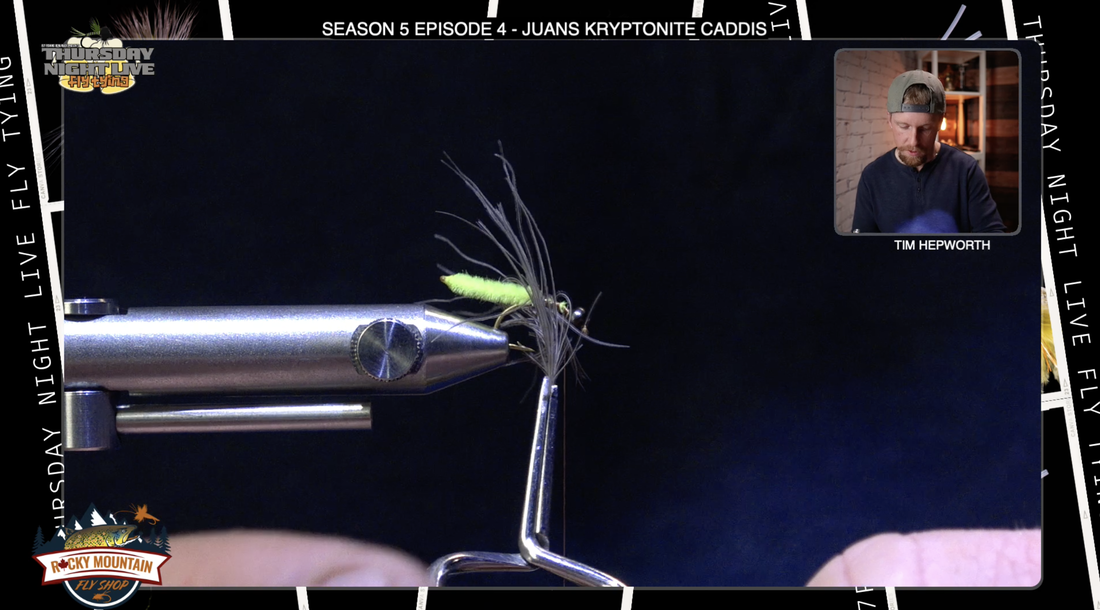
So then from the top, you're left with something that looks like that. Now I'm gonna do a quick whip finish here. And then just a little bit of resin, so I'm not gonna go crazy with my whip finish cause I don't need to do more than anything. I don't wanna trap any of those hackle fibers. Trim that out. I'm gonna trim that one little piece that's hanging forward. Now I'm gonna. My solarez bone dry. I like this stuff. It's super thin. It's gonna soak right into the thread wraps, like a Sally Hansens, just that this you can cure at the end and it dries really quick. Okay? So I like to reinforce it by putting just a small drop on top of there. And what that's gonna do is gonna bind that stem down to the materials underneath, and it's gonna keep it from wanting to go all over the place. So once I get that good and cured, now what I'm gonna do is I'm gonna bring my scissors underneath and I'm gonna cut. Lifting up the feather. I'm gonna bring this in underneath and try to cut off this feather fairly close. I'm trying to leave just a little triangle that doesn't extend much past the hackle itself. Okay. So you can see that it sits right up there. That just gives us that little bit of a white spot there, little triangle. You got the right shape if you did it like. And that is supposed to, basically the original version of this was meant to look like a cased caddis . I think it does a pretty spectacular job of that as well as looking like a lot of other things tied in different sizes and and even colors. Okay guys, this is the Zug bug. Hope you're able to get through this one with me. This is definitely an oldie but a goody. Keep this one in your box as well as we are going to probably use it and catch some fish with it. My name is Tim Hepper here with Fly Fishing Bow River Outfitters, and Thursday Night Live Fly Tying. We wanna say thanks to Rocky Mountain Fly Shop. All right guys. Take care. AuthorTim Hepworth @timothyhepworth 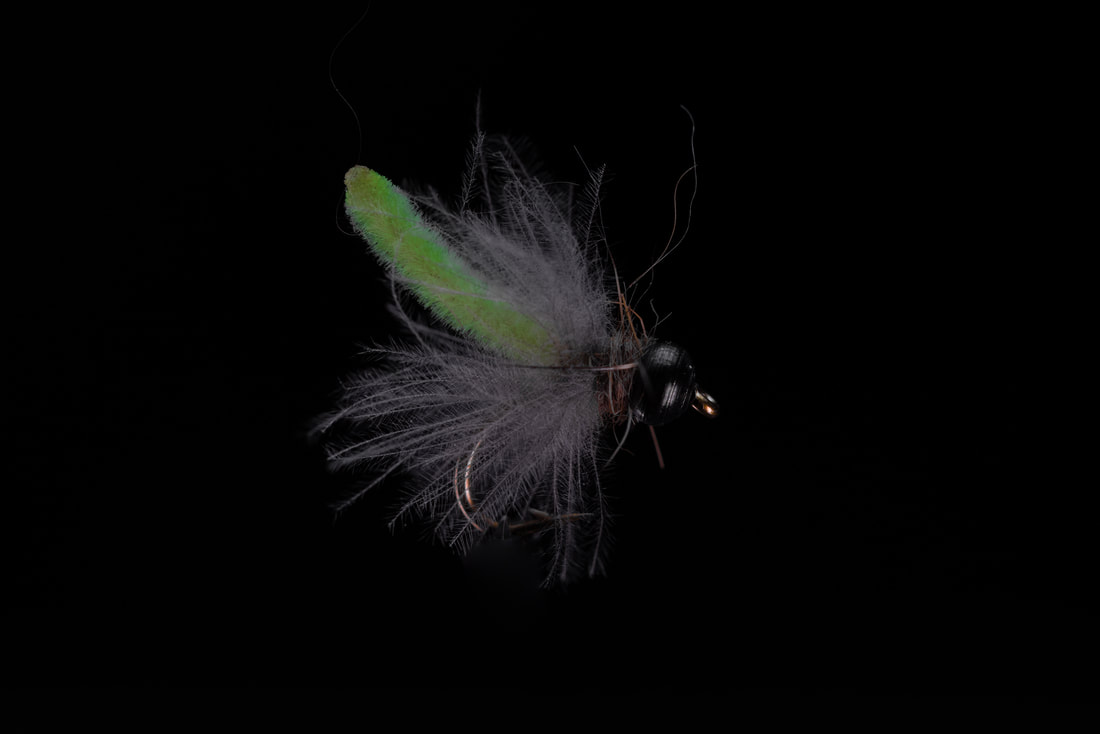 JUANS KRYPTONITE CADDIS Fly Tying Recipe: Hook: #14 Daiichi 1120 Bead: 5/64”-7/64” Black Tungsten Bead Thread: Tan or Brown Vevuus 8/0 or 10/0 Body: 15LB Green Amnesia Running Line Collar1: Natural or Olive Brown CDC Collar2: Hareline Natural Hare’s Ear Dubbing Hey everybody, this is Tim Hepworth again here with Fly Fishing Bow River Outfitters and Thursday Night Live Fly tying. And I'm here to bring you another quick tie blog. We are going to be tying the Juans Kryptonite Caddis. We want to thank Rocky Mountain Fly Shop for bringing you this quick tie today. Remember you can get FREE Shipping on all orders over $99 over a www.rockymountainflyshop.net. I'm gonna be tying out my Season five kit. If you want to still grab one of these things, you can sure do it.www.flyfishingbowriver.com/tnls5. You can also follow along with the material list at the top of the page, or purchase the Juans Kryptonite Caddis Material kit ( link above) To get started, We're gonna grab our size 14 Daichi 1120 hook. we're gonna get that black bead from your kit affixed to your hook. Okay? I'm gonna come in here and get it put into my vice. Good and secure I'm gonna be tying with some brown colored UTC 70 today. Okay. Something a little bit thinner. Could go black, could go olive. Doesn't really matter. We're not really seeing the thread on this fly. Just something a little bit smaller. I'm gonna come in here and start my thread just behind the bead. I'm gonna go ahead and snip out the tag. Now I'm gonna take some thread wraps, all the way back just to the edge of that bend where the barb is. But then I'm gonna come and bring my thread back. Okay. I'm gonna bring it. So it's sitting about at that halfway point on the hook. Okay, I'm gonna leave it right there. I'm gonna go over and grab the first material we're gonna be working with. This is gonna be the body of the caddis, this nice kind of minty colored, green soft looking body. Now the original pattern calls for 15lb fluorescent green amnesia. We're gonna build it out of some chenille on this tie. So to protect the Chenille and to make sure that it's not gonna erode or come apart or anything like that, we're just gonna grab a little lighter. Okay? And we're just gonna burn just at the very end. Have you ever worked with this type of chenille before? It also creates a nice little point , it points out the body, makes it even look a little bit more realistic. We use this method on worms a lot. Okay? So when I come in here to tie this in, The length that I'm looking for is overall, if I take the length of the hook right there, okay. By bracing off the front of the eye, and then I transitioned that to the portion where I'm gonna tie in at the middle. Basically find the length of the hook, tie in that much hanging out the back. Set that right there. That creates the length that we want. I'm gonna switch hands. Do a gathering wrap for that chenille, I wanna keep it right up on top of the hook. Okay? Take a couple thread wraps. Check my length. I like it. It's where I want it to be. Take a couple thread wraps forward and I can go in there and I can snip out the rest of that chenille, just make sure you're cutting the right end and then finish securing the underside of it. Take some thread wraps all the way to the bead. So that's where we're left with for now. Okay, only two more materials to put into this one, but this next one might be something you haven't worked with before. CDC Feathers.
Okay. This comes for lack of better words, it comes from a duck's butt. This is a very movable basically fibers on this feather, but they're delicate, hard to work with at times. We're gonna tie it in at the tip of the stem and then we're gonna try to work this forward. Palmer it forward. You're gonna see there's a differing length. Some of 'em are long, some are short. I'm gonna break some off cause I want a certain length. I don't want this to be super, super long. Stroke these back so they're outta the way so I can expose just the very. And I'm gonna bring my thread back to where I tied in that Chanel and I'm gonna tie in that stem right there. Now you have a couple, you should have quite a few of these in your kit. So that way if this one breaks, cuz sometimes they do break and it, who knows? It could happen to me as well. If they break, we can always tie in another one. Okay? So just wanna make sure we get that stem really locked in. We can worry about the stem in a second. And now I am gonna go grab some hackle pliers just because this is very delicate and the stem is quite small and I'm gonna grab on to it. Don't tug too hard, or you definitely could break this. And now we're just gonna work on palming this forward. And I have some nice open wraps, so I wanna make sure I don't trap any of those cuz every single one of those little fibers is important. I'm just gonna palmer that forward towards the eye of the hook and when I run out of feather. Try to make as many wraps as you can as you go or back down the fly, using up just about all of that feather that we can. But you're gonna realize if you pull too hard at any point, you are either gonna break the stem or you're gonna slip off your hackle pliers. And I'm gonna come in, take a securing wrap behind the securing wrap in front. Okay. So I should be good and secure there. I can go ahead and trim out the edge of that stem like so now you can see I have all these differing lengths here, but before I do anything else, I just wanna take a few more securing wraps right behind that bead and back a little ways, making sure I got that stem firmly.
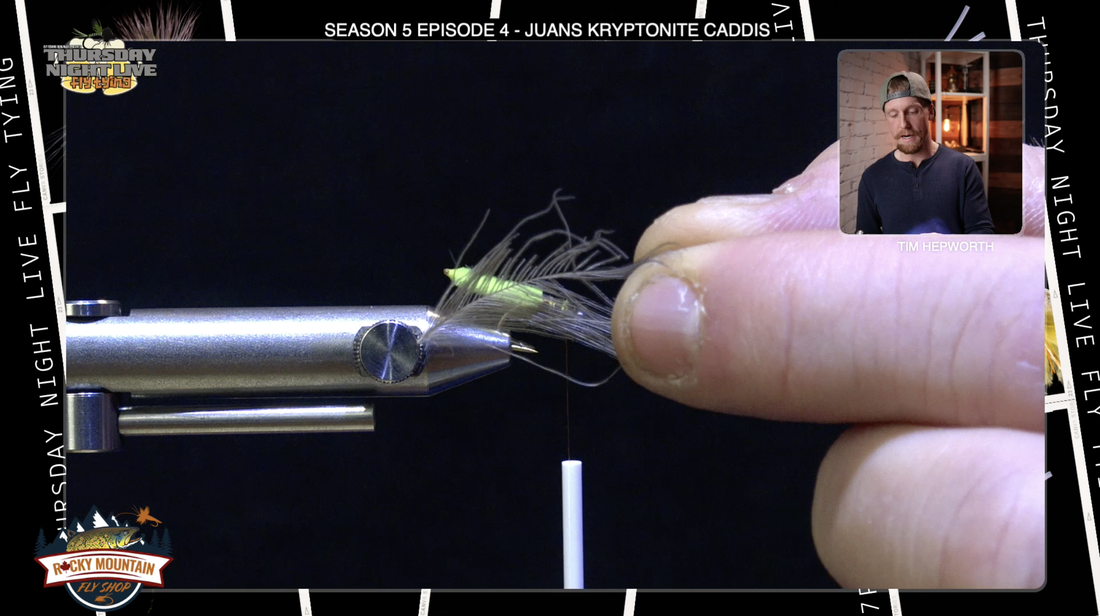
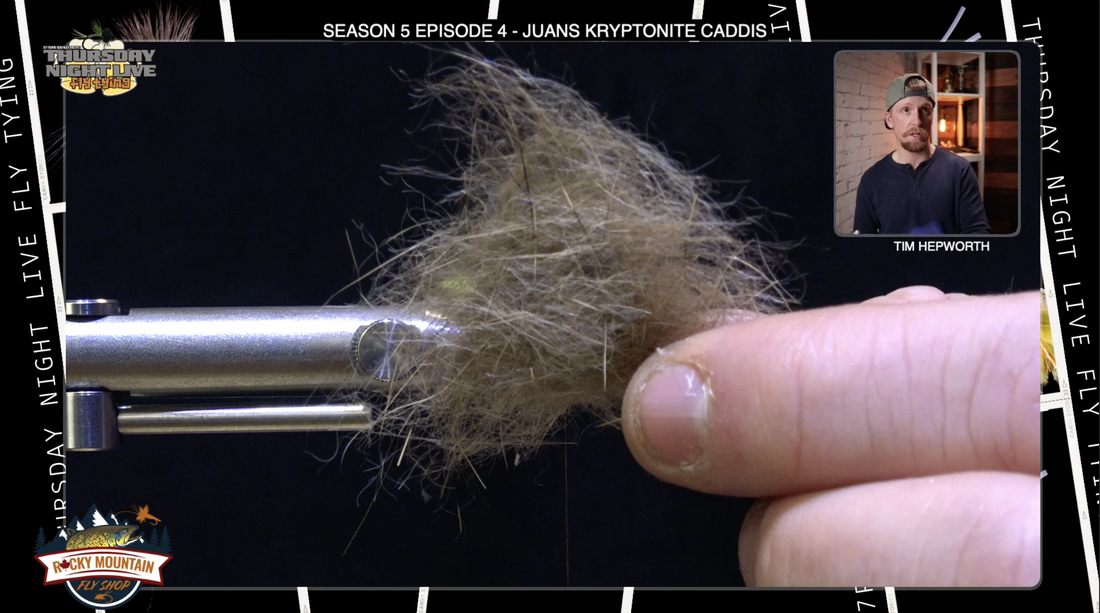
And now I'm gonna push all these fibers back with my fingers and grab that tail in at the same time. So you can see I got a measurement going right here. And all of these that are out beyond, I'm just gonna grab and pull. Okay. They break, they're quite brittle. I'm gonna pinch them a little bit. So I get the desired length that I want of the CDC feathers. You can see there, I didn't want them to extend too far beyond the back of that body portion. So I just went in there and I went a little bit more off those ones just pinch and. Just like that. Okay, now we've only got one material left and it's a real simple one. We're gonna grab this beautiful hares ear dubbing. I love this stuff. It's literally as natural as you get. We haven't changed the color, nothing. It's got all those guard hairs in it, which we're gonna utilize here in a moment as well. Just separate it once so you can see some of those guard hairs. And then grab a little pinch that's got a decent clump of guard hair in it. Okay? Something like this. Switch my hands over and I'm gonna make a dubbing noodle. Okay, so I'm just gonna spin that. Remember moving my fingers always in the same direction like that, spinning that, just a short piece, inch and a half long or so. And I'm gonna start my thread right where I left it, where I left that CDC. And I don't, I'm not gonna put a ton of pressure on these wraps and I'm just gonna move forward once I've used it all up. I have a little bit of extra, that's totally fine. I'll pull that off. It comes off easy. And then a couple thread wraps just behind the bead. I'm gonna go ahead and whip finish this off where it is.
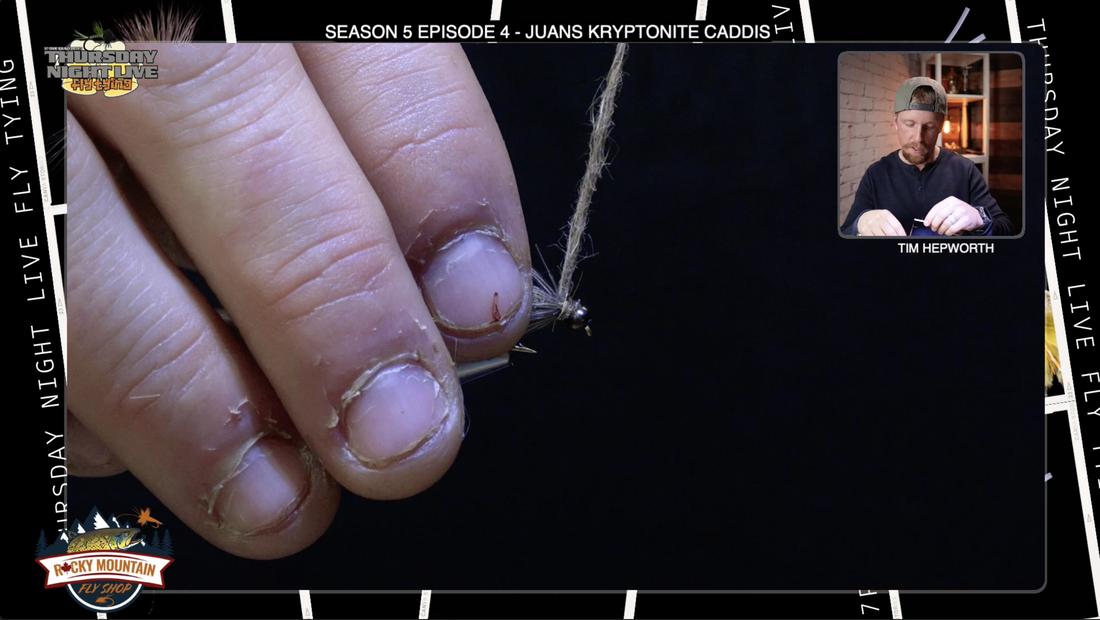
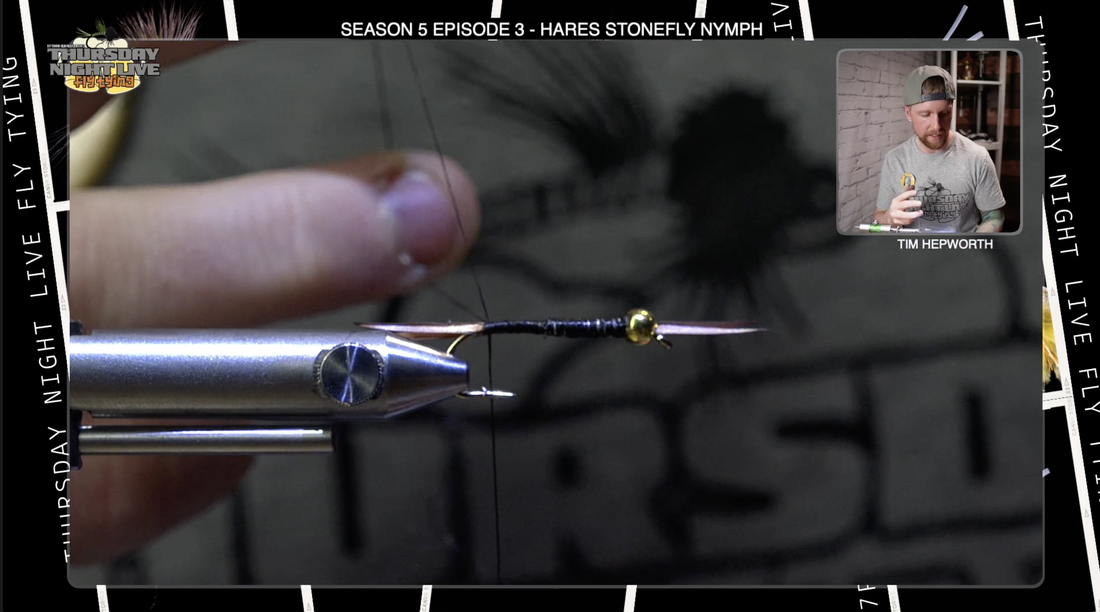
Do one more whip. I'm not gonna worry about resin on this guy. I don't wanna mess up all that nice dubbing we just put in there. I'm gonna trim this outta the way and then I'm just gonna do a little bit of work with a dubbing brush, also known as my Velcro, and I'm just gonna, That dubbing just a little bit rearward. And what it should do is it should blend in, come off just a little bit. Don't get too vigorous with it. We don't wanna pull it all out. Just blend that a little bit. Gives us this beautiful looking fly. The Juan’s Kryptonite Caddis, you're gonna want to try this one out a few times. Try some different sizes. This is the number 14, probably our most common size that we're gonna attack with. You can try a different color of the body, even go with a brown or a tan but definitely a great pattern. All right, everybody. Again, this is Tim Hepworth here with Fly Fishing Bow River Outfitters and Thursday Night Live fly tying. Thanks again to Rocky Mountain Fly Shop for bringing this quick tie, and we will see you next week. AuthorTim Hepworth @timothyhepworth 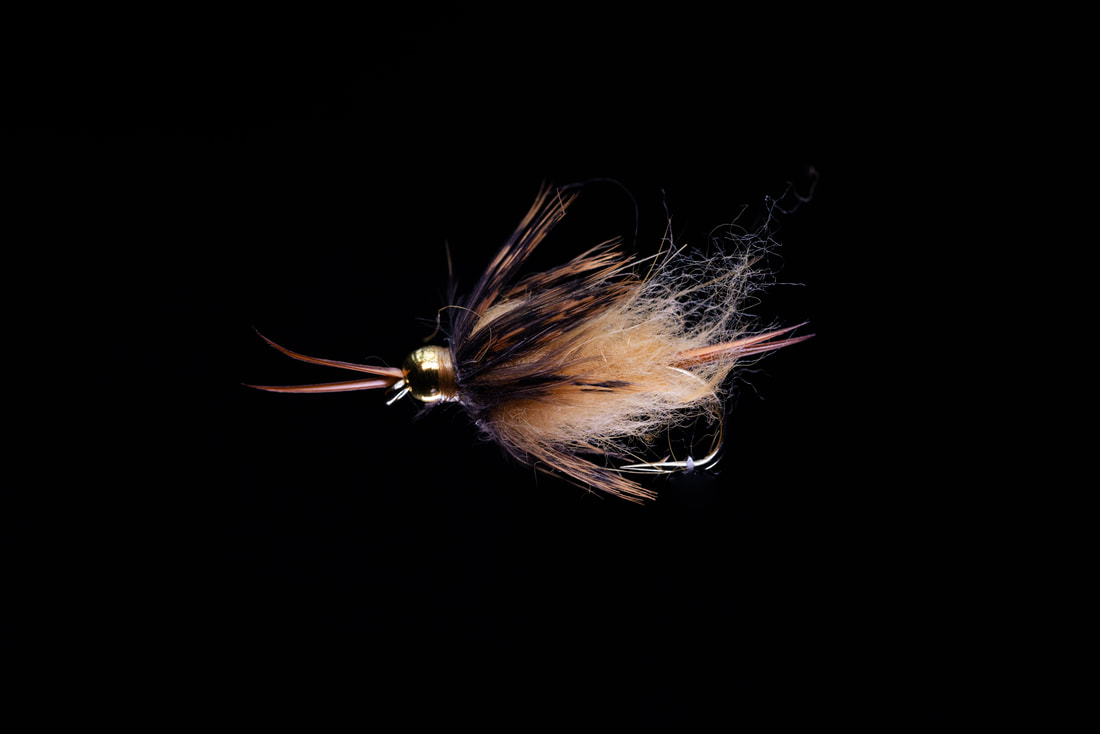 HARES STONEFLY NYMPH Fly Tying Recipe: Hook: #06 Tiemco 5262 Bead: 7/64”-1/8” Gold Bead Thread: Tan UTC 70 Wire: .010”-.015” Lead Wire Tail and Antennae: Brown Goose Biots Body: Golden Brown Hare Wiggle Dub Collar: Natural India Hen Cape Hey everybody. Welcome back to another Quick Tie Blog. My name is Tim Hepworth. I'm here with Fly Fish Fishing Bow River Outfitters. And Thursday Night Live Fly tying. And in this quickie we are gonna be tying, The Hares Stonefly Nymph. All right, real good pattern. We want to thank Rock Mountain Fly Shop for bringing you this quick tie. Remember , it’s free shipping over $99 www.rockymountainflyshop.net I'll be tying out of our kit. This is season five. You can still grab your kit if you head on over to www.flyfishingbowriver.com/tnls5. All right, I think that's all the good stuff. Let's head over to the vice and get ourselves. Go ahead and get that hook in your vice. To start with, we are gonna put this gold bead on size ⅛”. Remember, stick the hook, point into the small, the smallest hole that you can find on there. Get that good and secure. Then we're gonna grab that bead and immediately pull it back outta the way. We got some goose biots to tie in the front and the back to start this fly. So we're actually gonna start our thread up here.We are going to be using a tan UTC 70 for Thread. Take a few thread wraps back for snipping. Cutting that free. Okay, now next material we're gonna tie into some brown,Biots. So go ahead and grab yourself a couple off of the strip. Now, Biots can be frustrating to work with, but if you use a couple of simple techniques, you can make it easier for yourself. So separate those two. I suggest going in and snipping the coarse butts off. So I'm gonna come in here with my scissors. Cut those outta the way. Now you're gonna notice that each biot is curved. We want to have them curved to the outside, so running along the shaft of the hook and curving out. Essentially splayed away from each other. And then we want to pair them back to back. So once you find the angle that they are at, you're gonna stack 'em. So I'm gonna come in here, stack one on top of the other. Okay, we'll even those up. And now we're gonna reverse direction cuz these are gonna go out the front of the fly to start with. Make sure the tips are semi aligned. the most frustrating part in working with biots, is getting 'em to kind of display properly, get 'em lined up, and then get 'em tied in. So now that I've got 'em where I want 'em, they're even, as you can see, I'm gonna lay them so that they hang off the front of the eye. Roughly a quarter inch, somewhere in there. Make sure that thread is right up by the eye. I'm gonna kind of splay them one on either side of the hook Shank. I'm gonna take a gathering wrap, just making sure one's on each side, gathering, wrap, secure that down, and then start taking a few thread wraps back and the put some pressure on it, make sure it's good and tight, so it looks like so. Okay. That's ideally kind of, that's probably one of the best I've ever done. These are not always easy to work with, but once you get the hang of them, not too bad. Let's cover up the butts of those. Now all we're gonna do is go ahead and throw in a half hitch right here. It's gonna save our work and we're actually gonna snip our thread out. I'm gonna bring that bead back and you can see as you push your bead up, it keeps it splayed. Those look like that antenna, that stonefly, but it helps secure and save those butts from ever coming out. Now we're gonna go over, we have some 0.10 lead here. Okay. We're gonna take a series of wraps. I want the wraps to start about at the hook point and go up towards the eye. So I'll start back here. We're just meant to put lots of weight on this. Often we're gonna fish this quite low on the water column, but it is important that I have the thread wraps. Go all the way up, the lead wraps. Go all the way up onto the thread and we can just kind of bring it around so they finish somewhere up by the bead. Somewhere right up behind the bead, you can snip or tear that off. We're gonna make sure that the tag at the back is also brought down towards the hook shank, and that is what we should be left with. Making sure that it's pinched down and pushed up like so. Okay, now we're gonna grab our thread. We're gonna get back to business. With that, we're gonna take a couple of thread wraps here. Just behind that lead. I'm gonna spool that up and my thread had split on me a little bit. And now that we're back here, what I'm gonna do is I'm gonna go ahead and grab two more Biots off your stem. We're gonna tie two in for the back, exactly how we tied 'em in on the front. Okay. Same exact scenario. Split them off. Cut those butts. Stack 'em on top of each other so they splay outwards. Make sure the tips are relatively even again, now I'm gonna come in and try to do the exact same thing about the same distance off. I'm gonna switch hands here and I'm gonna come in here and just cut So these don't go up onto those lead wraps. And then I'm gonna take some thread wraps up over top, securing it to each side of the hook. And before I get too, too aggressive, I just wanna, readjust when you have 'em a little bit loose still. We wanna make sure that they are in fact where I want them to be. And then I can take some more thread wraps back. We don't want to go over the hook bend, we want to cut, basically come to it and just make sure that those are still splaying properly. If you're happy with that. Now I'm gonna take some thread wraps. Making sure that's good and secure. And we're gonna take thread wraps now, right up on top of all that wire, we basically want to cover up those lead wraps with that tan thread, which is just a UTC 70, if I didn't mention that earlier.
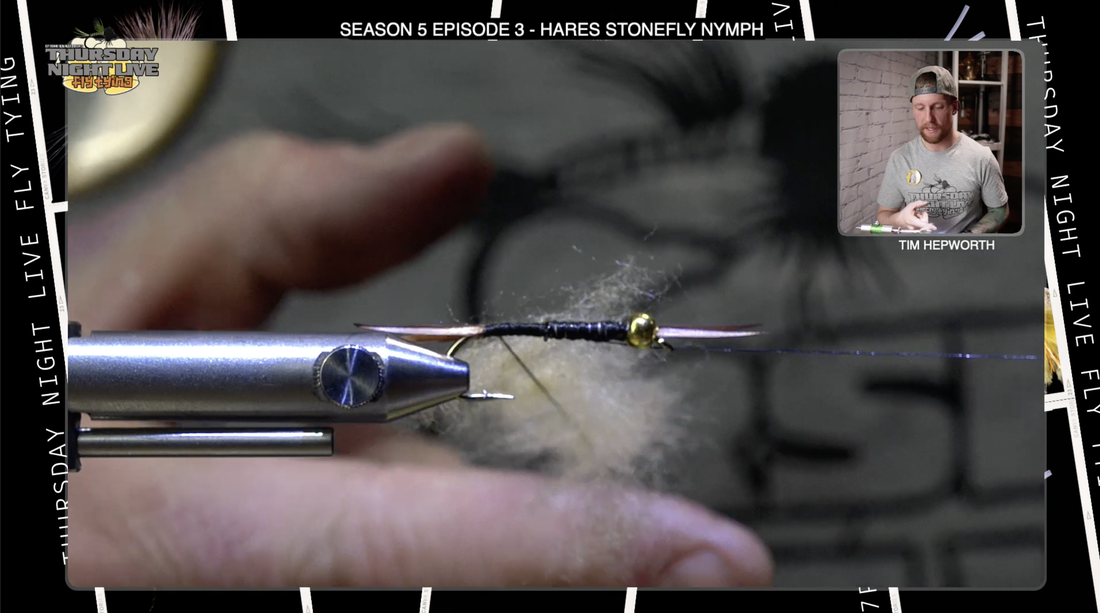
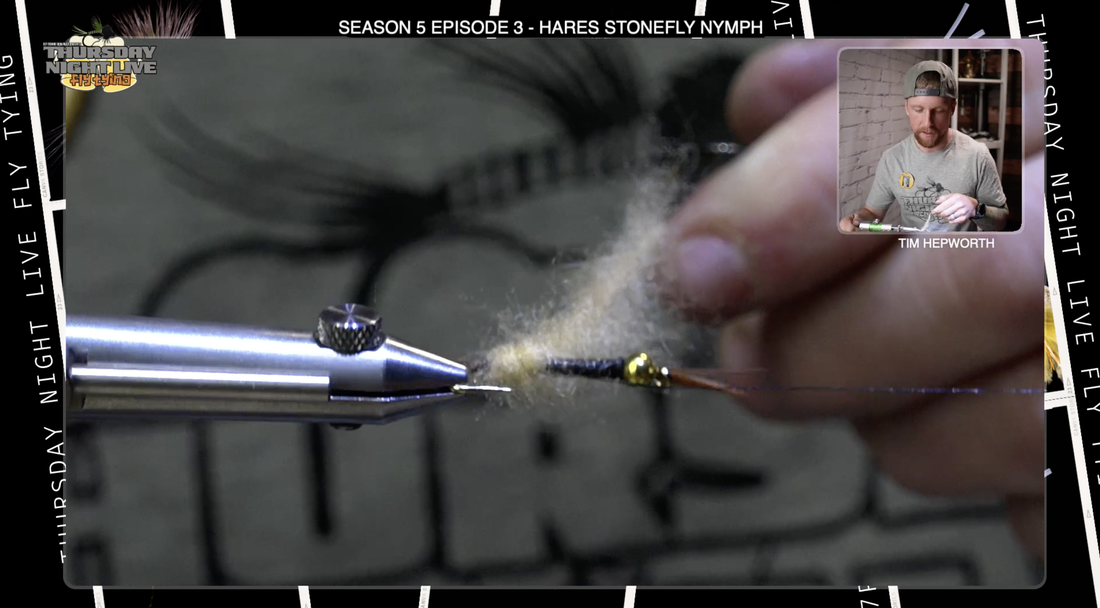
I'm gonna show you right here, we are gonna doa little dubbing loop . So I like a little bit thicker thread for spinning it. So all I'm doing is putting two fingers on the thread, making a bit of a loop, bringing my thread back to the top, and I'm gonna toss my bobbin over top. Try not to get all tangled up into those biots. I'm gonna cut this thread just to get it out of the way because if you pinch those down, you gotta start all over again. Let's restart my thread. Bring it down , so we're gonna go ahead, like I said, two fingers, toss my bobbin over top once, twice. And then I can wrap that back down just to where I left those biots. And I'm gonna go ahead and grab my dubbing spinner and hook it on. And now, while I'm in here already, I am gonna grab just a little bit of wax. I'll take my other thread forward to the eye. I'm gonna take some of this wax, just a little touch of it. Not going crazy with it. Get that in there. Try not to have any clumps on there Cause that'll just work itself into the material, the dubbing once we put it in. Now that I have it here, I'm just gonna do a little half hitch up here at the bead just to make sure that's locked in place. And now we're gonna go to the dubbing. We're just using this tan. Hares dubbing. Okay, we're gonna brush some of this out as we go, but little dabs of it, we're not grabbing a lot. I'm gonna grab some and pull it apart and stack it on top of itself, and I'm gonna go ahead and set it right in the dubbing loop. That little bit of wax that's in there is gonna kind of hold it in place initially so I don't have to fight with it too much. Now, I'm gonna take a few pinches of this dubbing. We'll probably do that three or four times, get it in there. We kind of wanna spread out this dubbing as much as possible to start with. Again, I can just touch it to that thread and because I have that wax in there, it's holding it in place. And then I can kind of come in here and make sure it's all spread out properly and where I want it. And I'm just gonna go ahead and spin that up. Spin, spin, spin. Gonna let it rope really nice, but if you overspin it, you are gonna end up breaking that thread. So be careful not to do too much. Now I am gonna go in with my brush or my Velcro here, and I'm just gonna pull out just a little bit. I'm not gonna really get aggressive with it. Gonna pull out a little bit of those fibers, just touching that Velcro to it, and then I'm gonna start wrapping forward. Okay? So just touching wraps, going up the fly, and hopefully we're gonna run outta dubbing. With a little bit of space behind the bead. I come in here and I'm gonna secure that dubbing loop by taking your thread wrap behind a thread wrap in front. That's your securing wraps. Do it twice. I know it's not going anywhere now, and I can trim it out. Okay? We're not gonna do anything more with this dubbing right now. We will do a little bit in a moment.
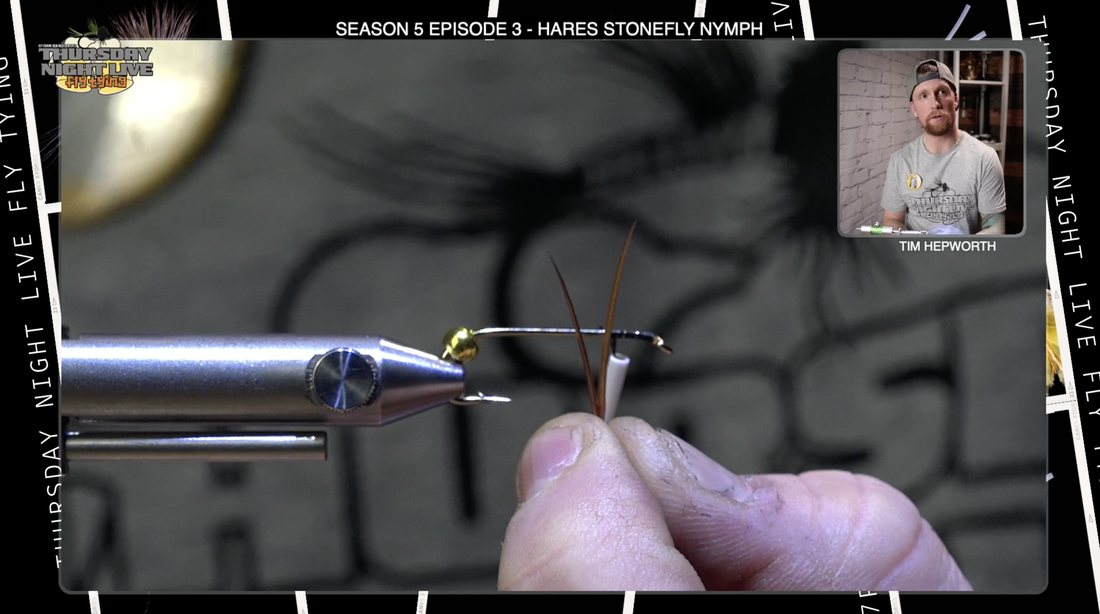
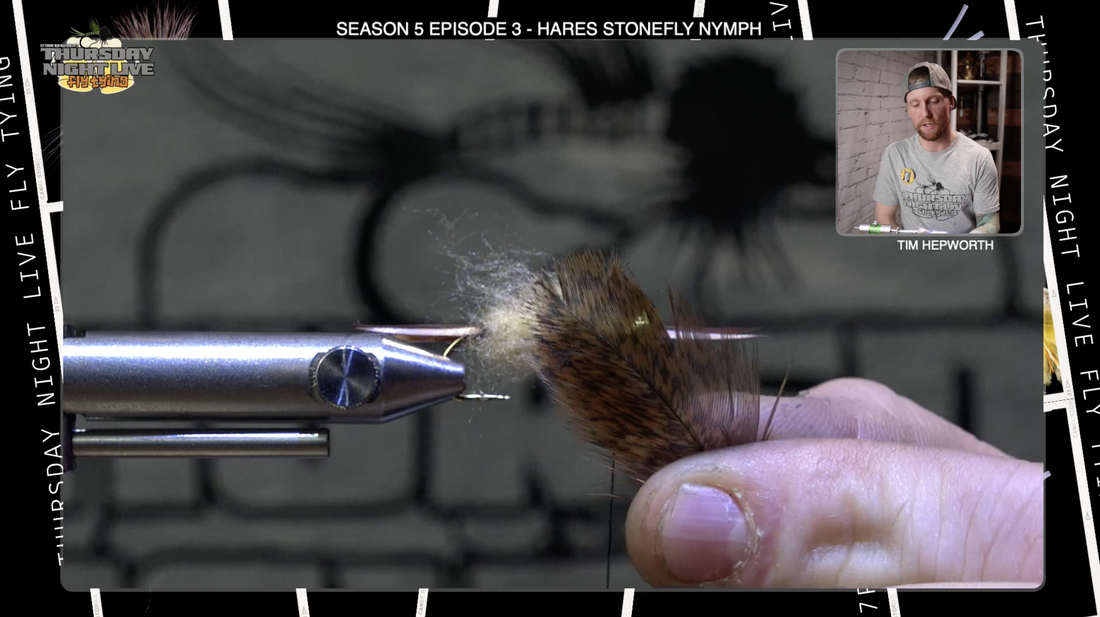
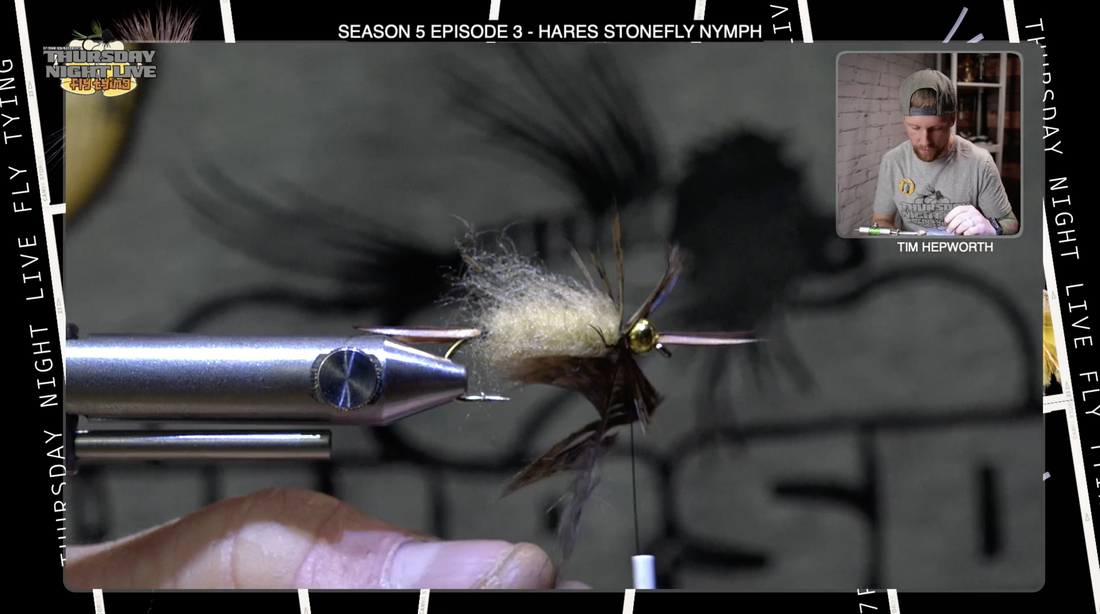
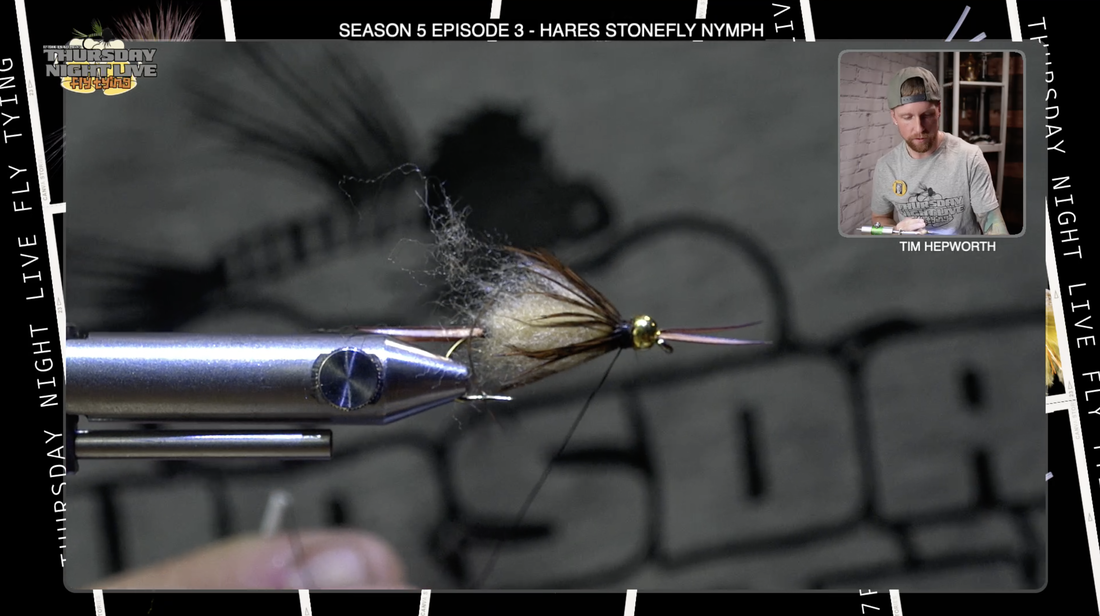
So you see I have just a bit of space, uh, behind that bead. And this is where we're gonna come in here with our south soft tackle feather. Okay? Got a whole range of colors and soft hackles you could use. This one's a dark brown with almost a chocolate colored flex in it. What I'm gonna do is I'm gonna come in here, I'm gonna pull down, exposing a little triangle. Right at the peak, and that's what I'm gonna tie in. I want to tie it in with the underside of the feather pointed back down the fly. get that secure thread wrap a couple times on one side, a couple on the other, repeat, and then we can trim out that stem before we start wrapping so we don't get it caught up in what we're doing. Really wanna make sure that's secure and it's not going anywhere. Now we're not gonna overdo it. You can take a ton of wraps of this stuff, but it'll just bulk up all of that at the front of the fly. We definitely need one full wrap. We're gonna try to not get caught up on itself, so you don't wanna wrap it on top of itself. Gonna bring it all the way back around and I'll bring my thread up and through it. Try not to trap any of it. Thread wrap behind, thread wrap in front, and don't worry if you've caught some of it, we can work with that in a moment. I'm gonna come in here and trim out my stem again. Make sure you secure that quite well. I'm gonna pull all that material back and I'm gonna take a few thread wraps. Okay. It's almost creating a bit of a dam, forcing all of those Fibers to go back down the fly. Like so has this appearance of a hare's ear nymph. That's why it is called the hares stonefly. I'm now gonna come in here. I'm gonna take a half hitch first just to secure that spot. I'm just gonna go ahead and find your whip finish tool. We'll do what one whip finish here and we'll touch it with some solarez uv resin. Trim that out. I'm gonna grab just a little bit of this bone dry from Solarez UV resin. Just put a drop on the thread wraps. It'll start to soak in. I'm gonna hit that with my uv light, so it cures Really quick, I'm gonna do a little bit of a brush and then we're gonna be finished with this fly. Gonna go back to my Velcro brush here. It's gonna take a little bit of poles back down the fly, and just like that guys. You have your hares stonefly nymph. Great little nymph to keep in the box. Keep it in a few sizes. Pretty much guarantee you you're gonna catch something on that. Thank you for showing up to this quick tie blog. We wanna say a big thank you to Rocky Mountain Fly Shot for bringing it to you tonight.
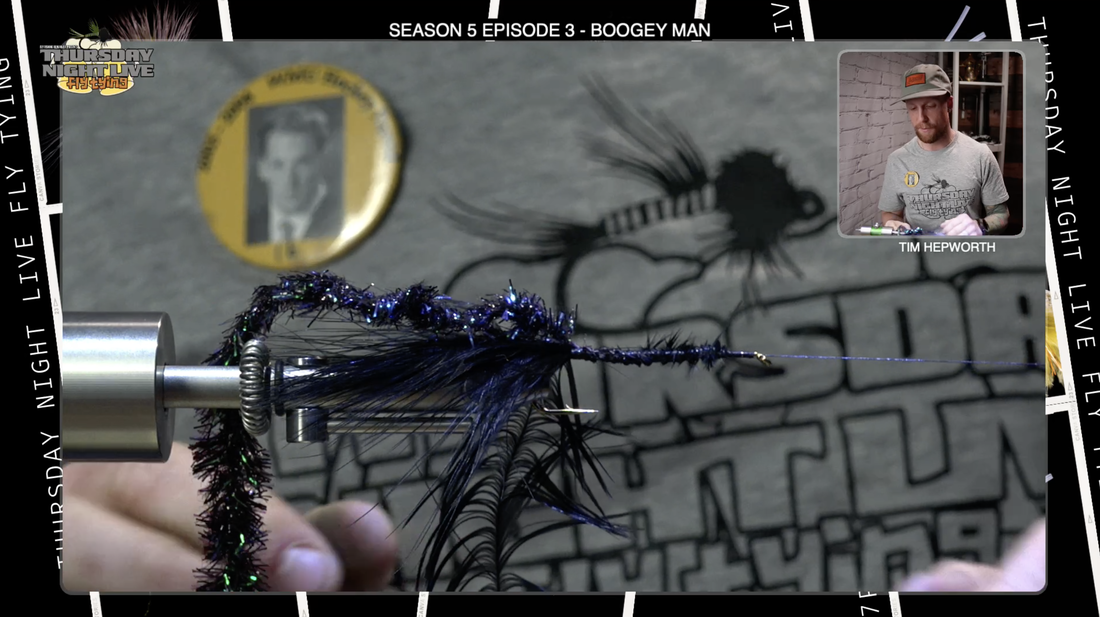
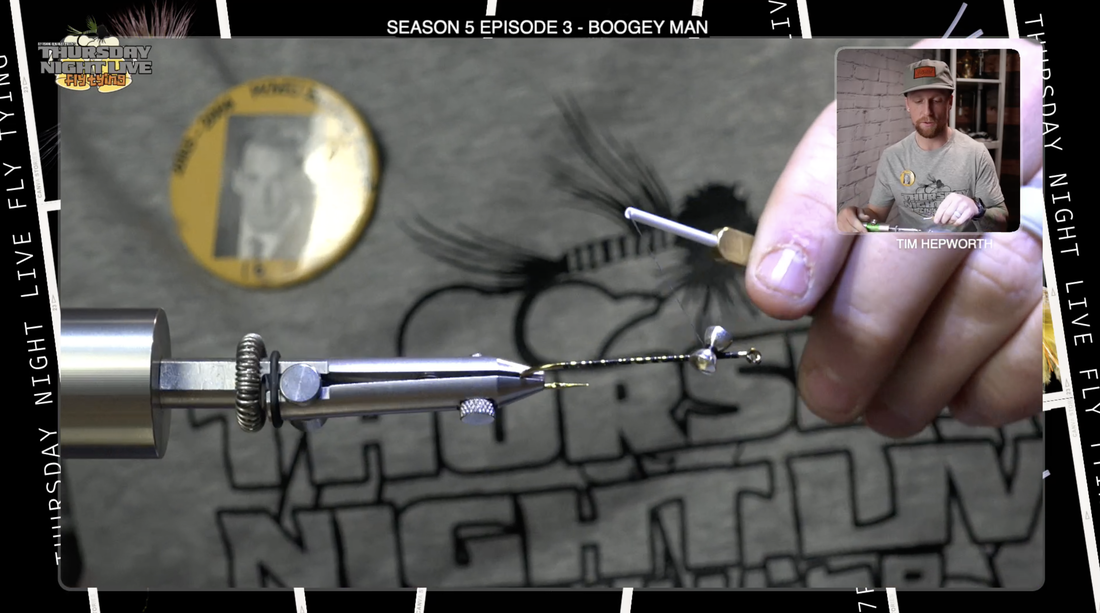
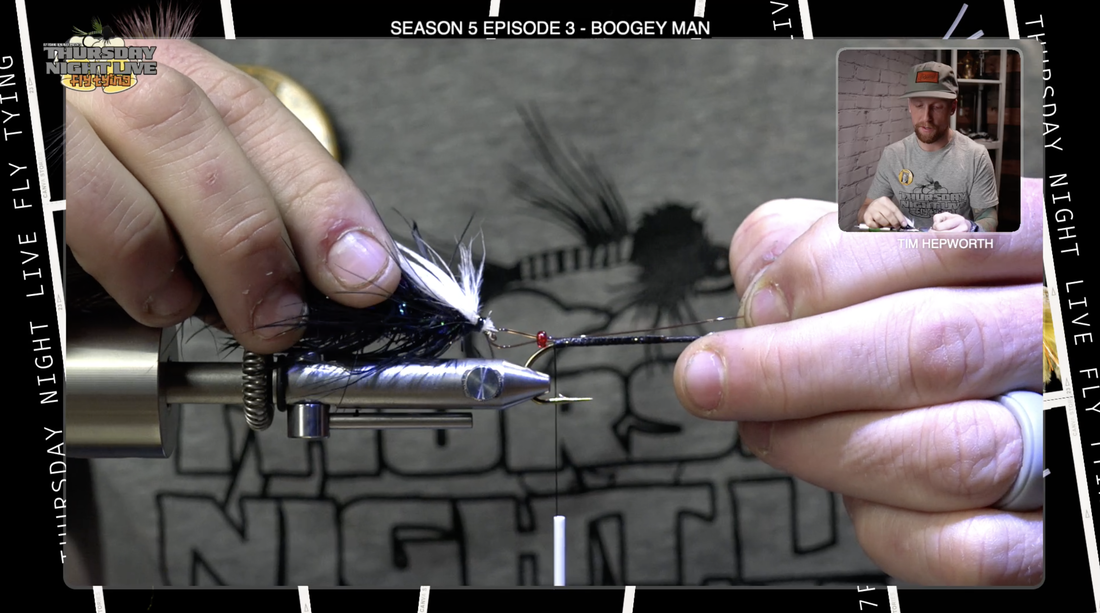
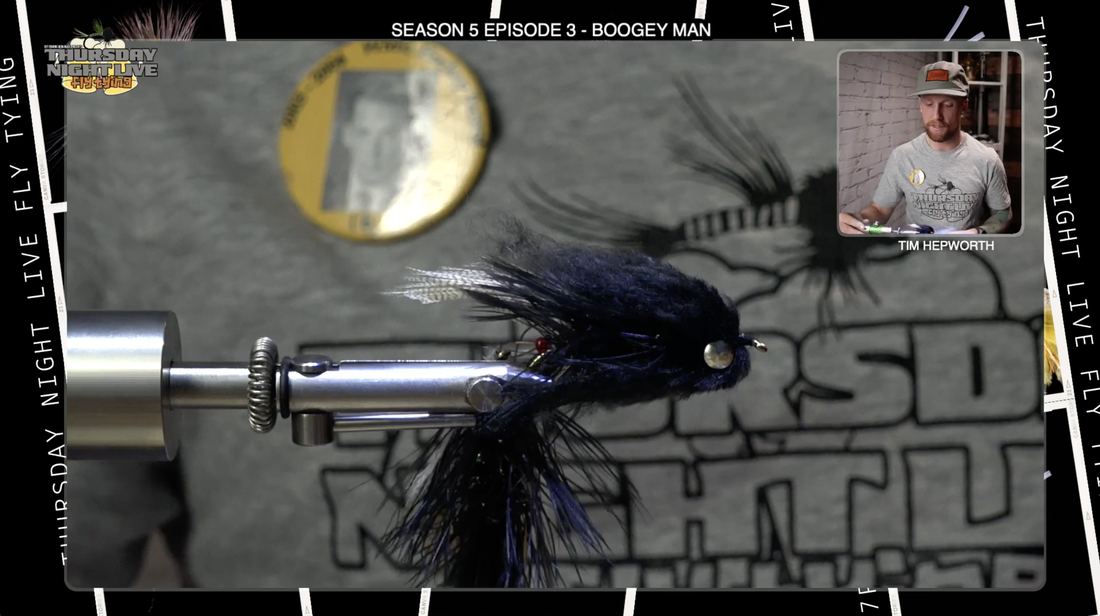
AuthorTim Hepworth @timhepworth BOOGEY MAN ARTICULATED STREAMER Fly Tying Recipe: Rear Hook: Daichi 2461 Size 1/0 Thread: Black FlyMaster Plus Tail: Black marabou Rib: Brassie Black Wire Body: Black Cactus Chenille Hackle: Black Schlappen, palmered over the body Wing: Wood Duck Flank feather, tied flat on top Front Hook: Daiichi 2461 Size 1/0 Eye: Medium Red Lead Eye, tied on bottom of hook shank Connector: Looped Beadalon Wire, with One Red Bead Threaded Tail: Black Marabou, extending over the connector Rib: Brassie Black Wire Body: Black Cactus Chenille Hackle: Black Schlappen, palmered over body Wing: Wood Duck Flank Feather, tied flat extending to mid-point of rear hook Head/Collar: Black Sculpin Wool, tied in and cut to shape 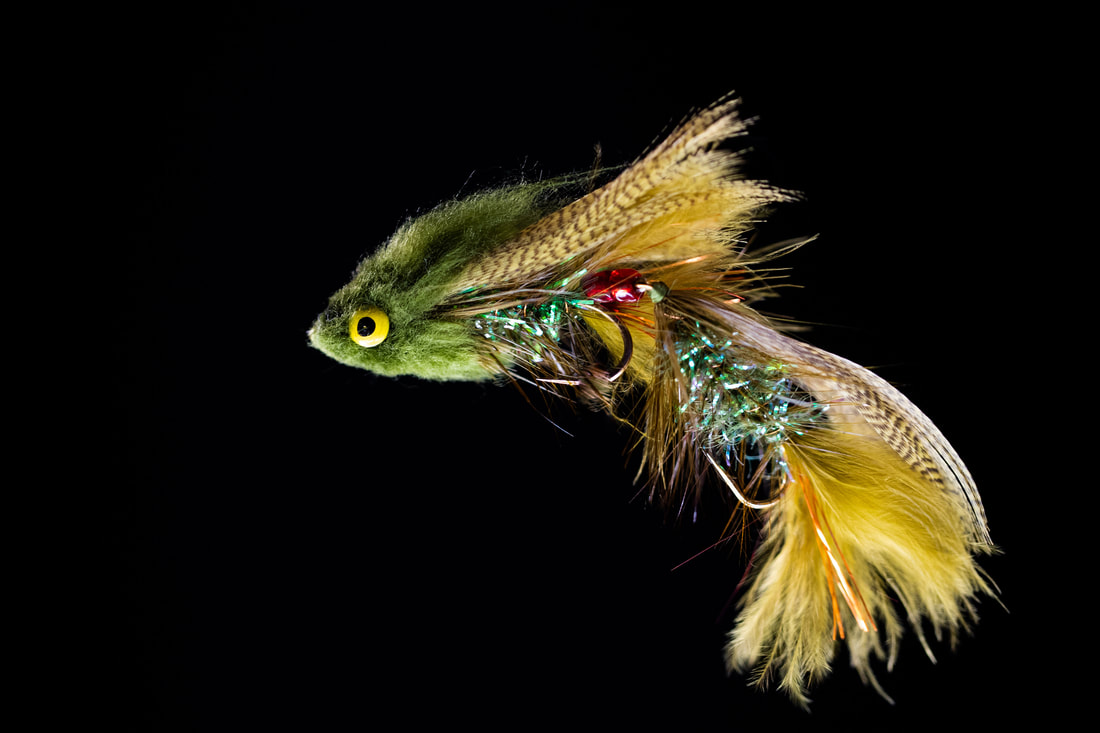 On this quick tie blog, we are going to be tying up Kelly Galloups Boogeyman. An awesome streamer pattern that is sure to allure some big fish into eating it. This quick tie is brought to you by www.rockymountainflyshop.net , and we are going to be tying out of our Season 5 kits ( purchase yours here www.flyfishingbowriver.com/tnls5 ) we're tying from season five episode three. If you don’t have the kits with all your pre packaged materials, you can still find our recipe list for these flies on our website, or it should be listed above on this page. Let's head on over the vice and get started. First things first let's go ahead and grab one of our hooks, a daiichi 2461 and this isn't a one ought size it's a long streamer hook. It’s the first hook for the back end of The Fly, as always on these articulated streamers. I am tying with some UTC 140 in Black. first thing we're going to do is we're just going to come in here and let's lay down a good base of thread wraps. Start it somewhere up by the eye. I'm going to put this a little deeper into my nor vise. I can just whip this up. I'm going to add some thread all the way back down into the bend and bring it back up. I'm just going to lay a nice thread base down there so those materials that were put on next have something to bind onto. then I'm going to bring my thread right back to about the Barb. go ahead and grab out of your kit or if you're tying from home grab from your materials. We're going to grab a chunk of Marabou, and the color scheme for this fly today is going to be in Black. So we're going to grab a good chunk of Marabou and measure it being roughly the length of that hook shank, set that back to where I left my thread switch hands, do a nice Gathering wrap secure that Marabou , and start taking thread wraps forward. Now I'm just going to use the underside of this remaining part of the marabou to kind of create a little bit of bulk as I go down the hook shank. you can see here I'm just gonna basically attach it down to one side or the other I'm gonna get near the eye, then I'm just going to come in here trim it out and then make sure that base of the feather is secured down. I'm going to come back up the fly , then just right back down the fly to where I tied the marabou in, and we are going to tie in our next material. Next material is a schlappen. start up at the tip pull some of that fiber back down, turn it over so that the underside of the feather is pointed rearward down the fly and come in here and secure this right in front of that Marabou. make sure that's good and secure. I'm even just going to lay that little piece of the tip down. make sure that's all good and secure, don't worry about all that bulk we have underneath. that just creates a little profile and it's not going to be seen. we're going to head on over to our large size Cactus chenille. we're gonna strip off a few of those fibers so you can see it exposes just that little bit of chenille cord. we're going to lay the cord we have exposed on top of the hook Shank and gather them, secure them down nice and tight. work our thread forward this time right to the eye and I'm gonna go ahead and put a little half hitch in to secure my work up to this point. I'm going to set my thread off to the side on my bobbin cradle and now I'm going to start wrapping my Cactus Chenille forward. I'm going to do a full wrap all the way around first before starting to head forward
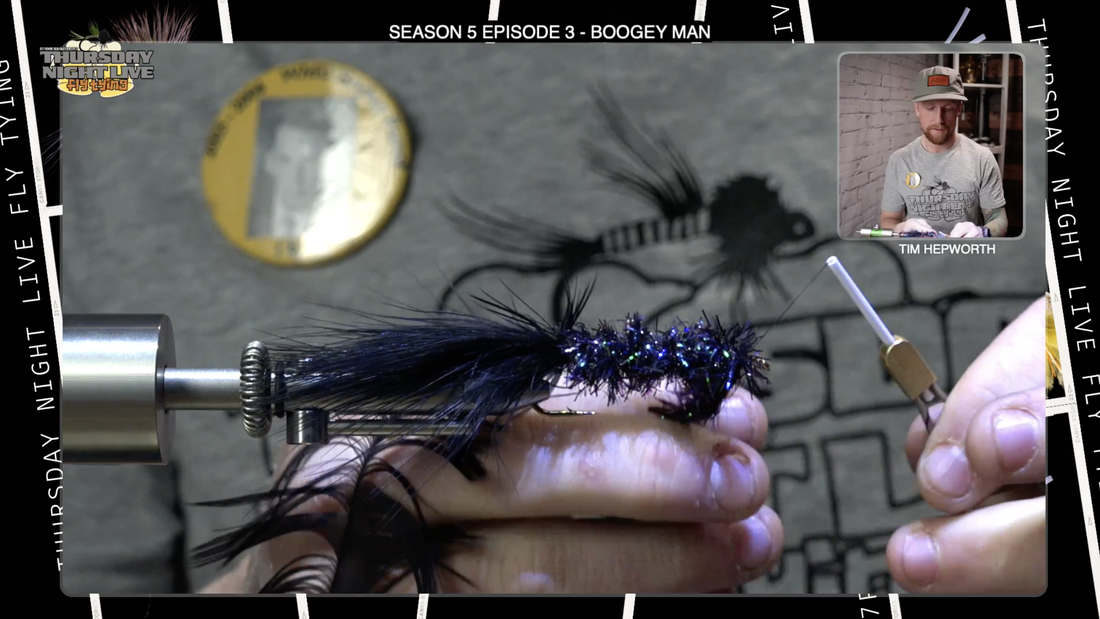
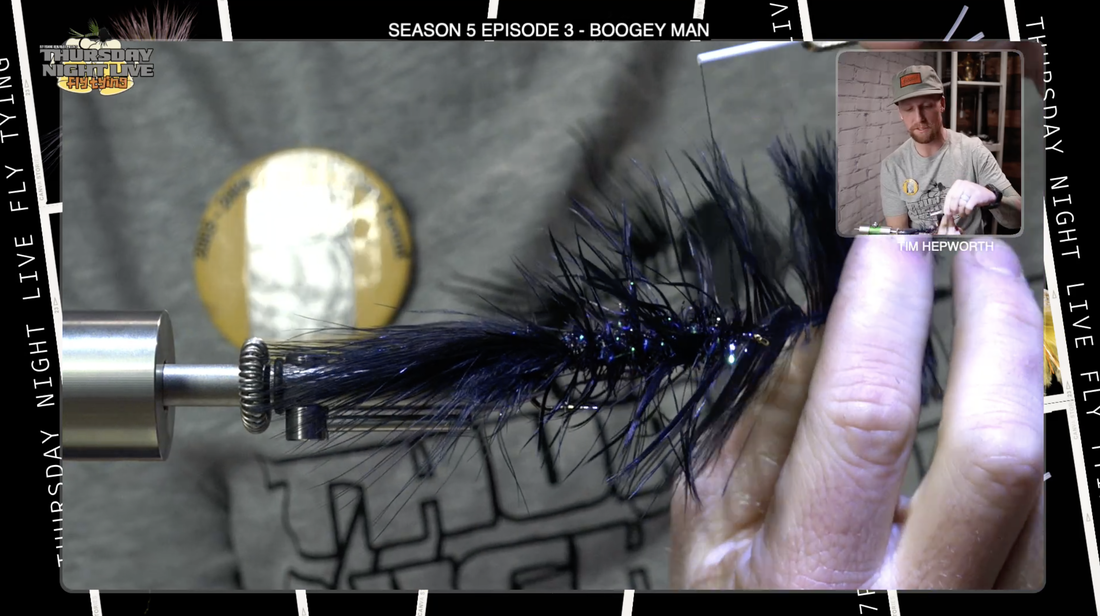
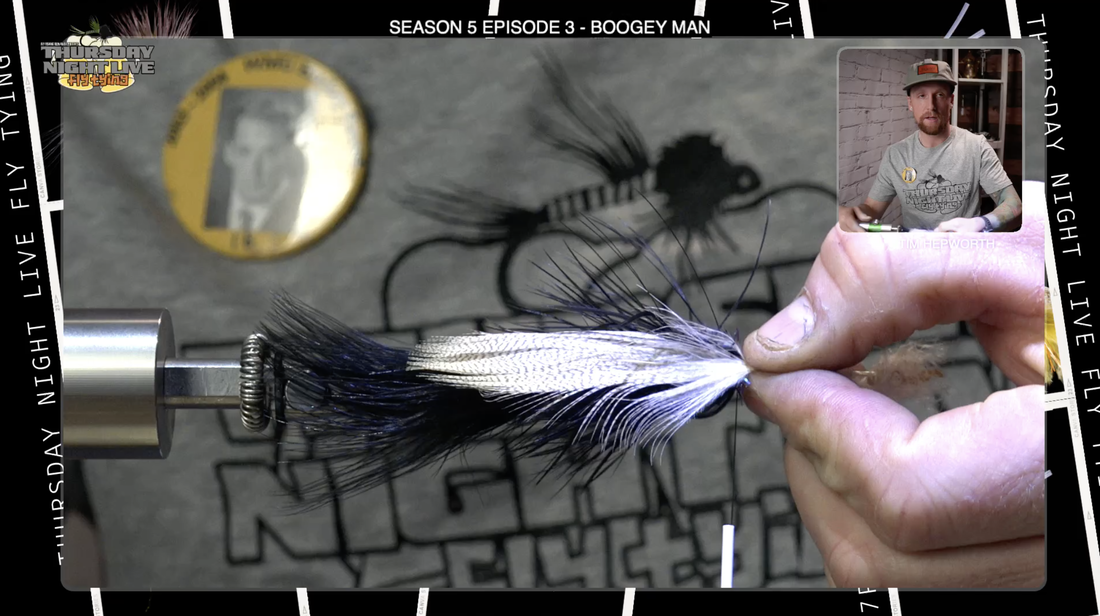
As I go forward I'm just going to pull the fibers back so they stack nicely all the way forward, just kind of pulling them back each time I wrap forward. I'm going to take this all the way up to just behind the eye of the hook. leave yourself a little bit of space up there and bring that thread back in, thread wrap behind, thread wrap in front as always to secure that material, do that twice and you can go ahead and trim out that Cactus chenille. make sure it's out of the way, gonna take a couple more thread wraps to make sure that's all locked in. I'm going to do the exact same thing again. I'm going to do a little half hitch and set my bobbin off to the side of my cradle. Now I'm going to come to our schlappen . I'm going to do exactly the same thing. I'm going to start palmering it forward and as I do I'm just kind of making sure that all the pieces of the feather are standing up nicely. it's not an exact science and it doesn't need to be. just wrap that forward and we're going to leave it basically right where we left that Cactus chenille. we're more or less trying to make sure we're just now wrapping back over top of any of the pieces. I'm going to bring my thread back in and do the same thing, thread wrap on one side in front, thread wrap behind and repeat that process a couple times to make sure we have that good and secure because we don't want this to come undone. we can come in here and trim it out and I'm just going to fold everything back, take a few thread wraps to make sure that's good and secure, not going anywhere. I can come in here with a little brush and just make sure I when I brush it's just going to pull all those pieces of that feather apart kind of get them headed rearward down the fly. Now one of the best parts of this fly that I love so much and the appearance that it gives is our Mallard flank. we're gonna put a mallard flank feather right on top, this gives the appearance of the top of the back of a fish and you can kind of vary your coloring scheme. I like these tan ones, they're barred and look like maybe a little brown trout's back. we're gonna set it right on top. We want it to extend just into the tail slightly, not too far just a little bit. make sure it's right on top of the hook shank and that it's not going down to one side or the other. this one's important that it stays up on top. go ahead get some thread wraps on top of it take your hand off make sure you got it good and level. If it's not perfect, adjust it and take a few more thread wraps back to make sure it's secure, lift up the tag end make sure you get some wraps underneath that that's going to lock it in to keep it from twisting. We can go ahead and trim it out now and all I'm going to do is take a few more thread wraps , trim the base of that feather up a little , and don't have to be super clean. let's do a quick little whip finish. I'm going to grab a little bit of my favorite UV resin which as you know is that solarez bone dry, it’s very thin and I really like this. it'll soak into this material quite nicely. put a drop of it on there and let that soak in for half a second. grab my UV light and cure that. we're gonna pop that out the Vise we'll set it aside for the time being. we're going to get to work on the front half of the fly.
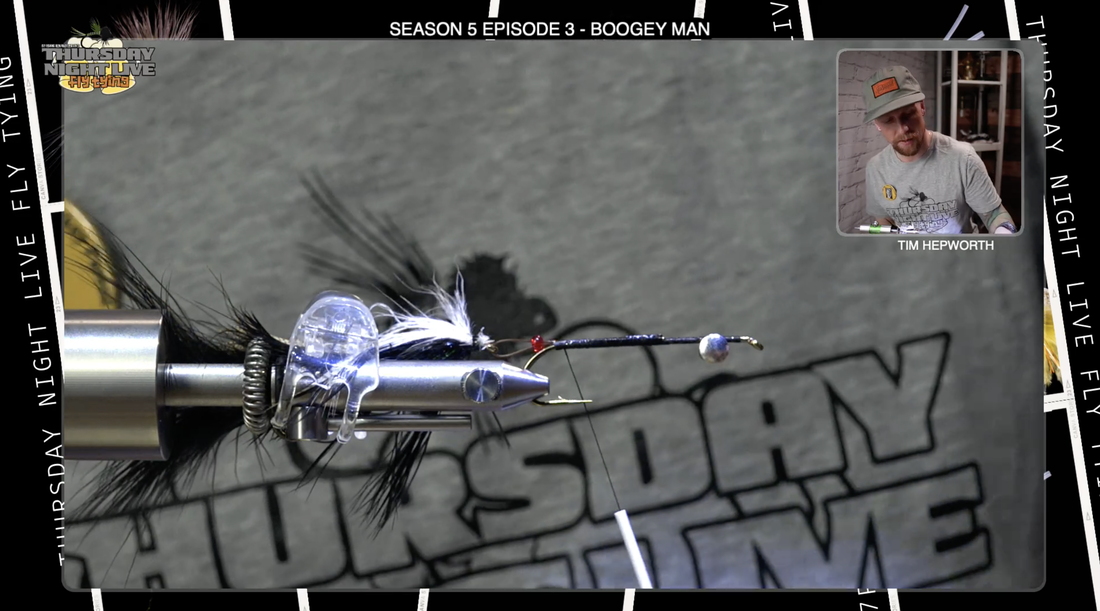
I'm going to go back in and grab another hook (daiichi 2461) . we're using that same hook we used in the back end we're going to use for the front end. make sure we get it good and secure in the norvise. now I'm going to go ahead and grab my thread again and start it up by the eye, work some more of a thread base down just like we did before. take that all the way back into the bend and back forward and this time we're going to come up about a couple of eye lengths behind the eye itself and we're going to go ahead and tie in our dumbbell eyes. We got some of these lead eyes here and we're going to lay it kind of across as it naturally wants to. it wants to kind of sit on that Crux. we're going to take our first few thread wraps just to hold it in place then we can switch directions so right now it looks like that we can switch directions and pull it over from the other side too we just start taking some cross wraps either direction then we'll throw in some figure eights which is exactly like it sounds. This looks like a figure eight so around one side around the other takes some just around the eyes itself. then we want to take those eyes and we want to spin them so they're on the bottom where the lead eyes sit is the way it's going to swim. we want the hook down on this fly. take a few more thread wraps making sure everything's good and secure when you're happy with it we'll take some thread wraps farther back and now leave it about mid Shank. You can hit those eyes with bone dry solarez if you wish. Now in your kit or if you have some at home, we're just using a piece of mono but you could use Intruder wire or anything like that to attach the back to the front hook. we're going to secure the back piece to the front so I'm going to lay this mono on top of the hook shank. take some thread wraps and we're really going to put quite a few nice tight wraps down , securing this all the way back, trying to keep it right on top of the hook shank. we're going to take it just into the edge of the bend and I'm going to come back forward. just really securing that in place. now what we're going to do is we're going to go ahead and grab a couple of the beads that you have in your kit as well as any type of beads. craft beads or whatever you like can work. you can use a couple or use one , either way we're just basically tying with some beads to hold that back hook out of the way so hopefully it doesn't come back in and foul the front hook when you’re fishing it. I'm gonna stick this mono through the eye of the back hook. I'm going to bring it back forward and I'm going to slide that back through that bead and it all kind of depends on how stiff the line or the Intruder wire you are using, but most of them are stiff enough that it's going to hold that back in place. I'm going to leave that Loop a little ways back, pinch down and start taking some thread wraps of that mono or the wire and this time I'm going to flip it over and double it over. then I can snip it out. get that good and secure down.
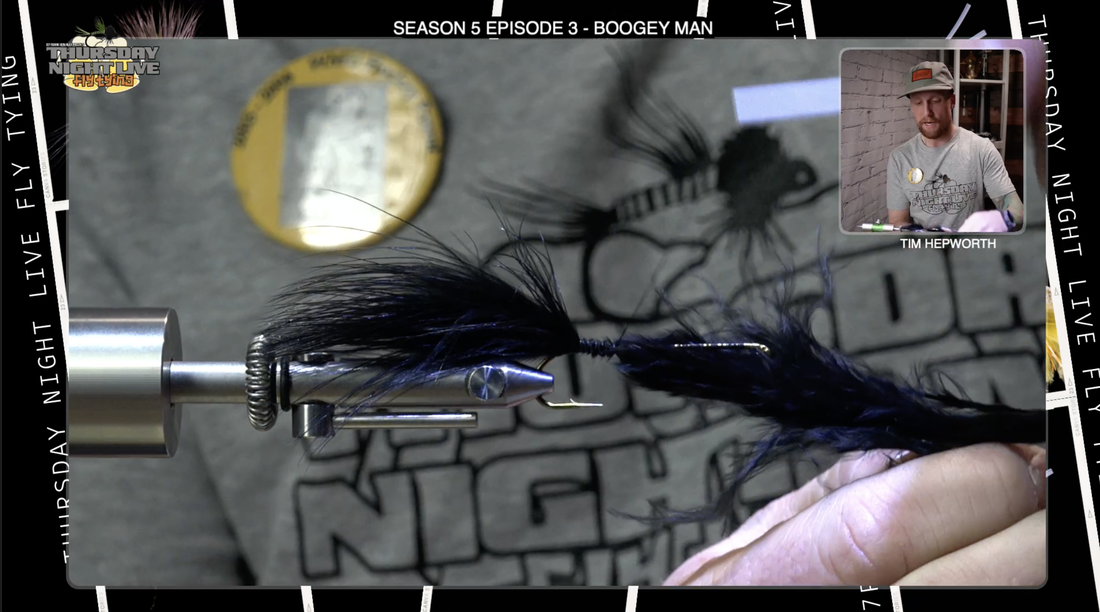
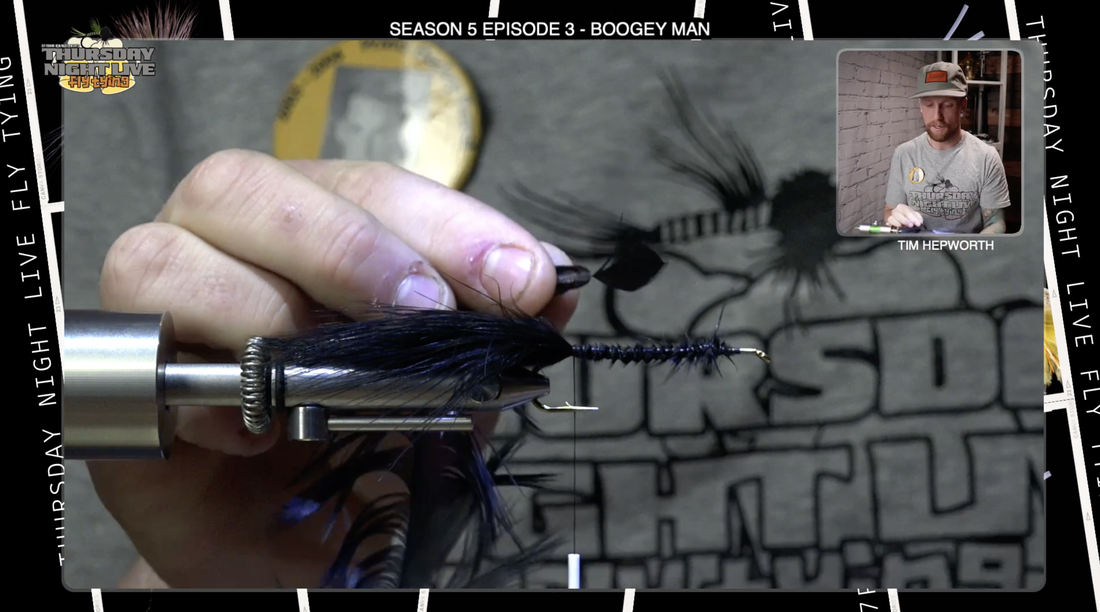
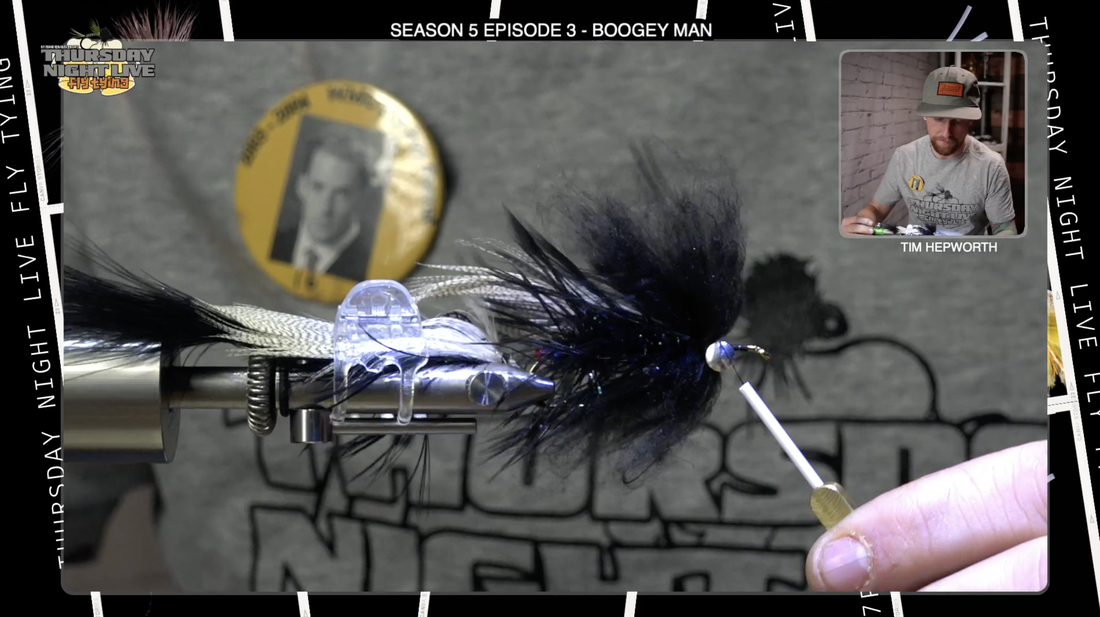
I'm going to bring my thread back to this back portion of the fly. now some people would like to put some Marabou back in here but we're going to tie as close to the original pattern as possible, so we're going to leave this as is and we're just going to start working on that front portion again, which this time we're going to go straight to tying in our schlappen or your saddle Hackle ( whichever you prefer). we'll tie that in first, same thing Underside back down the fly. we'll kind of secure that tag like we did the last time by bringing my thread back down. go ahead and grab that Cactus Chenille, again peel off a few of those pieces so you can expose that core and get that core secured down. This time we're going to wrap forward just behind the eyes. I'm gonna throw in a little half hitch, hit that save button and now I'm going to start wrapping forward with my chenille. same thing kind of trying to pull all the little pieces back as we go forward. This is a nice bulky looking Cactus chenille, it has lots of Flash in it and it’s gonna look great in the water. we're gonna bring that forward . leaving one of those lead eye spaces behind the current lead eyes. Secure it by wrapping in front, wrapping behind and make sure that's good and secure and then we can trim it out. really wrap down and make sure it's good and secure. now we're going to take our schlappen and we're going to do exactly the same thing we did last time , making sure we try to pull those pieces of the feather apart to make sure we're not trapping any of them as we move forward but we will brush it out kind of again so we should be able to prevent most of that just going to Palmer that forward through that chenille and we're going to leave it right by those eyes and secure it off again wraps behind wraps in front go ahead in and trim it out again take a few thread wraps really make sure that's locked in place. I'm going to take my brush like I did before brushing it a little bit, then we're going to go over and repeat what we did in the back. we're going to grab another one of our mallard flanks. we want it to extend just slightly into that back portion so that it overlaps on the mallard flank we have in the back. we just want that to overlap slightly, right up on top of the hook. tie that in place to secure it down. A few more wraps and we can trim it out super close. Now we're going to work on the head of the fly, which might be some of the more complicated portions. I just have a little clip on there to hold everything back out of the way. We are working with sculpin wool. Now you want to grab a chunk of it, it's about an inch - inch and a half long. I am using black and what I like to do is kind of fluff it up. I'm just going to keep pulling it apart and stacking it and it almost builds air into it. It makes it nice and fluffy and that's kind of how we're going to gain some shape and fluffiness to this. I'm going to find that halfway mark in it and we're going to start by putting this on the top and putting a thread wrap over top of it. a couple thread wraps forward and then I'm going to pull it back., you want to tie this first one in pretty much right behind the eyes so pull it back and add a couple thread wraps. it's going to look pretty poofy as we tie it in and then we'll do some trimming after to give it shape. Now we're going to flip it upside down and we're going to repeat that process on the underside. Same thing to fluff it up, and lay that just behind those dumbbell eyes. secure it in place with a couple wraps. pull it out of the way and we're gonna flip this fly back up again. I'm going to advance just in front of my eyes. okay so that's our first portion, and I'm gonna grab another clump. this time I'm going to lay it again kind of doing that same halfway part and I'm going to lay it on the underside of the fly. I'm reaching my thread behind the dumbbell eye and on this side. I'm going to reach the thread on the underside of the dumbbell eye and make sure that stays on top. it just filled up that space on top of the dumbbell eyes. That's kind of the harder spot to fill. Now I'm going to flip it upside down and repeat that exact same thing on the underside. fill that space upside down and we got a couple more to do but we are almost there. that's going to fill the underside of that Gap. you want to end up pretty close to the front of the fly with the wool and then what I'm actually going to do is I'm going to take a few wraps if I can back on the wool, kind of helps hold it back out of the way and create a bit of a thread Dam. I'm going to do a quick whip finish and then we're just going to do a little trimming and add your favorite resin up here at the head. I'm gonna do just a small dab of it so I know that's very secure but it never hurts to add just a little touch of some resin, let that soak in a half sec, hit it with the light. Let's do a little bit of trimming. note that when you're trimming wool it is actually pretty hard on your scissors so if you got a little crummier pair. or a pair of Dana's Scissors. maybe use them instead. I like to stand it all up so it looks like a big mohawk. now I'm going to trim the shape. I want to be a little bit pointed the nose leaving some of that wool to go back over that mallard flank but the shape is up to you, just remember you can't put it back on once you've trimmed it off. I'm going to make my first cut at a bit of an angle towards the back do a little bit of the same again on the side. this is my first kind of big General cuts. I'm going to flip it upside down I'm going to do the exact same thing a pretty steep angle on this one. I like how that's sitting trim a little bit more and now from this point all the trimming you're doing is just to satisfy the appearance that you want. I like to moisten the fingers just a little bit and pull back on it. it's going to give me a little better appearance of what it's going to look like.
There you have it , Galloup's boogeyman. I suggest you keep a few of these in your box. they are definitely productive. I am Tim Hepworth with Fly Fishing Bow River Outfitters, and Thursday Night Live fly tying. This has been the boogeyman, another quick tie blog. Don’t forget that www.rockymountainflyshop.net has free shipping over $99 ! See you next week AuthorTim Hepworth - @timothyhepworth |


 RSS Feed