Frenchie Nymph Fly Tying Recipe: |
 |  |  |
I am tying out our Season 5 material kits, but don't worry, if you head on over to her website (www.flyfishingbowriver.com/tnls5) you also are going to find a complete material list. If you don't have the materials with you, don't worry, you're going to be able to find what you need and probably the best place to do that is at www.rockymountainflyshop.net. Let's head over to the Norvise and let's get started.
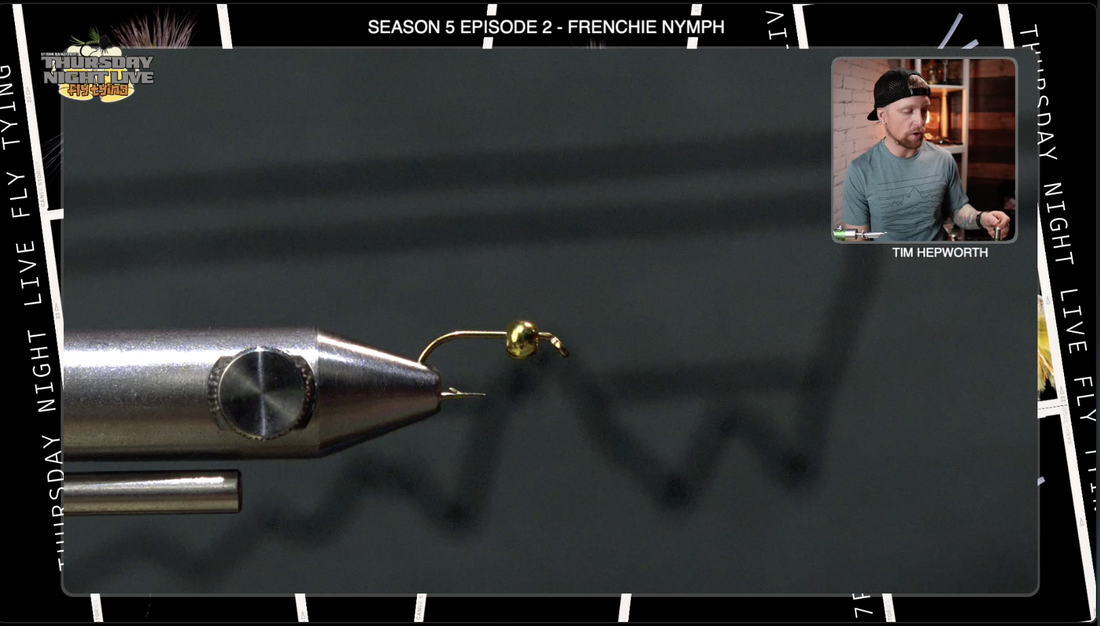
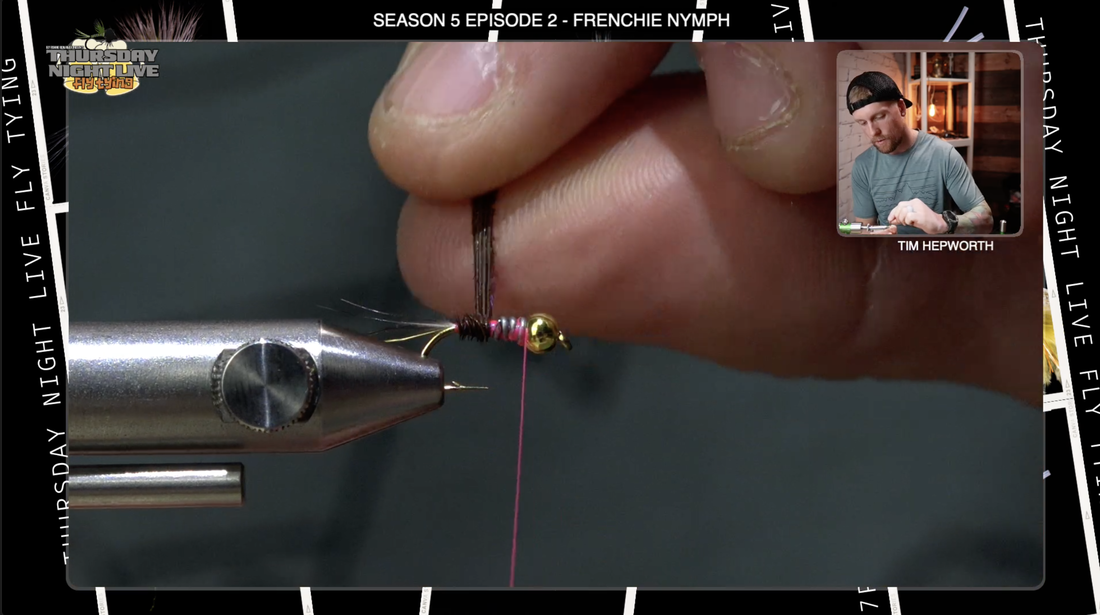
So what we got here guys, we have a size 14 Dai-Riki # 60 hook. Before you put your hook on the norvise, make sure you have a 7/64 Gold tungsten bead on your hook. I'm going to be tying with some fluorescent pink. This is UTC 70. You could also use an 8/0, that would work well here as well. Before I put some thread on though, we're going to start with some lead wire. This is 0.15 lead wire. I'm going to put in three full wraps, okay no more than that otherwise we're going to use up too much space on this hook. I'm going to use Dana scissors to come in here and trim out that lead wire, but you'll see when you do that it leaves these little pieces that stick up, so it's really important to go in there and do your best whether you're using scissors or whatever it is to flatten that lead wire down against the hook. You want it to be nice and flat. You don't want there to be a massive bump there when you put your thread in and all your other materials. Slide that lead up against the bead, and that's going to help build some taper for us. It's going to be part of the thorax as we start building this fly. So let's take that UTC 70 fluorescent pink thread and start some thread wraps just behind those lead wrap. Then trim out that tag and then while I'm here I'm going to come up, and I'm going to put some light wraps first up over that wire, and then I'm going to start to put a few more tighter ones, and then I'll come back down the hook.
So what we got here guys, we have a size 14 Dai-Riki # 60 hook. Before you put your hook on the norvise, make sure you have a 7/64 Gold tungsten bead on your hook. I'm going to be tying with some fluorescent pink. This is UTC 70. You could also use an 8/0, that would work well here as well. Before I put some thread on though, we're going to start with some lead wire. This is 0.15 lead wire. I'm going to put in three full wraps, okay no more than that otherwise we're going to use up too much space on this hook. I'm going to use Dana scissors to come in here and trim out that lead wire, but you'll see when you do that it leaves these little pieces that stick up, so it's really important to go in there and do your best whether you're using scissors or whatever it is to flatten that lead wire down against the hook. You want it to be nice and flat. You don't want there to be a massive bump there when you put your thread in and all your other materials. Slide that lead up against the bead, and that's going to help build some taper for us. It's going to be part of the thorax as we start building this fly. So let's take that UTC 70 fluorescent pink thread and start some thread wraps just behind those lead wrap. Then trim out that tag and then while I'm here I'm going to come up, and I'm going to put some light wraps first up over that wire, and then I'm going to start to put a few more tighter ones, and then I'll come back down the hook.
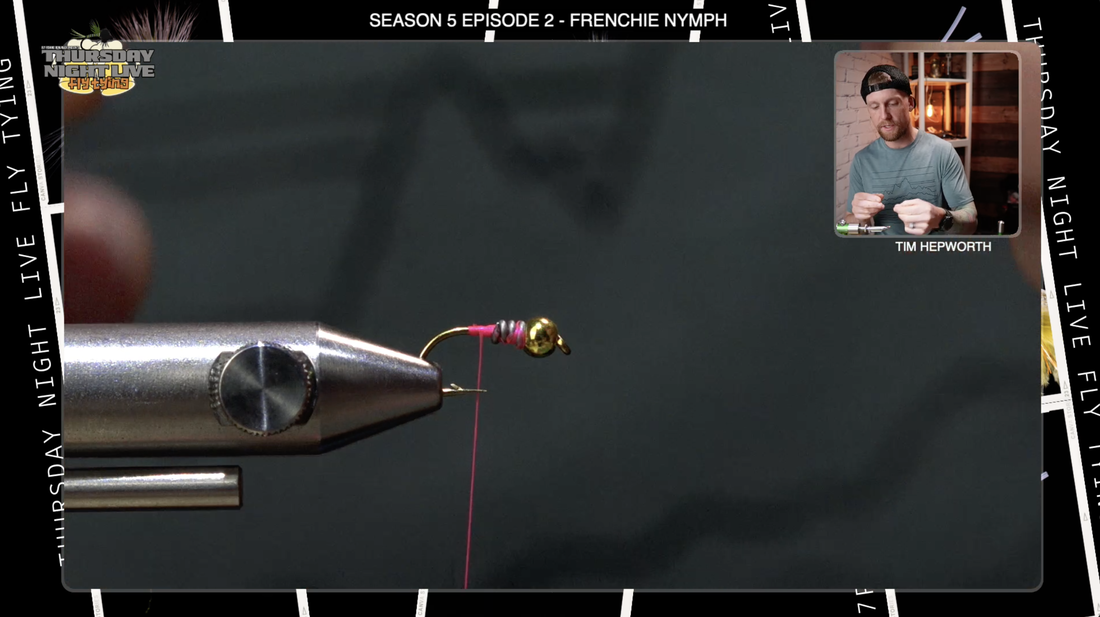 |  |  |
The first thing we're going to do, after getting our thread base down, is we're going to put in some tailing fibers for a tai.l This is traditionally done with some Coq De Leon. I'm going to take somewhere between probably eight and ten pieces. You're just looking for a little bit of a clump. These tails are going to be pretty light in color as well as they're not going to be a huge clump of material. After taking some off, I'm going to come in and grab the tails to get all the little fluff that might be on there out, and I'm going to come and measure out about a full hook length worth of material that is going to hang off the back of this fly. I'm going to transfer that down as my tail. I'm going to switch hands now. I'm going to Mark where that is against those lead wires, and then I'm going to cut the leftover tails. Now I'm going to lay that down on the hook, so just take that material lay it right down and do a nice securing wrap trying to keep that tail fiber right up on top of the hook. We're going to wrap the thread down just the edge of the bend of the hook. We don't want to go any farther otherwise that's going to cause the tail to aim straight down, and we want them to stick straight out of the hook. I bring my thread back to just behind the lead wire. Now we've got some size small gold wire (Brassie wire), this is going to be our ribbing on this fly. Now I'm going to come in here and I’m going to place this wire butting up against those lead wraps. I'm going to secure it on the side of the hook, and I'm going to take that down right to where I left my tail fiber, and I'm going to leave it out the back. So we've got our ribbon, we've got our tail in, now we're going to go over to the main body. The material going to be some pheasant tail. So grab yourself a healthy Clump, and you're going to again want somewhere, probably in that eight pieces Mark. You want a decent sized body. I've come in here with a fairly generous clump. I'm going to try to line up those tips the best I can and once I have, I'm just going to trim them out. Trim them flat, so they're all the same length, and then I'm going to tie these in right at that tail, so I can lay them forward a bit first. Take a wrap around the pheasant tail, and then I can pull back on those fibers to get them back to where I want them at the back of the fly. I'm just going to lock those in place and work my thread all the way forward to right behind the bead. Now I'm going to go ahead grab all that pheasant tail, and I'm slowly going to Palmer that forward, making sure I try to keep them together but also covering up all my work as I go. Watch out for that hook point; it can grab some pheasant tails. We're going to work those fibers all the way up to just behind the bead. Take your time, these aren't super long fibers, so they can slip out of your hands pretty easy. Hackle pliers aren't a terrible idea. Once I get up here to the head, I'm going to grab that material and lock it in place with my thread. If you were able to leave a little space behind the bead that's kind of Ideal because we have some dubbing we're going to put in there, if not, it's okay too we can wrap back over them. We're going to come in here and trim these out as close as we can, nice and smooth. I'm going to take a couple thread wraps just to make sure that's definitely locked in place and not going to come unraveled on me, that would be a bit of a frustrating thing to happen here now. I'm going to take my brassie wire rib, and come forward to protect those pheasant tails and give some segmentation to the body. There's two schools of thought here
1. I could either counter-wrap it or
2. I could wrap it the same direction
1. I could either counter-wrap it or
2. I could wrap it the same direction
 | 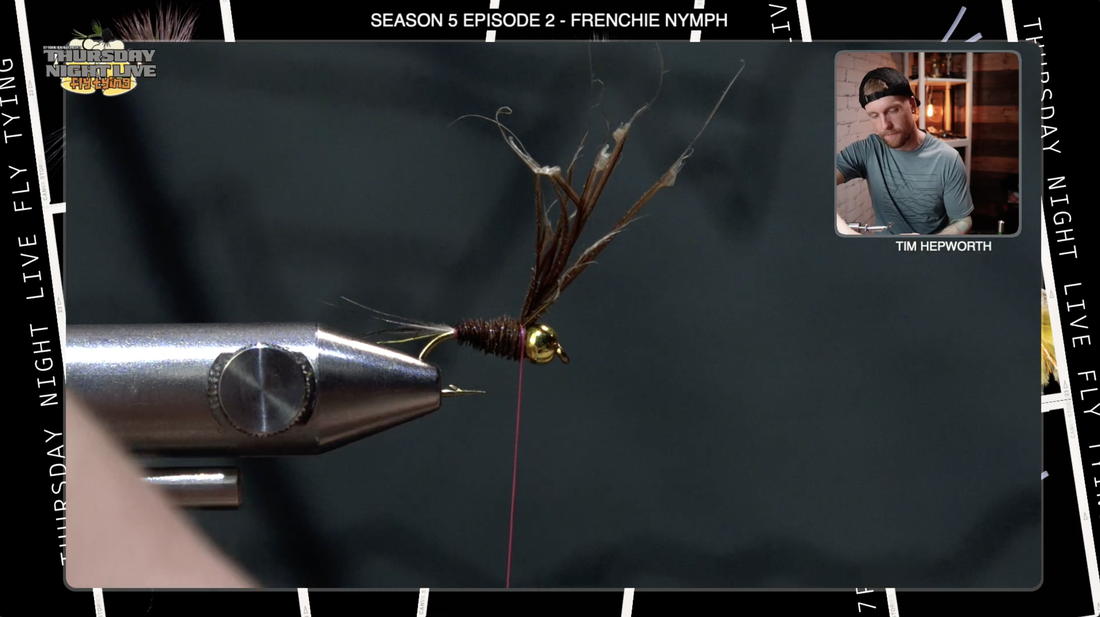 | 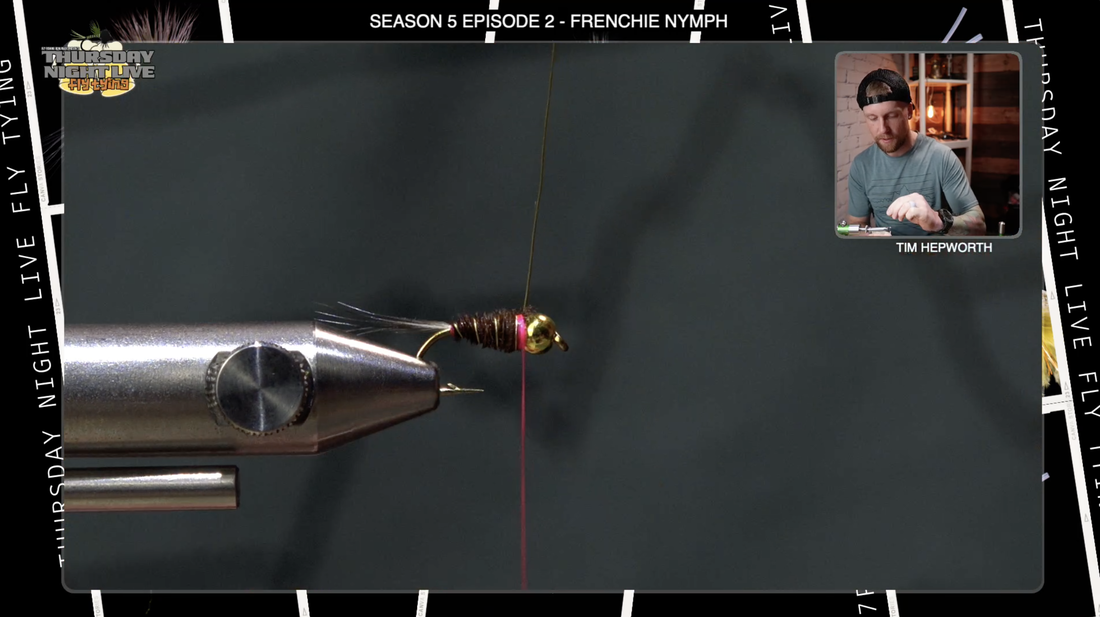 |
The issue with counter wrapping is when I go to secure my wire with my thread I'm going to be securing it in the wrong direction, and it has the probability of loosening the wire down the chain. So I'm going to go ahead, and I'm going to go the same direction that I put on that pheasant tail, just a nice equally spaced rib all the way up to where I left my thread. I'm going to secure that with a couple wraps behind, a couple wraps in front, and now you can either go ahead and helicopter that off, or go into some not so great scissors (Dana’s Scissors) and cut out that wire.
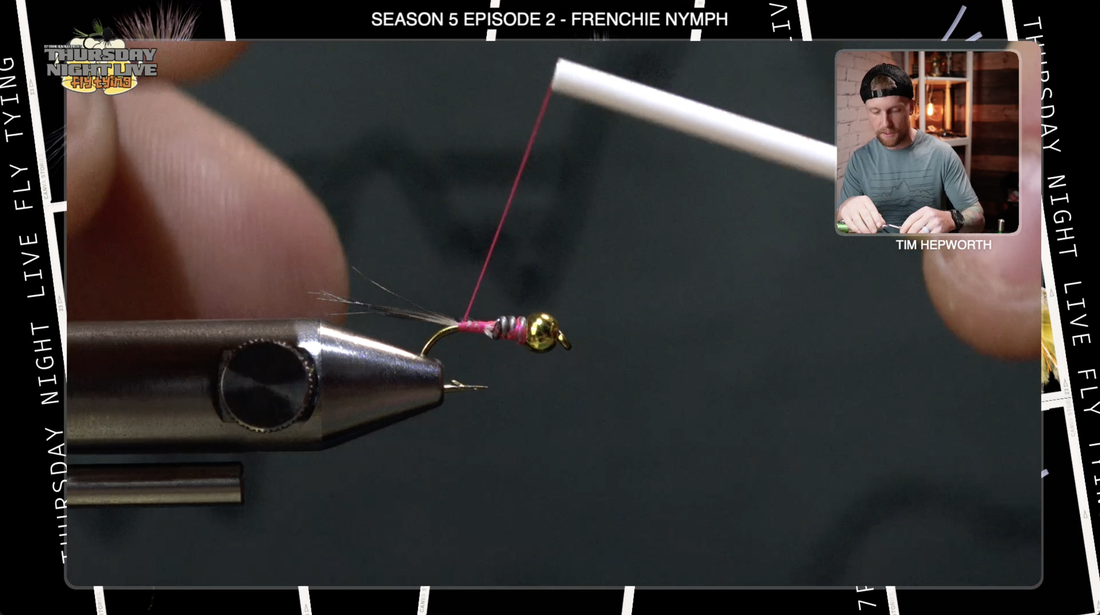
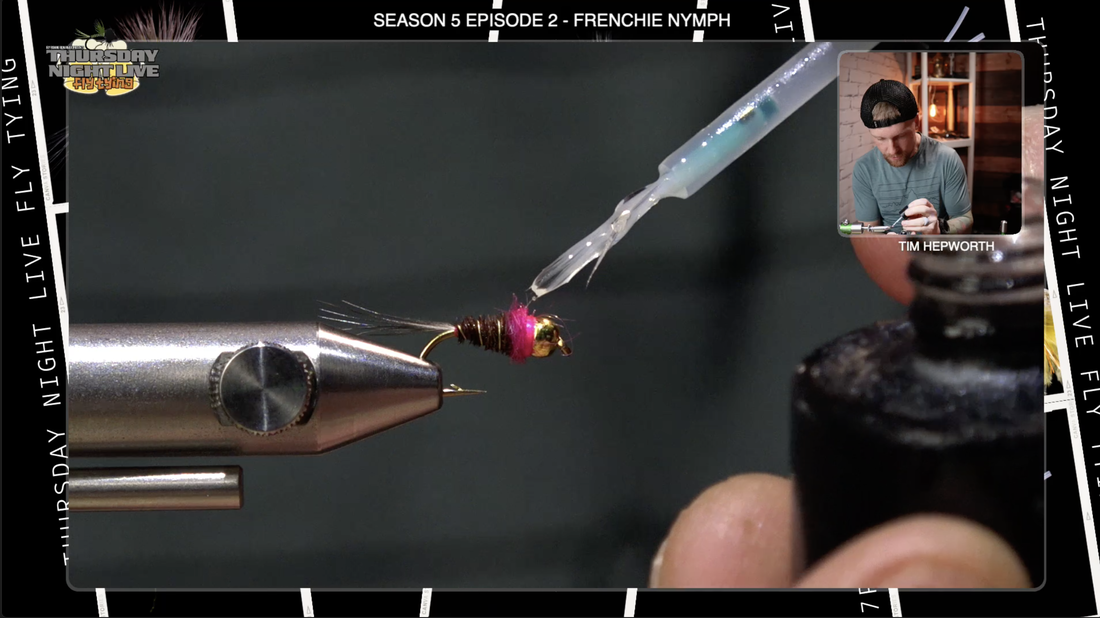
Only one more material left. We got this beautiful pink fluorescent UV dubbing, and we're going to take just a whisk, and I mean a whisk. We don't need much at all. Most people use way too much, so make sure you just grab a little bit. We're going to make a little bit of a dubbing noodle with that pink UV Dubbing. I'm going to come in here like we did last time on the Near Nuff Sculpin. Take that small pinch and spin it onto my thread. It shouldn't need any wax or anything on the thread. This stuff actually binds to the thread really well. Now I'm going to start making some wraps just behind that bead I want to make a nice thorax out of that pink dubbing, and then I'm going to bring my thread in front, and now we want to make a bit of a hot spot with just the Pink Fluorescent Thread. Seems kind of silly, but the pattern calls for a hot spot with hot pink even though there's pink dubbing. A way we can accomplish that is let's just overdo it on our whip finish, to be careful not to create too much bulk around the bead. I'm going to come in here with a whip finish just behind the bead. Normally we do three, let's go four five six wraps. That's going to create a little bit of a hot spot just behind that bead, and then I can come in here and snip that. If you like, you can go ahead and put just a little bit of resin on there. I'll use just a little bit of Bone Dry from Solarez. Just the tiniest touch on those thread wraps, and I'll come in here, and I'll cure it with my UV light. Give it a half a second so it cures.
Only one more material left. We got this beautiful pink fluorescent UV dubbing, and we're going to take just a whisk, and I mean a whisk. We don't need much at all. Most people use way too much, so make sure you just grab a little bit. We're going to make a little bit of a dubbing noodle with that pink UV Dubbing. I'm going to come in here like we did last time on the Near Nuff Sculpin. Take that small pinch and spin it onto my thread. It shouldn't need any wax or anything on the thread. This stuff actually binds to the thread really well. Now I'm going to start making some wraps just behind that bead I want to make a nice thorax out of that pink dubbing, and then I'm going to bring my thread in front, and now we want to make a bit of a hot spot with just the Pink Fluorescent Thread. Seems kind of silly, but the pattern calls for a hot spot with hot pink even though there's pink dubbing. A way we can accomplish that is let's just overdo it on our whip finish, to be careful not to create too much bulk around the bead. I'm going to come in here with a whip finish just behind the bead. Normally we do three, let's go four five six wraps. That's going to create a little bit of a hot spot just behind that bead, and then I can come in here and snip that. If you like, you can go ahead and put just a little bit of resin on there. I'll use just a little bit of Bone Dry from Solarez. Just the tiniest touch on those thread wraps, and I'll come in here, and I'll cure it with my UV light. Give it a half a second so it cures.
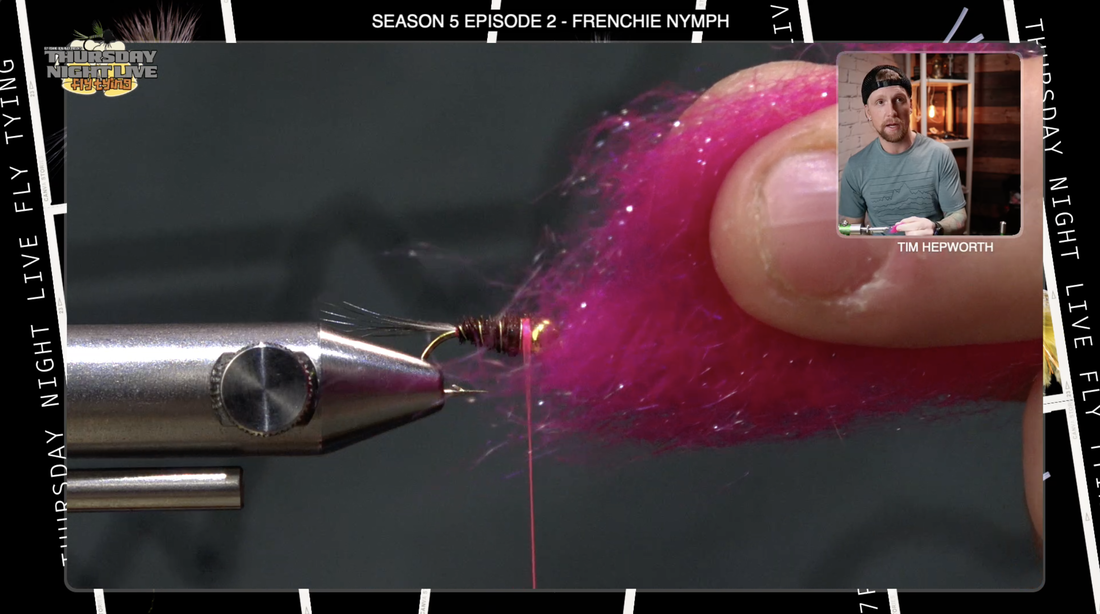 | 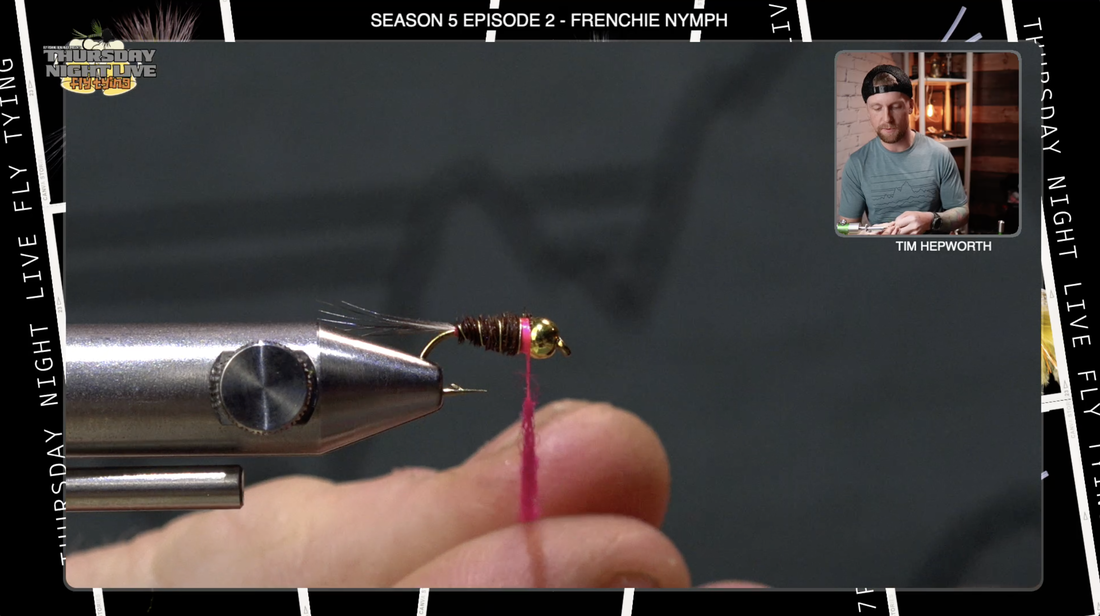 |  |
This is a real simple fly, guys. You want to keep some of these in your box and have a dozen of them in a few different sizes. Change up that pheasant tail to different colors as well, and you'll make a true variation on this pattern. Once again this is Tim here with Fly Fishing Bow River Outfitters and Thursday Night Live fly tying, this has been another quick tie blog brought to you by Rocky Mountain Fly Shop. Don’t forget, everything over $99 is free shipping from them, so make sure to check them out! We will see you on the next pattern.
Author
Tim Hepworth
 RSS Feed