NEAR NUFF SCULPIN |

 | 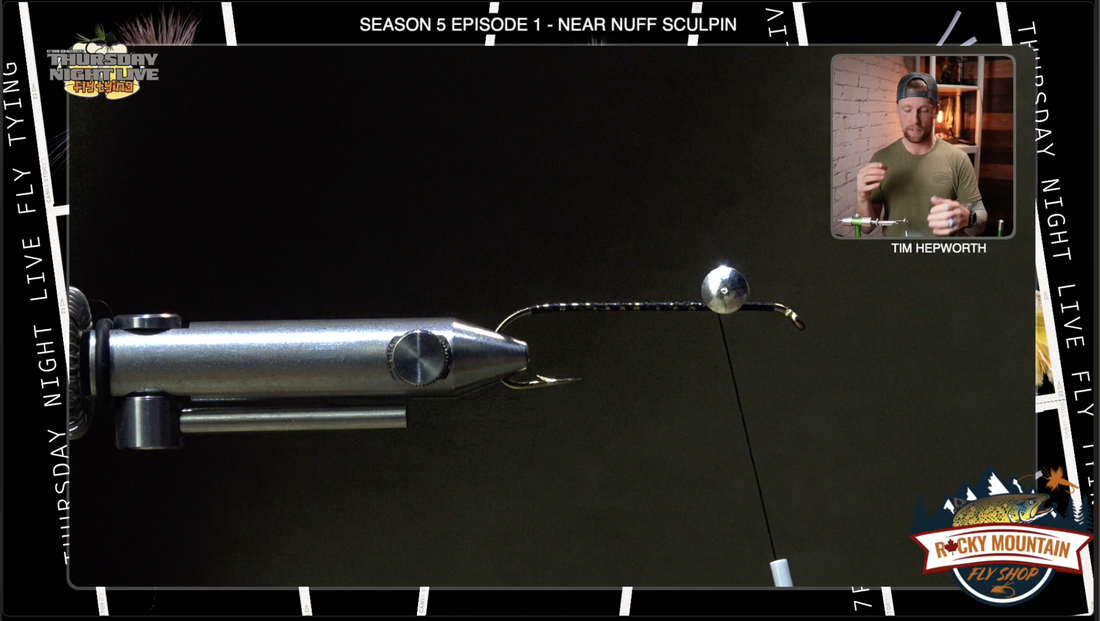 |  |
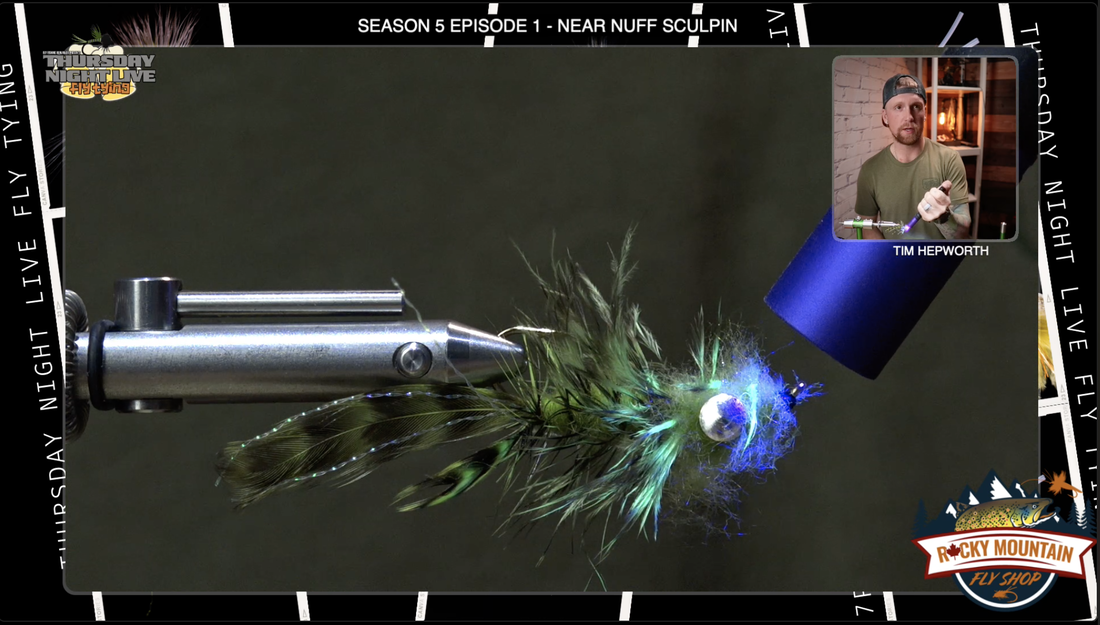
You can also put some super glue, whatever you like. What I am using is bone dry by solarez. I like this stuff, it soaks in really nice, and you’ll have to hit that with your UV light so you know those eyes aren't going to go anywhere. When you see The Smoke Stop you know the Solarez bone dry is cured.
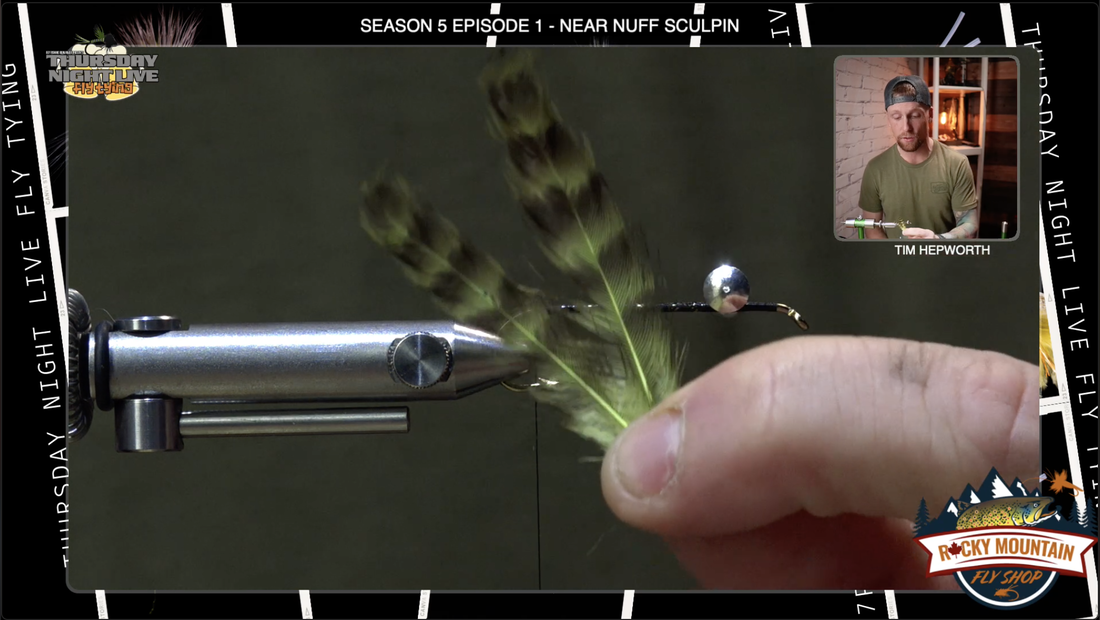
I'm gonna flip the hook back up so I can see what I'm working with. I'm gonna take my thread ( UTC 140) and I'm gonna start working back. I'm gonna get all the way back so it's sitting right about at the Barb. We don't want to be down beyond the hook Bend, you want to be before that hook starts to tip off. We're going to start off with the soft hackle Grizzly and Olive. We're gonna take two of these feathers. Now there's two trains of thought on this. You could think of putting them facing each other or facing out. I want to face them out. I like the way that this moves in the water. I want them to splay when I tie them in, but I want them to be matched in length so I'm holding them opposite each other. I want them to be roughly a hook shank out the back of the fly. I'm gonna switch hands. I'm gonna take a gathering wrap, make sure that it's cinched in there nice, and then pull tight. I'm going to look from the top to make sure they splay and make sure they're even now. Those back here are going to move really nicely in the water. This is a good opportunity to arrange them on the hook shank where you want them before you move on. I'm going to use some of the butts ends of the grizzly hackle to build bulk in the body. I'm gonna wrap thread back on these butts, because I want to create some bulk in the middle end of this fly. We will do it with dubbing as well, but lets take advantage of the material that's already on the hook.
I'm gonna flip the hook back up so I can see what I'm working with. I'm gonna take my thread ( UTC 140) and I'm gonna start working back. I'm gonna get all the way back so it's sitting right about at the Barb. We don't want to be down beyond the hook Bend, you want to be before that hook starts to tip off. We're going to start off with the soft hackle Grizzly and Olive. We're gonna take two of these feathers. Now there's two trains of thought on this. You could think of putting them facing each other or facing out. I want to face them out. I like the way that this moves in the water. I want them to splay when I tie them in, but I want them to be matched in length so I'm holding them opposite each other. I want them to be roughly a hook shank out the back of the fly. I'm gonna switch hands. I'm gonna take a gathering wrap, make sure that it's cinched in there nice, and then pull tight. I'm going to look from the top to make sure they splay and make sure they're even now. Those back here are going to move really nicely in the water. This is a good opportunity to arrange them on the hook shank where you want them before you move on. I'm going to use some of the butts ends of the grizzly hackle to build bulk in the body. I'm gonna wrap thread back on these butts, because I want to create some bulk in the middle end of this fly. We will do it with dubbing as well, but lets take advantage of the material that's already on the hook.
 |  |
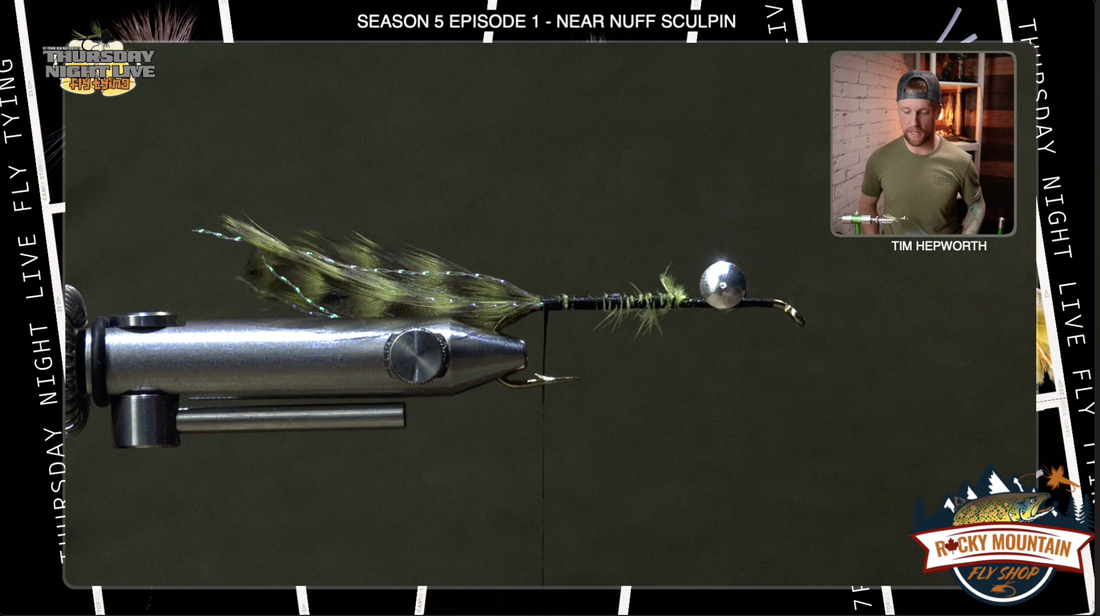
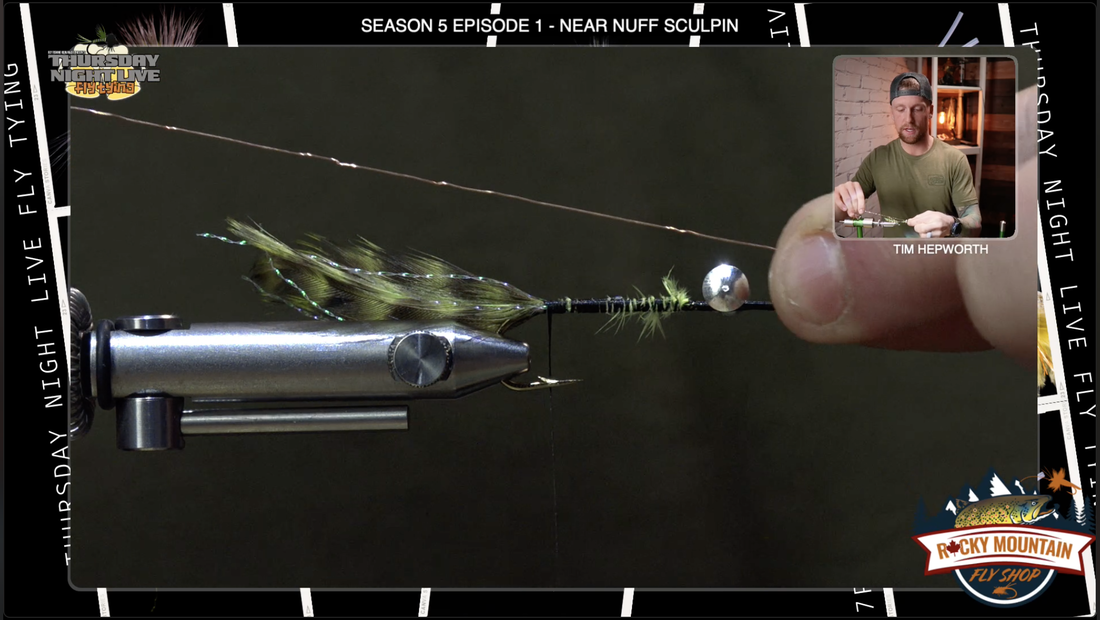
I’m going bring my thread back about the halfway mark. Leave my thread there. I'm going to come in and grab a piece of Crystal Flash. I'm gonna grab just one piece. I'm gonna cut it in half so I've got two pieces in my hand. I'm gonna find that Midway Point on it and I'm gonna fold it around my thread. This is kind of a neat little Trick. I fold around my thread. I now pull upwards on it and I can use my thread to direct where I want it to go. I pull it right down on top of the hook shank and I start taking a few thread wraps back so it's secure. I want to take and grab two pieces and pull it to the near side of the fly and take two pieces and pull it to The Far Side of the fly. I use my fingers to spread them out and then I'm going to run my thread back down the fly and secure the crystal flash on either side of those Grizzly Hackle feathers. So now work them all the way back. The goal is just to have two pieces on both sides and then I'm going to pull them back with the feathers. I want to cut them off just a little beyond the feather. Next material you got some brass colored wire in your kit. Grab a chunk of it ( 6 inches minimum) . We're going to tie it in the back along the crystal flash. This fly is tied similar to a style of an original woolly bugger so we're going to leave wire at
the back end we're going to tie in our Hackle feather at the front and then we're going to secure it with our wire going back forward. The wires pointing out the back now and at this points should have three materials locked in. The Grizzly Hackle, The wire, and the Crystal Flash.
the back end we're going to tie in our Hackle feather at the front and then we're going to secure it with our wire going back forward. The wires pointing out the back now and at this points should have three materials locked in. The Grizzly Hackle, The wire, and the Crystal Flash.
 |  |  |
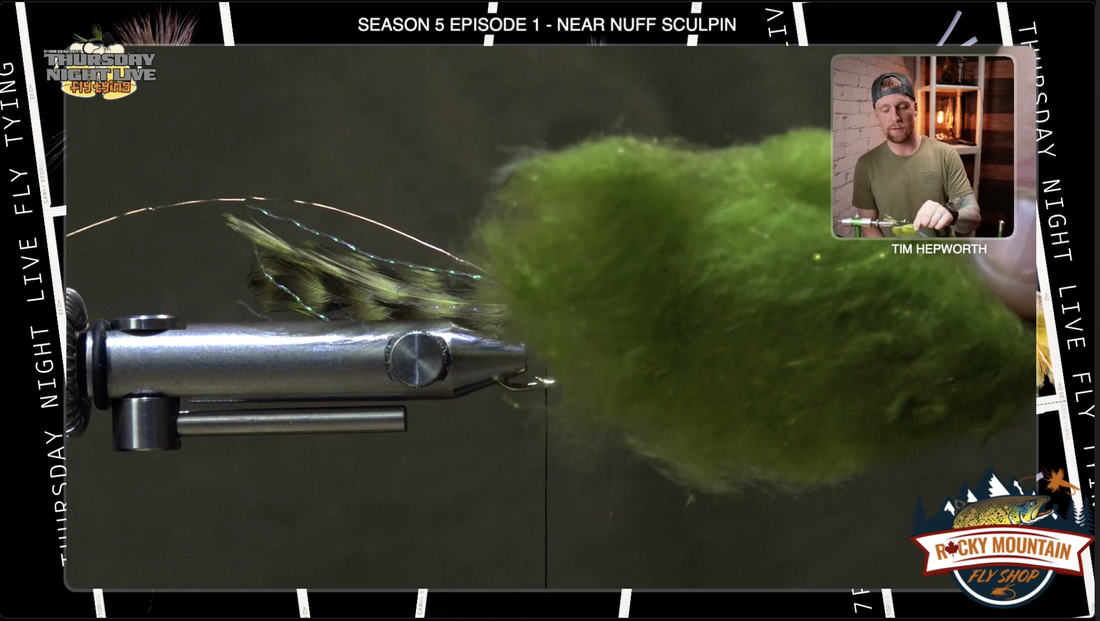
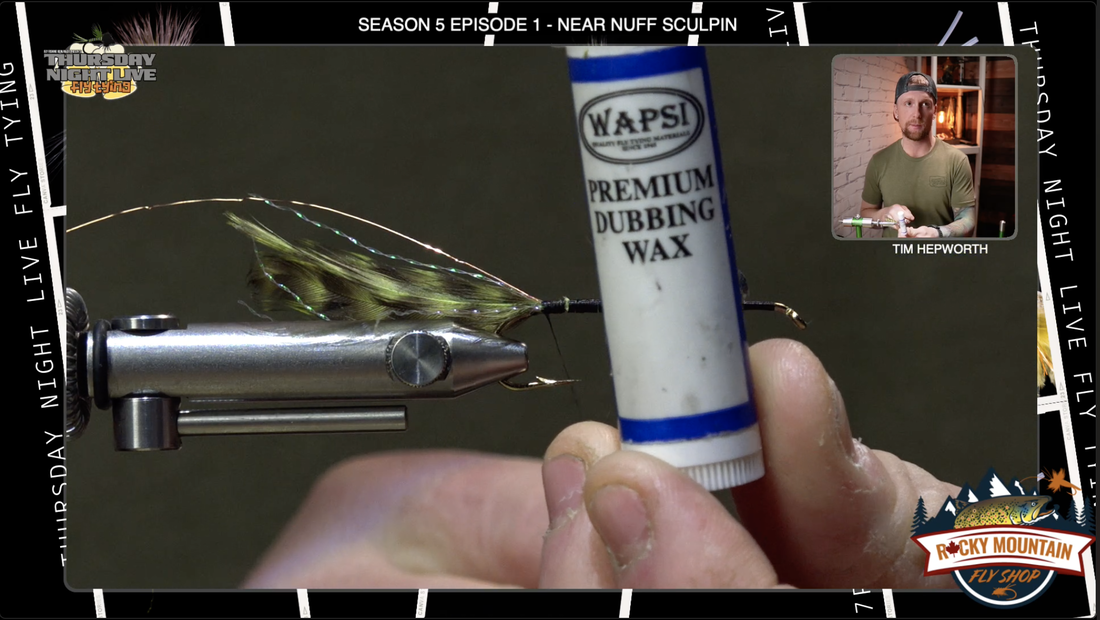
Grab some Olive Dubbing, or Caddis Green Dubbing (Wapsi Prism Dubbing) and we're gonna start making dubbing noodle. I am going to use a little bit of wax nothing too crazy just some of Wapsi premium dubbing wax, it helps with this style of dubbing I just put a light
little skiff on top of my thread. Don't get overthinking the situation on this dubbing, we are going to create just a real generous sized dubbing Noodle and probably have to add more. I come in and I spin my fingers on it, remember, only spin one direction, or your dubbing wont noodle proper. We want quite a big thick rope because we're gonna try to build up a nice bulky body and head with this material. We want to make sure that we get that fairly secured onto that thread by winding it on. I'm gonna start wrapping forward towards the dumbbell eyes. Think about tapering a fly so we get it thinner in the back bulkier at the head. Start building bulk as you go forward. It doesn't have to be perfect but we're trying to kind of create a generalized shape. That should get us all the way up to the head. Finish that off right behind those dumbbell eyes. Now we're going to go in and we're gonna put Hackle in and wrap it back. You're gonna see on a hackle fiber a little bit of Marabou here at the back and then you get into the actual Hackle as we move up the feather. We want to use a little bit of both in this fly so I'm gonna come back to about here. I want to use my first whole wrap to be that nice fluffy Marabou so it creates a little bit of extra bulk up at the head of the fly. I'm going to leave some of that on. I'm gonna peel off the rest. I've got that stem, it looks something like that, you can already see how it creates a tapered shape. We tie in the thicker part of the feather at the front of the fly and as we go back it gets thinner and that's going to create that taper. I have the underside of the feather, it's the dull side. I want that dull side to be pointed back down the fly, towards the back, when I tie it in and secure it with a few wraps. I like to wrap that stem under the dumbbell eyes. Once it’s secure, then I'll come in and trim it out. Make sure it's good and secure.Now what I want to do is secure my work with a little half hitch, which is just a simple overhand knot. Now what I'm going to do is start working this Hackle back down the fly. I'm going to do one full wrap before I start moving down. I'm just gonna have some nice evenly spaced out wraps. Moving back down the fly trying to kind of time it perfectly so I run out of Hackle, right near the back end of The Fly. You could use some Hackle pliers as well, if that makes it easier for you.
little skiff on top of my thread. Don't get overthinking the situation on this dubbing, we are going to create just a real generous sized dubbing Noodle and probably have to add more. I come in and I spin my fingers on it, remember, only spin one direction, or your dubbing wont noodle proper. We want quite a big thick rope because we're gonna try to build up a nice bulky body and head with this material. We want to make sure that we get that fairly secured onto that thread by winding it on. I'm gonna start wrapping forward towards the dumbbell eyes. Think about tapering a fly so we get it thinner in the back bulkier at the head. Start building bulk as you go forward. It doesn't have to be perfect but we're trying to kind of create a generalized shape. That should get us all the way up to the head. Finish that off right behind those dumbbell eyes. Now we're going to go in and we're gonna put Hackle in and wrap it back. You're gonna see on a hackle fiber a little bit of Marabou here at the back and then you get into the actual Hackle as we move up the feather. We want to use a little bit of both in this fly so I'm gonna come back to about here. I want to use my first whole wrap to be that nice fluffy Marabou so it creates a little bit of extra bulk up at the head of the fly. I'm going to leave some of that on. I'm gonna peel off the rest. I've got that stem, it looks something like that, you can already see how it creates a tapered shape. We tie in the thicker part of the feather at the front of the fly and as we go back it gets thinner and that's going to create that taper. I have the underside of the feather, it's the dull side. I want that dull side to be pointed back down the fly, towards the back, when I tie it in and secure it with a few wraps. I like to wrap that stem under the dumbbell eyes. Once it’s secure, then I'll come in and trim it out. Make sure it's good and secure.Now what I want to do is secure my work with a little half hitch, which is just a simple overhand knot. Now what I'm going to do is start working this Hackle back down the fly. I'm going to do one full wrap before I start moving down. I'm just gonna have some nice evenly spaced out wraps. Moving back down the fly trying to kind of time it perfectly so I run out of Hackle, right near the back end of The Fly. You could use some Hackle pliers as well, if that makes it easier for you.
 |  | 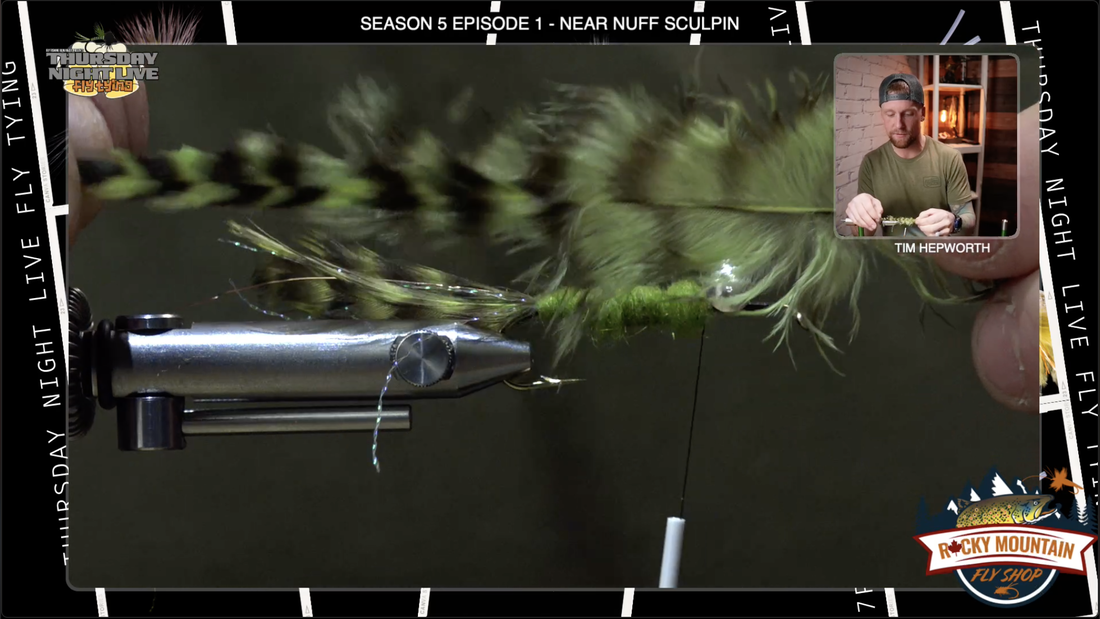 |
Grab that wire and pull that wire back and kind of out of the way and then capture that feather with the wire. Start wrapping the wire back up the opposite way that I came down with the feather. I'm wiggling it back and forth so that the wire doesn't trap a whole bunch of those feather fibers. Work it all the way back forward to the dumbbell eyes. Take a wrap behind the wire, a wrap in front of the wire, and a wrap behind. That's how I know how to get the wire nice and secured. You can either helicopter that off or grab your buddy's scissors and cut that wire. Don't use your good Shor Scissors because that definitely will dull your scissors. Now we're going to finish off with the head of the sculpin.
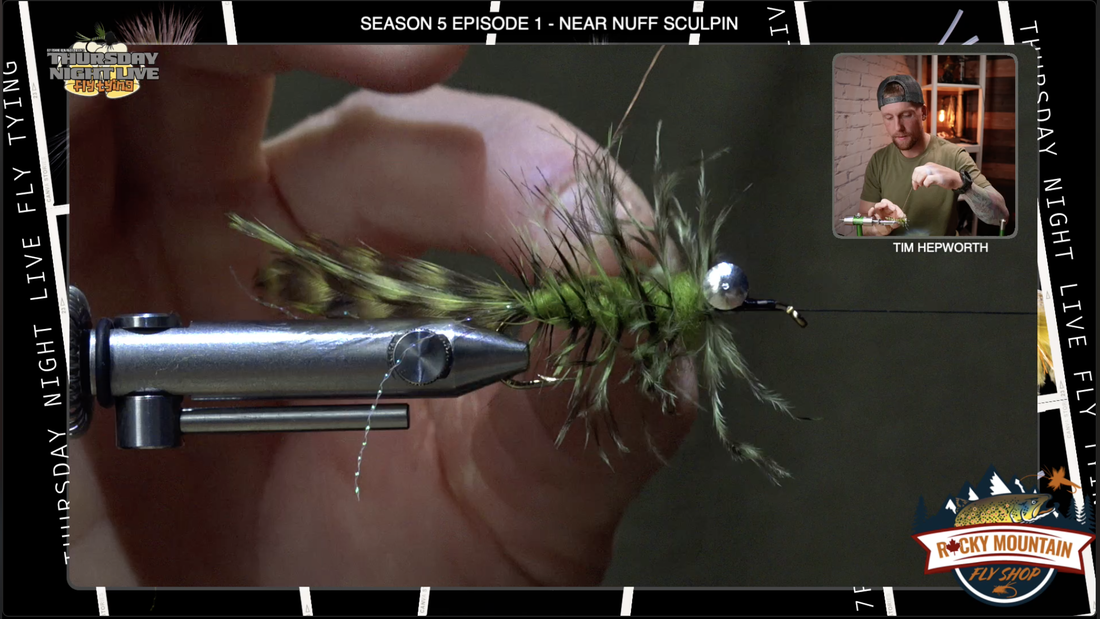 | 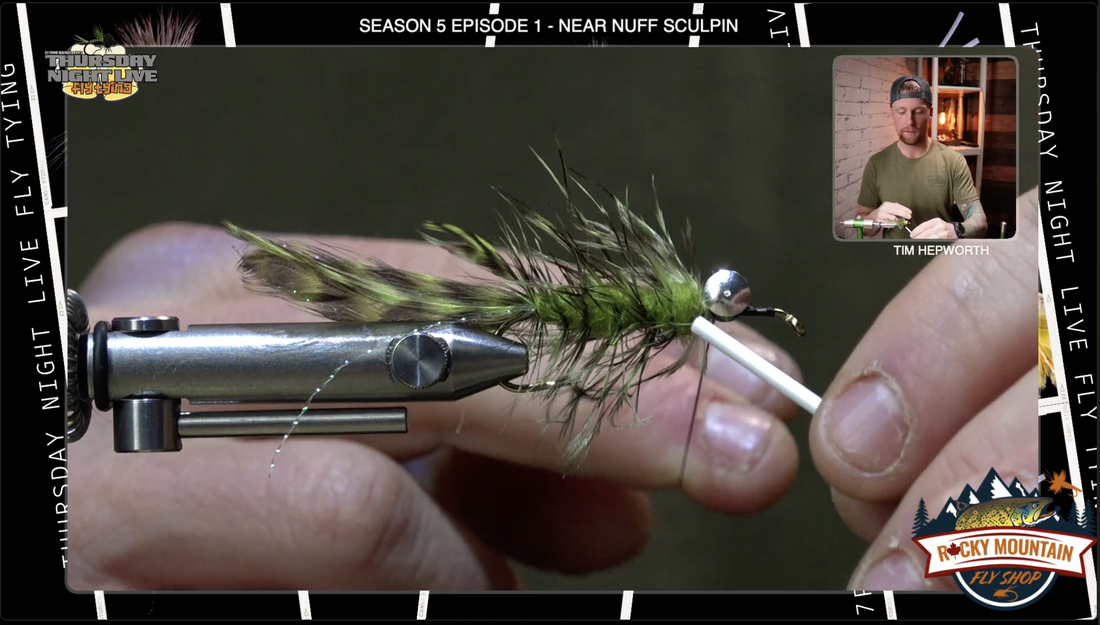 |
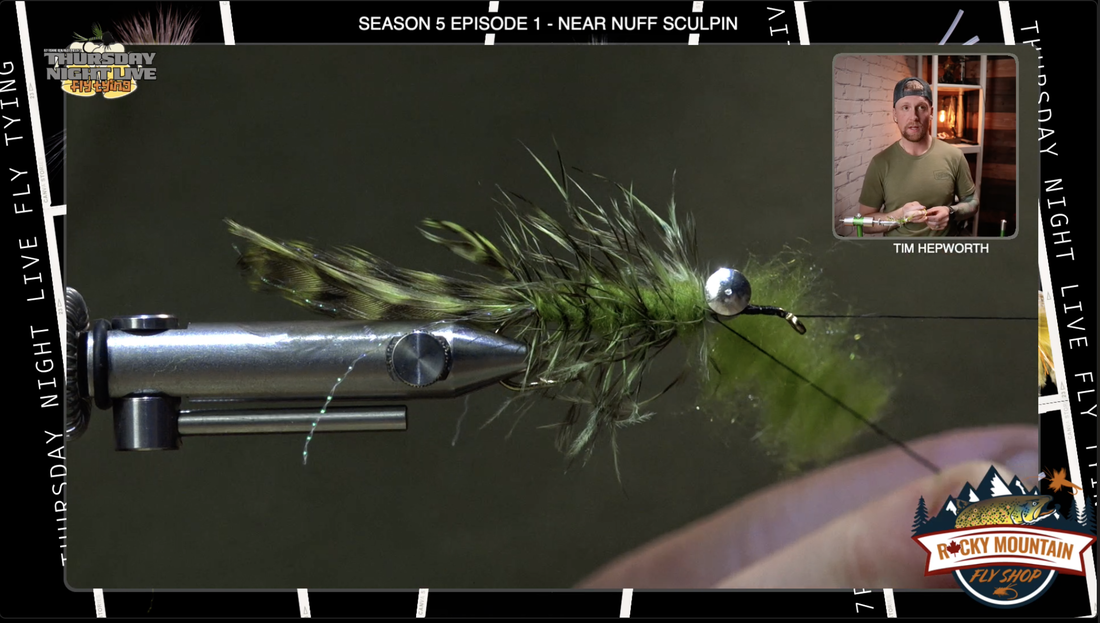
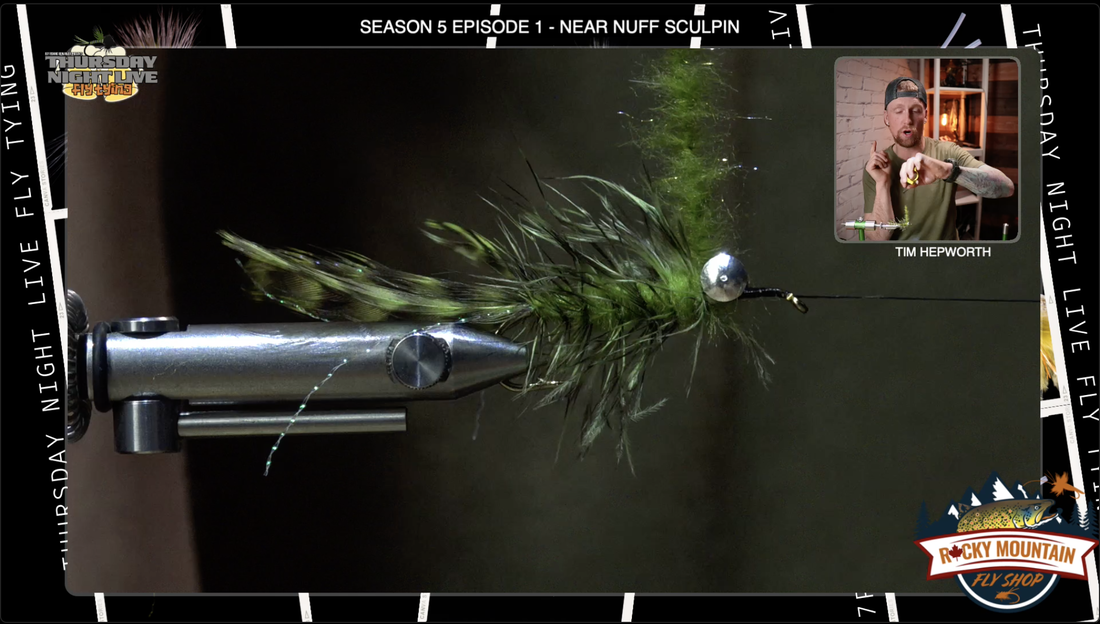
We're going to use the same dubbing but we're going to make a little bit of a different style to apply it to the head. This time I'm gonna make a dubbing Loop. I'm Gonna put two fingers and fold over top to make this loop. I'm gonna give myself about four inches of thread in this dubbing loop. I’m gonna take a couple of wraps in front and behind the dubbing loop at the hook. Bring the thread in front of the eye. I just have my finger stuck in that Loop, or you can stick the dubbing spinner in the loop to keep it open.I'm using this Loon Tools Dubbing Spinner. I'm gonna grab a little bit of that Wapsi dubbing wax. I'm only gonna put some on the bottom side. What I'm going to do is grab that same dubbing I was using before. I'm gonna grab little pinches. Spread them out a little bit. This isn't long fiber dubbing so we can't try to spread it out too much. All I'm going to do is start setting these little pinches into that dubbing Loop. We're going to put quite a few because we're going to rope this up and create some bulk in the head of the fly. I'm gonna let go of that top thread so it pinches down and closes the dubbing loop, this will hold the material in place before we start spinning this loop tight. Give the dubbing spinner a good spinner and make that noodle nice and tight. We're not going to brush it out. I'm gonna do a full wrap right behind the dumbbell eyes then I'm going to cross over forward, so it's almost like a figure eight, like how we put the Dumbbell Eyes on at the beginning of this fly. I'm going to cross over in front and I'm gonna come back over behind and back to the front again. I'm going to finish off with a couple of wraps right in front of the eyes and I should pretty much run out of material at the right time. Bring bobbin and thread back to the fly again. I'm going to do that same wrapping sequence to secure the dubbing loop to the hook. I'm going to go behind the thread in front of the thread behind the thread in front of the thread and that's going to lock it in so it's not going anywhere. I'm going to trim out that dubbing noodle now. I like to flip the fly around so I can see the underside and make sure I've trapped all those materials at the head. Take a few thread wraps, build a little bit of a thread damn so none of that material is going to move on you. I'm going to grab my whip finish tool. I'm gonna whip finish it right here with three wraps. I can go ahead and snip out that thread. I'm going to add a little bit of that Solarez Bone Dry UV resin again to make sure this isn't going anywhere. Grab a little brush or you can grab a piece of velcro whatever you prefer. I'm just going to grab and pull all those fibers rearward. I'm not going to try to brush them up too much. I just want to pull them rearward so I can see the shape that I'm working with. There you go guys, that is your near nuff sculpin. super buggy looking looks great under the water it's going to sit right on the bottom where you want it to be.
 |  |  |
 RSS Feed